### Dockerの概要
– 軽量な仮想化環境作成のツール
– コンテナを用いてアプリケーションをすばやく構築、テスト、デプロイできるソフトウェアプラットフォーム
– ubuntu上で開発されている
https://www.docker.com/
### Ubuntu/trusty64の用意
$ vagrant init ubuntu/trusty64
config.vm.network "private_network", ip: "192.168.33.10"
$ vagrant up
$ vagrant status
$ vagrant ssh
### Dockerインストール
公式ドキュメント: linux ubuntu install
1. Update the apt package index:
$ sudo apt-get update
2. Install packages to allow apt to use a repository over HTTPS:
$ sudo apt-get install \
apt-transport-https \
ca-certificates \
curl \
gnupg-agent \
software-properties-common
3. Add Docker’s official GPG key:
$ curl -fsSL https://download.docker.com/linux/ubuntu/gpg | sudo apt-key add –
4. Use the following command to set up the stable repository. To add the nightly or test repository, add the word nightly or test (or both) after the word stable in the commands below.
$ sudo add-apt-repository \
“deb [arch=amd64] https://download.docker.com/linux/ubuntu \
$(lsb_release -cs) \
stable”
INSTALL DOCKER ENGINE – COMMUNITY
1. Update the apt package index.
$ sudo apt-get update
2. Install the latest version of Docker Engine – Community and containerd, or go to the next step to install a specific version:
$ sudo apt-get install docker-ce docker-ce-cli containerd.io
3. List the versions available in your repo:
$ apt-cache madison docker-ce
4. Install a specific version using the version string from the second column
$ sudo apt-get install docker-ce=18.06.3~ce~3-0~ubuntu
### 確認
$ sudo docker –version
Docker version 18.06.3-ce, build d7080c1
docker pullしてdocker runするとimageが実行される
### dockerの操作
// imageの取得
$ sudo docker pull centos
// image一覧表示
$ sudo docker images
// imageの詳細表示
$ sudo docker inspect 470671
// dockerの実行
$ sudo docker run 47067 echo “hello world”
docker: Error response from daemon: OCI runtime create failed: container_linux.go:348: starting container process caused “process_linux.go:297: copying bootstrap data to pipe caused \”write init-p: broken pipe\””: unknown.
kernelが古い
https://github.com/docker/for-linux/issues/591
kernel >= 3.17
// kernelを4.4にバージョンアップする
$ sudo apt-get install –install-recommends linux-generic-lts-xenial
// reboot
$ sudo reboot
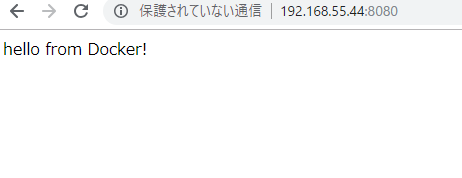
再度dockerを実行
vagrant@vagrant-ubuntu-trusty-64:~$ sudo docker run 47067 echo “hello world”
hello world
$ sudo docker ps -a -n=5