The four main methods used on the app’s introductory screen

Splash
It is a technique called splash that is adopted by most applications. This screen appears when you tap the app icon from home, and it is used to earn data loading time or to make the app known to the user as a brand.

However, since it is only for the purpose of earning time and recognizing the brand, it is not compatible with tool-based apps. The user who uses the tool wants to “use it quickly and repeatedly”.

Walk through
A technique called walk-through is a method that allows the user to gradually understand the features and usage of the app using slides instead of letting the app touch the app immediately after launching the app. Often see people who call it “Tutorial”, but the official name for this is Walkthrough.

Coach mark
Overlays and pop-ups appear on the normal screen of the app. Use arrows to explain the function of each button and what its contents mean. If the UI becomes complicated and it is determined that “a user who has just installed the app will be confused if you look at this screen”, you should adop it.

Empty state
It may be an unfamiliar word, but the point is “the guy who displays when the content is empty”. The purpose of this screen is “convey information that there is no content now” and “convey action to be performed next”.
It may be more user-friendly to have an empty state for apps that do not display content if you do not follow someone, or for apps such as Notepad that create content yourself.

list view

<?xml version="1.0" encoding="utf-8"?>
<LinearLayout xmlns:android="http://schemas.android.com/apk/res/android"
              android:orientation="vertical"
    android:layout_width="wrap_content"
    android:layout_height="50dp"
    android:weightSum="1">

    <TextView
        android:layout_width="wrap_content"
        android:layout_height="wrap_content"
        android:textAppearance="?android:attr/textAppearanceLarge"
        android:text="Large Text"
        android:id="@+id/textView" />

    <TextView
        android:layout_width="match_parent"
        android:layout_height="wrap_content"
        android:textAppearance="?android:attr/textAppearanceMedium"
        android:text="Medium Text"
        android:id="@+id/textView2"
        android:layout_weight="0.08" />
</LinearLayout>

Android Browser

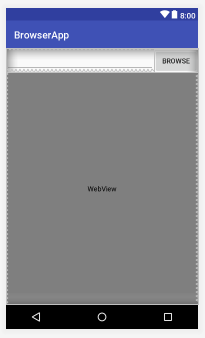
<?xml version="1.0" encoding="utf-8"?>
<LinearLayout
    xmlns:android="http://schemas.android.com/apk/res/android"
    xmlns:tools="http://schemas.android.com/tools"
    android:layout_width="match_parent"
    android:layout_height="match_parent"
    android:orientation="vertical"
    tools:context=".MainActivity">

    <LinearLayout
        android:orientation="horizontal"
        android:layout_width="match_parent"
        android:layout_height="wrap_content">

        <EditText
            android:layout_weight="1"
            android:id="@+id/urlText"
            android:layout_width="0dp"
            android:layout_height="wrap_content"
            />
        <Button
            android:text="Browse"
            android:onClick="showWebsite"
            android:layout_width="wrap_content"
            android:layout_height="wrap_content"
            />

    </LinearLayout>

    <WebView
        android:layout_weight="1"
        android:id="@+id/myWebView"
        android:layout_width="match_parent"
        android:layout_height="0dp"
        ></WebView>

</LinearLayout>

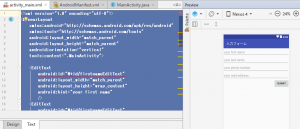
EditTextで入力フォームをつくる

ボタンの右寄せは layout_gravity=”right” を使う

<?xml version="1.0" encoding="utf-8"?>
<LinearLayout
    xmlns:android="http://schemas.android.com/apk/res/android"
    xmlns:tools="http://schemas.android.com/tools"
    android:layout_width="match_parent"
    android:layout_height="match_parent"
    android:orientation="vertical"
    tools:context=".MainActivity">

    <EditText
        android:id="@+id/firstnameEditText"
        android:layout_width="match_parent"
        android:layout_height="wrap_content"
        android:hint="your first name"
        />
    <EditText
        android:id="@+id/firstnameEditText"
        android:layout_width="match_parent"
        android:layout_height="wrap_content"
        android:hint="your last name"
        />

    <EditText
        android:id="@+id/phoneEditText"
        android:layout_width="match_parent"
        android:layout_height="wrap_content"
        android:hint="your phone number"
        />

    <EditText
        android:id="@+id/mailEditText"
        android:layout_width="match_parent"
        android:layout_height="wrap_content"
        android:hint="your mail address"
        />

    <Button
        android:id="@+id/button"
        android:onClick="getScore"
        android:layout_gravity="right"
        android:layout_width="wrap_content"
        android:layout_height="wrap_content"
        android:text="submit"
        />

</LinearLayout>

ここまではOKですね。

activityのlabelとparentActivityNameの設定

app -> manifest -> AndroidManifest.xmlの中で、activityのlabelと元へ戻る(parentActivityName)を設定できます。

<activity android:name=".MainActivity"
                  android:label="名前診断">
            <intent-filter>
                <action android:name="android.intent.action.MAIN"/>

                <category android:name="android.intent.category.LAUNCHER"/>
            </intent-filter>
        </activity>
        <activity android:name=".MyResult"
            android:parentActivityName="com.capital.scoreapp.MainActivity"
                  android:label="結果"
            >
        </activity>

Nice!
parentActivityNameで元へ戻るですか。
android:labelはhtmlのtitleみたいなもんですね。

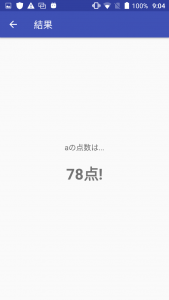
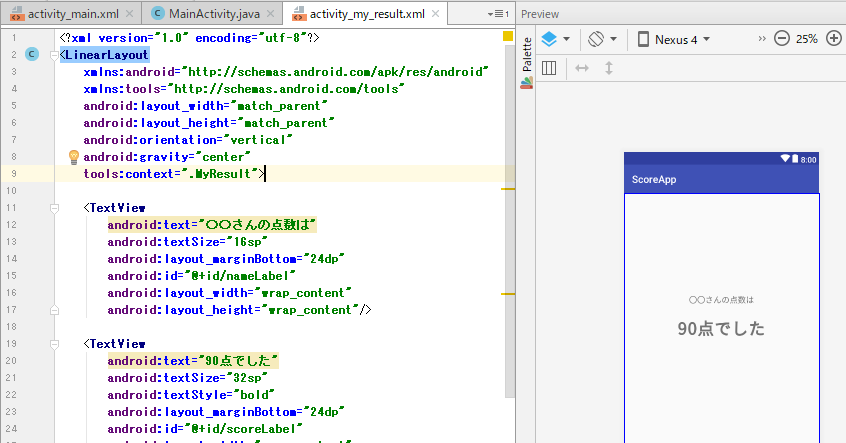
intent用に画面を作成する

<?xml version="1.0" encoding="utf-8"?>
<LinearLayout
    xmlns:android="http://schemas.android.com/apk/res/android"
    xmlns:tools="http://schemas.android.com/tools"
    android:layout_width="match_parent"
    android:layout_height="match_parent"
    android:orientation="vertical"
    android:gravity="center"
    tools:context=".MyResult">

    <TextView
        android:text="〇〇さんの点数は"
        android:textSize="16sp"
        android:layout_marginBottom="24dp"
        android:id="@+id/nameLabel"
        android:layout_width="wrap_content"
        android:layout_height="wrap_content"/>

    <TextView
        android:text="90点でした"
        android:textSize="32sp"
        android:textStyle="bold"
        android:layout_marginBottom="24dp"
        android:id="@+id/scoreLabel"
        android:layout_width="wrap_content"
        android:layout_height="wrap_content"/>


</LinearLayout>

androidのform

form は EditText

<?xml version="1.0" encoding="utf-8"?>
<LinearLayout
    xmlns:android="http://schemas.android.com/apk/res/android"
    xmlns:tools="http://schemas.android.com/tools"
    android:layout_width="match_parent"
    android:layout_height="match_parent"
    android:orientation="horizontal"
    tools:context=".MainActivity">

    <EditText
        android:layout_width="wrap_content"
        android:layout_height="wrap_content"
        android:hint="your name ..."
        />

</LinearLayout>

onclick時の呼び出しメソッドをxmlに記載する