pugを使ってみよう

とりあえず、チュートリアルに沿って書いてみます。

doctype html
html(lang="ja")
	head
		meta(charset="utf-8")
		title タイトル
	body
		h1 見出し1
			p Pugテスト

コマンドラインでコンパイルします。
[vagrant@localhost python]$ pug index.pug

rendered index.html

なにーーーーーーーーーーーーーー、htmlファイルができている。。。

で、ソースを見ると。。。

<!DOCTYPE html><html lang="ja"><head><meta charset="utf-8"><title>タイトル</title></head><body><h1>見出し1<p>Pugテスト</p></h1></body></html>

気持ちわりー、なんだこれ。。。。。。。。
あ、インデントがない。

–prettyをつけます。
[vagrant@localhost python]$ pug index.pug –pretty

rendered index.html

<!DOCTYPE html>
<html lang="ja">
  <head>
    <meta charset="utf-8">
    <title>タイトル</title>
  </head>
  <body>
    <h1>見出し1
      <p>Pugテスト</p>
    </h1>
  </body>
</html>

あれ、h1の閉じタグがおかしい。

h1と同じインデントにすると、治った。何故?

		h1 hoge
		p それそれ

pugをインストール

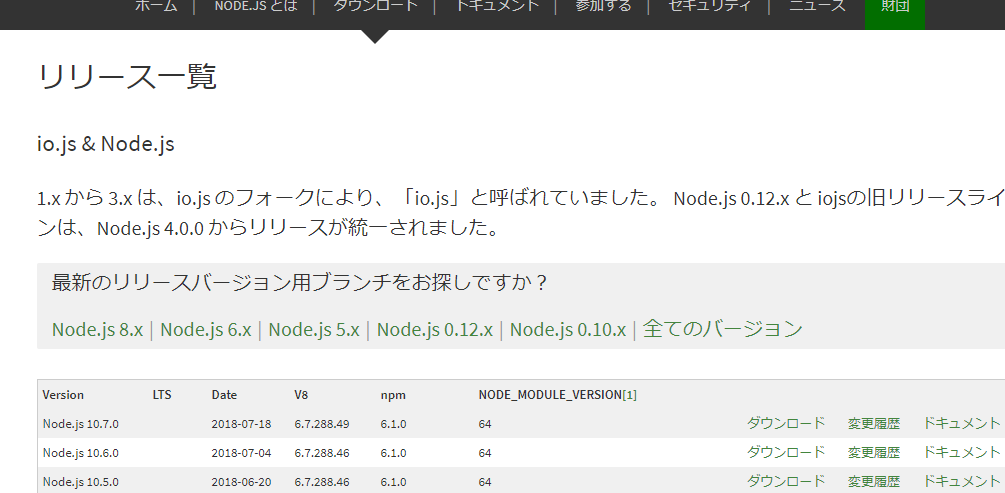
npmのサイトに沿って進めます。node.jsは最新版が必要。先ほど10.7.0にupdateしたばかり。
https://www.npmjs.com/package/pug

[vagrant@localhost python]$ npm install pug
npm WARN saveError ENOENT: no such file or directory, open ‘/home/vagrant/python/package.json’
npm notice created a lockfile as package-lock.json. You should commit this file.
npm WARN enoent ENOENT: no such file or directory, open ‘/home/vagrant/python/package.json’
npm WARN python No description
npm WARN python No repository field.
npm WARN python No README data
npm WARN python No license field.

+ pug@2.0.3
added 62 packages from 140 contributors and audited 104 packages in 11.406s
found 0 vulnerabilities

[vagrant@localhost python]$ npm install pug-cli -g
/home/vagrant/.nvm/versions/node/v10.7.0/bin/pug -> /home/vagrant/.nvm/versions/node/v10.7.0/lib/node_modules/pug-cli/index.js
+ pug-cli@1.0.0-alpha6
added 73 packages from 140 contributors in 5.131s

なんじゃこりゃー
[vagrant@localhost python]$ pug –help

Usage: pug [options] [dir|file …]

Options:

-V, –version output the version number
-O, –obj JSON/JavaScript options object or file
-o, –out

output the rendered HTML or compiled JavaScript to
-p, –path filename used to resolve includes
-b, –basedir path used as root directory to resolve absolute includes
-P, –pretty compile pretty HTML output
-c, –client compile function for client-side
-n, –name the name of the compiled template (requires –client)
-D, –no-debug compile without debugging (smaller functions)
-w, –watch watch files for changes and automatically re-render
-E, –extension specify the output file extension
-s, –silent do not output logs
–name-after-file name the template after the last section of the file path (requires –client and overriden by –name)
–doctype specify the doctype on the command line (useful if it is not specified by the template)
-h, –help output usage information
Examples:

# Render all files in the `templates` directory:
$ pug templates

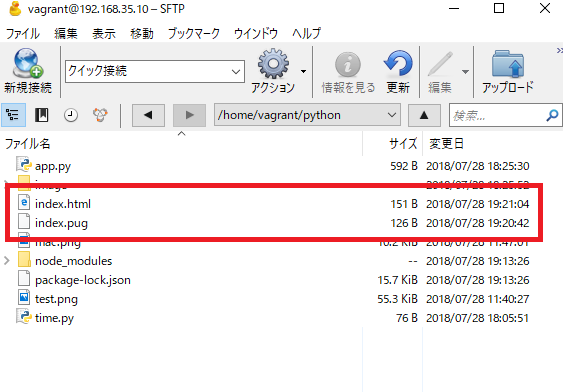
# Create {foo,bar}.html:
$ pug {foo,bar}.pug

# Using `pug` over standard input and output streams
$ pug < my.pug > my.html
$ echo ‘h1 Pug!’ | pug

# Render all files in `foo` and `bar` directories to `/tmp`:
$ pug foo bar –out /tmp

# Specify options through a string:
$ pug -O ‘{“doctype”: “html”}’ foo.pug
# or, using JavaScript instead of JSON
$ pug -O “{doctype: ‘html’}” foo.pug

# Specify options through a file:
$ echo “exports.doctype = ‘html’;” > options.js
$ pug -O options.js foo.pug
# or, JSON works too
$ echo ‘{“doctype”: “html”}’ > options.json
$ pug -O options.json foo.pug

pugを使いたい node.jsをupdate

pugを使いたい。で、node.jsのvをみる。
[vagrant@localhost python]$ node -v
v0.10.48
[vagrant@localhost python]$ npm -v
1.3.6

あれ、古くないか?

https://nodejs.org/ja/download/releases/
最新だと、10.7.0ですね。0.10.48ってどういうことだ?

[vagrant@localhost python]$ git clone git://github.com/creationix/nvm.git ~/.nvm
Initialized empty Git repository in /home/vagrant/.nvm/.git/
remote: Counting objects: 7182, done.
remote: Compressing objects: 100% (11/11), done.
remote: Total 7182 (delta 10), reused 17 (delta 8), pack-reused 7163
Receiving objects: 100% (7182/7182), 2.22 MiB | 439 KiB/s, done.
Resolving deltas: 100% (4517/4517), done.
[vagrant@localhost python]$ source ~/.nvm/nvm.sh
[vagrant@localhost python]$ nvm ls

-> system
iojs -> N/A (default)
node -> stable (-> N/A) (default)
unstable -> N/A (default)
[vagrant@localhost python]$ nvm ls-remote

[vagrant@localhost python]$ nvm install 10.7.0

[vagrant@localhost python]$ nvm use 10.7.0
Now using node v10.7.0 (npm v6.1.0)
[vagrant@localhost python]$ node -v
v10.7.0

はああああああああああ? v10.7.0になりました。なんだこりゃ。

[vagrant@localhost python]$ npm -v
6.1.0

はあああああああああああああああああ?

スパゲティコード

日付、時間をハイフンなしで取得(2018072817)を

from datetime import datetime
import re

now = datetime.now()
now = str(now)
slice = now[0:13]
time = re.sub("-","", slice)
time = re.sub(" ","", time)
print(time)

これはあかんわw
[vagrant@localhost python]$ python time.py
2018072817

from datetime import datetime
print(datetime.strftime(datetime.now(), "%Y%m%d%H"))

2行になりました。

[vagrant@localhost python]$ python3 time.py
2018072817

import urllib.request
from datetime import datetime

time = datetime.strftime(datetime.now(), "%Y%m%d%H")

url = "https://www.jma.go.jp/jp/amedas/imgs/temp/000/"+ time +"00-00.png"
print(url)

[vagrant@localhost python]$ python3 app.py
https://www.jma.go.jp/jp/amedas/imgs/temp/000/201807281700-00.png
なるほど。
あれ、まてまてまて、17時って、centos、3時間づれてるぞ。

[vagrant@localhost python]$ date
2018年 7月 28日 土曜日 17:59:52 JST

こうなる、と。

import urllib.request
from datetime import datetime

time = datetime.strftime(datetime.now(), "%Y%m%d%H")

url = "https://www.jma.go.jp/jp/amedas/imgs/temp/000/"+ time +"00-00.png"
savename = "image/amedas.png"

urllib.request.urlretrieve(url, savename)
print("保存しました")

あれ?
[vagrant@localhost python]$ strings /etc/localtime
TZif2
TZif2
JST-9

python3 datetime

import datetime
print(datetime.date.today())

[vagrant@localhost python]$ python3 time.py
2018-07-28

ハイフンを失くしたい。

today = datetime.date.today()
print(type(today))

[vagrant@localhost python]$ python time.py

from datetime import datetime
import re

now = datetime.now()
print(str(now))

[vagrant@localhost python]$ python3 time.py
2018-07-28 16:14:29.145644

import datetimeはdatetimeからimport
from datetime import hogeはdatetimeのhogeからimport
from datetime import datetimeだとややこしいね。

python3でアメダス

import urllib.request

url = "https://www.jma.go.jp/jp/amedas/imgs/temp/000/201807281500-00.png"
savename = "image/amedas.png"

urllib.request.urlretrieve(url, savename)
print("保存しました")

201807281500のところは自動で出力したい。

python2とpython3を使えるようにしよう

[vagrant@localhost ~]$ python -V
Python 3.5.2
[vagrant@localhost centos6]$ python
Python 3.5.2 (default, Jul 28 2018, 11:25:01)
[GCC 4.4.7 20120313 (Red Hat 4.4.7-23)] on linux
Type “help”, “copyright”, “credits” or “license” for more information.
>>>
[vagrant@localhost centos6]$ python3
Python 3.5.2 (default, Jul 28 2018, 11:25:01)
[GCC 4.4.7 20120313 (Red Hat 4.4.7-23)] on linux
Type “help”, “copyright”, “credits” or “license” for more information.
>>>

時間かかった~ 2日くらい

import urllib.request

url = "http://hogehoge/img/hoge.png"
savename = "test.png"

urllib.request.urlretrieve(url, savename)
print("保存しました")

[vagrant@localhost python]$ python3 app.py
保存しました

おおおお、
では、ヤフオクのmacbookを取得します。

import urllib.request

url = "https://wing-auctions.c.yimg.jp/sim?furl=auctions.c.yimg.jp/images.auctions.yahoo.co.jp/image/dr000/auc0407/users/6ba85c7e48fb6a8607eca71d0b7b7d6113140ce8/i-img1100x983-1532495826yzd18p69701.jpg"
savename = "mac.png"

urllib.request.urlretrieve(url, savename)
print("mac book")

[vagrant@localhost python]$ python3 app.py
mac book

OK

うん、ヤフオクだと、商品画像のアルゴリズムがよくわからんな。
img1100x983が画像サイズでしょうね。
6ba85c7e48fb6a8607eca71d0b7b7d6113140ce8
i-img1100x983-1532495826yzd18p69701.jpg

.bashrc

bashrcとは

bashは「シェルの種類のひとつで、shをパワーアップしたシェル」。
(ログインした後に画面上から)bashを起動したときに読み込まれる設定ファイル
シェルはsh、bash、csh、ksh、tcsh、zshなど

vi ~/.bashrc

# .bashrc

# Source global definitions
if [ -f /etc/bashrc ]; then
        . /etc/bashrc
fi

# User specific aliases and functions

ログイン時に「.bashrc」は読み込まれません。
ログイン時には「.bash_profile」というファイルが読み込まれます。

 .bash_profile

# Get the aliases and functions
if [ -f ~/.bashrc ]; then
        . ~/.bashrc
fi

# User specific environment and startup programs

PATH=$PATH:$HOME/bin

export PATH
source ~/.bashrc

source ~/.bashrcとすると、.bashrcを読み込む。もちろん、source ~/.bash_profileで、bash_profileを読み込む

痛恨のミスから回復(Excel VBA)

1.フォームを立ち上げる

2.フォームに入力して、登録ボタンを押すと、、、
Excelに反映!

なんやねん、いけるやんけ。onClickでフォームの値はnullにする。

Private Sub CommandButton1_Click()
 With Worksheets("Sheet1")
  lastRow = .Cells(Rows.Count, 1).End(xlUp).Row + 1
  .Cells(lastRow, 1).Value = title.Text
  .Cells(lastRow, 4).Value = description.Text
  .Cells(lastRow, 5).Value = keyword.Text
  .Cells(lastRow, 7).Value = image.Text
 End With
 title.Text = ""
 description.Text = ""
 keyword.Text = ""
 image.Text = ""
End Sub

痛恨のミス

しまったー、VBA勉強するの忘れたー
VBAというか、ユーザーフォームね。
おいおいおい、困ったぞー、徹夜はきついぞー

formのtitleはCaptionで変えられる。今回は「突貫工事」にした。

ExcelのカラムをTitle, description, keyword, Imageとし、UserForm1も同様に、Title, description, keyword, Imageをつくる。

command buttonを押したとき

Private Sub CommandButton1_Click()
 With Worksheet("Sheet1")
  lastRow = .Cells(Rows.Count, 1).End(xlUp).Row + 1
  .Cells(lastRow, 1).Value = title.Text
  .Cells(lastRow, 2).Value = description.Text
  .Cells(lastRow, 3).Value = Keywords.Text
  .Cells(lastRow, 4).Value = image.Text
 End With
End Sub