
assetにドロップして、メディアライブラリを開いてプレビューにドロップする
画像サイズに合わせて伸縮
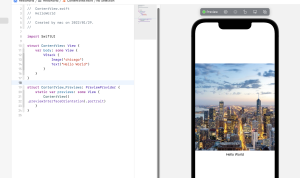
        VStack {
            Image("chicago")
                .resizable(resizingMode: .stretch)
                .aspectRatio(contentMode: .fit)
                .frame(width: 300)
            Text("Hello World")
                .padding()
        }
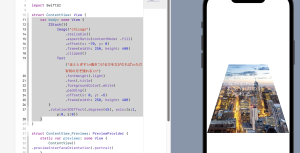
伸縮率と位置の調整
        VStack {
            Image("chicago")
                .resizable(resizingMode: .stretch)
                .aspectRatio(contentMode: .fit)
                .scaleEffect(1.8)
                .offset(x: -70, y: -30)
                .frame(width: 200, height: 300)
                .clipped()
            Text("Hello World")
                .padding()
        }
オーバーレイを使って文字を重ねる
        VStack {
            Image("chicago")
                .resizable(resizingMode: .stretch)
                .aspectRatio(contentMode: .fill)
                .scaleEffect(1.8)
                .frame(width: 300, height: 400)
                .clipped()
                .overlay(
                    Text("Hello World")
                        .font(.title)
                        .fontWeight(.light)
                        .foregroundColor(Color.white)
                        .offset(x: 0, y: -50)
                )
            Text("Hello World")
                .padding()
        }
### 図形の作成と配置
Circle, Ellipse, Rectangle, RoundedRectangle, Capsule, rotationEffect(), stroke(), ZStack, position()
円形を描写
        Circle()
            .foregroundColor(.blue)
            .frame(width: 200, height: 200)
楕円形
        Ellipse()
            .foregroundColor(.blue)
            .frame(width: 200, height: 400)
四角形
        Rectangle()
            .foregroundColor(.blue)
            .frame(width: 200, height: 400)
        // 角丸四角形
        RoundedRectangle(cornerRadius: 50)
            .foregroundColor(.blue)
            .frame(width: 200, height: 400)
        // カプセル
        Capsule()
            .foregroundColor(.blue)
            .frame(width: 250, height: 100)
図形の塗り色
        Circle()
            .fill(Color.pink)
            .padding(50)
Colorライブラリの指定
L Asset -> Color set -> RGB指定 -> ライブラリからドロップして指定
    var body: some View {
        Circle()
            .foregroundColor(Color("Wakakusa"))
            .frame(width: 300, height: 300)
    }
図形の回転
        Ellipse()
            .foregroundColor(.orange)
            .frame(width: 200, height: 400)
            .rotationEffect(.degrees(45))
            .clipped()
図形を重ねて表示
L 下に書いた方が上に表示される
        ZStack {
            Ellipse()
                .stroke(lineWidth: 4)
                .foregroundColor(.pink)
                .frame(width: 100, height: 300)
            Ellipse()
                .stroke(lineWidth: 4)
                .foregroundColor(.purple)
                .frame(width: 100, height: 300)
                .rotationEffect(.degrees(30), anchor: .bottom)
            Ellipse()
                .stroke(lineWidth: 4)
                .foregroundColor(.green)
                .frame(width: 100, height: 300)
                .rotationEffect(.degrees(-30), anchor: .bottom)
        }
### ビューの画像効果
Image, Text, clipShape(), shadow(), rotation3DEffect(), ZStack
        Image("chicago")
            .resizable()
            .aspectRatio(contentMode: .fill)
            .frame(width: 300, height: 300)
            .clipShape(Circle())
ビューに影をつける
        Image("chicago")
            .resizable()
            .aspectRatio(contentMode: .fill)
            .frame(width: 300, height: 300)
            .clipShape(RoundedRectangle(cornerRadius: 20))
            .shadow(radius: 20)
ビューを回転する
        Image("chicago")
            .resizable()
            .aspectRatio(contentMode: .fill)
            .frame(width: 300, height: 400)
            .clipped()
            .rotationEffect(.degrees(10), anchor: .center)
ビューの角を丸める
        Text("Hello, world!")
            .font(.body)
            .frame(width: 150, height: 150)
            .border(Color.pink, width: 10)
            .cornerRadius(10)
ビューを定義して背景に使う
struct ContentView: View {
    var body: some View {
        Text("Hello, world!")
            .font(.largeTitle)
            .padding(15)
            .foregroundColor(.white)
            .background(ShapeView())
            .cornerRadius(50)
            .frame(width: 150, height: 150)
    }
}

struct ShapeView: View {
    var body: some View {
        ZStack {
            Rectangle().rotationEffect(.degrees(45))
            Rectangle().rotationEffect(.degrees(-45))
        }
        .foregroundColor(.green)
        .frame(width: 50, height: 150)
    }
}
ビューを3D回転
L rotation3DEffectでYを軸にして回転
    var body: some View {
        Text("春はあけぼの。夜雨やう白くなり行く、山ぎは少し灯て、紫だちたる雲の細くたなびきたる。")
            .fontWeight(.light)
            .font(.title)
            .frame(width: 250)
            .rotation3DEffect(.degrees(45), axis: (x:0, y:1, z:0))
    }
スタック全体を3D回転
    var body: some View {
        ZStack(){
            Image("chicago")
                .resizable()
                .aspectRatio(contentMode: .fill)
                .offset(x: -70, y: 0)
                .frame(width: 250, height: 400)
                .clipped()
            Text("ほととぎす\n鳴きつける方をながむれば\nただ有明の月ぞ残れる\n")
                .fontWeight(.light)
                .font(.title)
                .foregroundColor(.white)
                .padding()
                .offset(x: 0, y: -5)
                .frame(width: 250, height: 400)
        }
        .rotation3DEffect(.degrees(45), axis:(x:1, y:0, z:0))
    }
なるほど、覚えること沢山あるな