GraphQLをより理解する[PHP編]

### Resolver
The resolver is basically a call back function for each field. There is always a default resolver for all fields, when we define own resolve function for a field, we simply override the default resolver.

### How to define Schema for Query

1
2
3
4
5
$schema_obj = new Schema {
    "query" => $queryType,
    "mutation" => $mutationType,
    "subscription" => $subscriptionType
}

index.php

1
2
3
4
5
6
7
8
9
10
11
12
13
14
15
16
17
18
19
20
21
22
23
24
25
26
require_once __DIR__ . '/vendor/autoload.php';
 
use GraphQL\GraphQL;
use GraphQL\Type\Schema;
try {
    $schema_obj = new Schema([
        'query' => $queryType
    ]);
    $Input = file_get_contents('php://input');
    $input_data = json_decode($Input, true);
    $query_data = $input_data['query'];
    $variable_values = isset($input_data['variables']) ? $input_data['variables'] : null;
    $value = ['prefix' => 'Output: '];
    $resultant = GraphQL::executeQuery($schema_obj, $query_data, $value, null, $variable_values);
    $output_value = $resultant->toArray();
} catch(\Exception $e){
    $output_value = [
        'errors' => [
            [
                'message' => $e->getMessage()
            ]
        ]
    ];
}
header('Content-Type: application/json');
echo json_encode($output_value);

$ curl http://192.168.34.10:8000 -d ‘{“query”: “query { echo(message: \” Hi Knowband, this is my first GraphQL program \”) }” }’
{“errors”:[{“message”:”Schema does not define the required query root type.”,”extensions”:{“category”:”graphql”},”locations”:[{“line”:1,”column”:1}]}]}

うむ… 実践的にやらないとあかんな

PHPでGraphQLを試したい

まずubuntuにcomposerを入れます。

$ curl -sS https://getcomposer.org/installer | php
$ sudo mv composer.phar /usr/local/bin/composer
$ sudo chmod +x /usr/local/bin/composer
$ source ~/.bashrc
$ composer -v
Composer version 2.1.8 2021-09-15 13:55:14

### ライブラリのインストール
$ composer require webonyx/graphql-php

public/graphql/index.php

1
2
3
4
5
6
7
8
9
10
11
12
13
14
15
16
17
18
19
20
21
22
23
24
25
26
27
28
29
30
require_once __DIR__ . '/../../vendor/autoload.php';
 
use GraphQL\Type\Definition\ObjectType;
 
class Query extends ObjectType {
    public function __contruct(){
        parent::__construct([
            'name' => 'Query',
            'fields' => [
                'number' => [
                    'type' => Type::int(),
                    'args' => [
                        'number' => Type::int(),
                    ],
                    'resolve' => function($value, $args, $context, ResolveInfo $resolveInfo){
                        return $args['number'];
                    }
                ],
            ],
        ]);
    }
}
 
$schema = new GraphQL\Type\Schema([
    'query' => new Query(),
]);
 
$server = new Graph\Server\StandardServer([
    'schema' => $schema
]);

$ php -S 192.168.34.10:8000
$ curl -X POST -H “Content-Type: application/json” “http://192.168.34.10:8000/graphql/” \
> -d ‘{“query”: “query { number(number: 20210928) }”}’

### Repositoryを使う
src/Type/User/User.php

1
2
3
4
5
6
7
8
9
10
11
12
13
14
15
16
17
18
19
20
21
22
23
24
25
26
27
28
29
30
31
32
33
34
35
36
37
38
39
40
41
42
43
44
45
46
47
48
49
50
namespace Hpscript\Type\User;
 
use GraphQL\Type\Definition\ObjectType;
use GraphQL\Type\Definition\Type;
use Hpscript\Repository\UserRepository;
use Hpscript\Type\Definition\DomainType;
 
class User extends ObjectType {
 
    private $userRepository;
 
    public function __construct(){
        $this->userRepository = new UserRepository;
        parent::__construct([
            'name' => 'User',
            'fields' => function(){
                return [
                    'id' => [
                        'type' => Type::int(),
                        'resolve' => function($id){
                            return $id;
                        },
                    ],
                    'name' => [
                        'type' => Type::string(),
                        'resolve' => function($id){
                            return $this->getUser($id)->getName();
                        }
                    ],
                    'profile' => [
                        'type' => Type::string(),
                        'resolve' => function($id){
                            return $this->getUser($id)->getProfile();
                        }
                    ],
                    'address' => [
                        'type' => Type::string(),
                        'resolve' => function($id){
                            return $this->getUser($id)->getName();
                        }
                    ],
                ];
            },
        ]);
    }
}
 
private function getUser($id){
    return $this->userRepository->getUser($id);
}

src/Type/Definition/DomainType.php

1
2
3
4
5
6
7
8
9
10
11
12
13
14
15
namespace Hpscript\Type\Definition;
 
use Hpscript\Type\User\User;
 
class DomainType {
 
    private static $user;
 
    public static function user(){
        if(!isset(static::$user)){
            static::$user = new User();
        }
        return static::$user;
    }
}

src/Repository/UserRepository.php

1
2
3
4
5
6
7
8
9
10
11
12
13
14
15
16
17
18
19
20
21
22
23
24
25
26
27
28
29
30
31
32
33
34
35
36
37
38
39
40
41
42
43
44
45
46
47
48
49
50
namespace Hpscript\Repository;
 
class UserRepository {
 
    private $dummyData;
 
    public function __construct(){
        $sakamoto = new User(1, 'Sakamoto', '坂本太郎', '東京都');
        $sato = new User(2, 'Sato', '佐藤和子', '神奈川');
        $tanaka = new User(3, 'Tanaka', '田中はじめ', '愛知県');
        $this->dummyData = [
            1 => $sakamoto,
            2 => $sato,
            3 => $tanaka
        ];
    }
 
    public function getUser($id){
        data_default_timezone_set('Asia/Tokyo');
        error_log(date('Y-m-d H:i:s') . "\t" . __METHOD__ . "\n", 3, "/tmp/php-graphql-sample.log");
        return $this->dummyData[$id];
    }
}
 
class User {
    private $id;
    private $name;
    private $profile;
    private $address;
 
    public function __construct($id, $name, $profile, $address){
        $this->id = $id;
        $this->name = $name;
        $this->profile = $profile;
        $this->address = $address;
    }
 
    public function getId(){
        return $this->id;
    }
    public function getName(){
        return $this->name;
    }
    public function getProfile(){
        return $this->profile;
    }
    public function getAddress(){
        return $this->address;
    }
}

public/grapql/index.php

1
2
3
4
5
6
7
8
9
10
11
12
13
14
15
16
17
18
19
20
21
22
23
24
25
26
27
28
29
30
31
32
33
34
35
require_once __DIR__ . '/../../vendor/autoload.php';
 
use GraphQL\Type\Definition\ObjectType;
use GraphQL\Type\Definition\Type;
use GraphQL\Type\Definition\ResolveInfo;
use Hpscript\Type\Definition\DomainType;
 
class Query extends ObjectType {
    public function __contruct(){
        parent::__construct([
            'name' => 'Query',
            'fields' => [
                'user' => [
                    'type' => DomainType::user(),
                    'args' => [
                        'id' => Type::int(),
                    ],
                    'resolve' => function($value, $args, $context, ResolveInfo $resolveInfo){
                        return $args['id'];
                    }
                ],
            ],
        ]);
    }
}
 
$schema = new GraphQL\Type\Schema([
    'query' => new Query(),
]);
 
$server = new Graph\Server\StandardServer([
    'schema' => $schema
]);
 
$server->handleRequest();

composer.json

1
2
3
4
5
6
7
8
9
10
{
    "autoload": {
        "psr-4": {
            "Hpscript\\": "src"
        }
    },
    "require": {
        "webonyx/graphql-php": "^14.9"
    }
}

$ curl -X POST -H “Content-Type: application/json” “http://192.168.34.10:8000/graphql/” -d ‘{“query”: “query { user(id: 2){id name} }”}
POST /graphql/ – Uncaught ArgumentCountError: Too few arguments to function GraphQL\Type\Definition\ObjectType::__construct(), 0 passed in /home/vagrant/dev/graphql/public/graphql/index.php on line 30 and exactly 1 expected in /home/vagrant/dev/graphql/vendor/webonyx/graphql-php/src/Type/Definition/ObjectType.php:86
エラーになるな。mutationはいらないから、querytypeだけで良いような気がするんだが。。

[GraphQL]入門

フロントエンドエンジニアの間ではGraphQLはもはや必須スキル?
ということでGraphQLを入門

### GraphQLとは
– APIのためのクエリ言語(Graph Query Language)
– SQLのようなクエリでAPIを定義する
– REST APIとはエンドポイントが異なる(特定の値を取得するために、余分なデータも取得されてしまう、あるいは、1つのエンドポイントでは必要なデータが取得できない といった問題を解決できる 必要なデータだけ要求する)
– 型付スキーマで記述する
– GraphQLのSubscriptionsはWebSocketを使用しているので、簡単にリアルタイム通信ができる
– Client側がGraphQL Query Languageで、Server側がGraphQL Schema Language

注) サーバ側とクライアント側 両方を学ぶ必要がある

### GraphQL Query Language(GET)
Githubの例: https://docs.github.com/en/graphql/overview/explorer

1
2
3
4
5
query {
  viewer {
    login
  }
}
1
2
3
4
5
6
7
query {
  user(login: "hpscript"){
    id
    name
    url
  }
}

おおおお、これは凄い
POST, PUT, DELETEはmutationを使用する

“!”は必須という意味

1
2
3
4
5
6
7
8
type User {
    login: String!
    id: String!
    name: String!
    age: Int
    bio: String
    url: String
}

実際に動かしてみないとわからないね

[Python3 x React.js] S3にアップロードしたjsonファイルをリアルタイムで読み込む

pythonでS3にアップロードします
 L S3 full accessのcredentialは別ファイルからimportにします。

1
2
3
4
5
6
7
8
9
10
11
12
13
14
15
16
17
18
import boto3
import json
import credentials
 
str = {
    "speech":"最高"
}
 
with open("sample.json", "w") as f:
    json.dump(str, f, ensure_ascii=False)
 
s3 = boto3.client('s3', aws_access_key_id=credentials.Accesskey, aws_secret_access_key= credentials.Secretkey, region_name=credentials.Region)
  
filename = "sample.json"
bucket_name = "hogehoge"
  
s3.upload_file(filename,bucket_name,filename, ExtraArgs={'ContentType': "application/json",'ACL':'public-read'})
print("upload {0}".format(filename))

React.jsでJsonをsetIntervalで読み込みます

1
2
3
4
5
6
7
8
9
10
11
12
13
14
15
16
17
18
19
20
21
22
23
24
25
26
27
function App(){
            const [data, setData] = React.useState([]);
 
            React.useEffect(() => {
                const fetchData = async() => {
                fetch("https://hoge.s3.ap-northeast-1.amazonaws.com/sample.json")
                    .then((res) => res.json())
                    .then((data) =>{
                        setData(data);
                });
                }
 
                const id = setInterval(() => {
                    fetchData();
                 }, 2000);
                 
            }, []);
 
            console.log(data);
 
            return(
                <h1>コメント:{data.speech}</h1>
            );
        }
 
        const target = document.getElementById('app');
        ReactDOM.render(<App />, target);

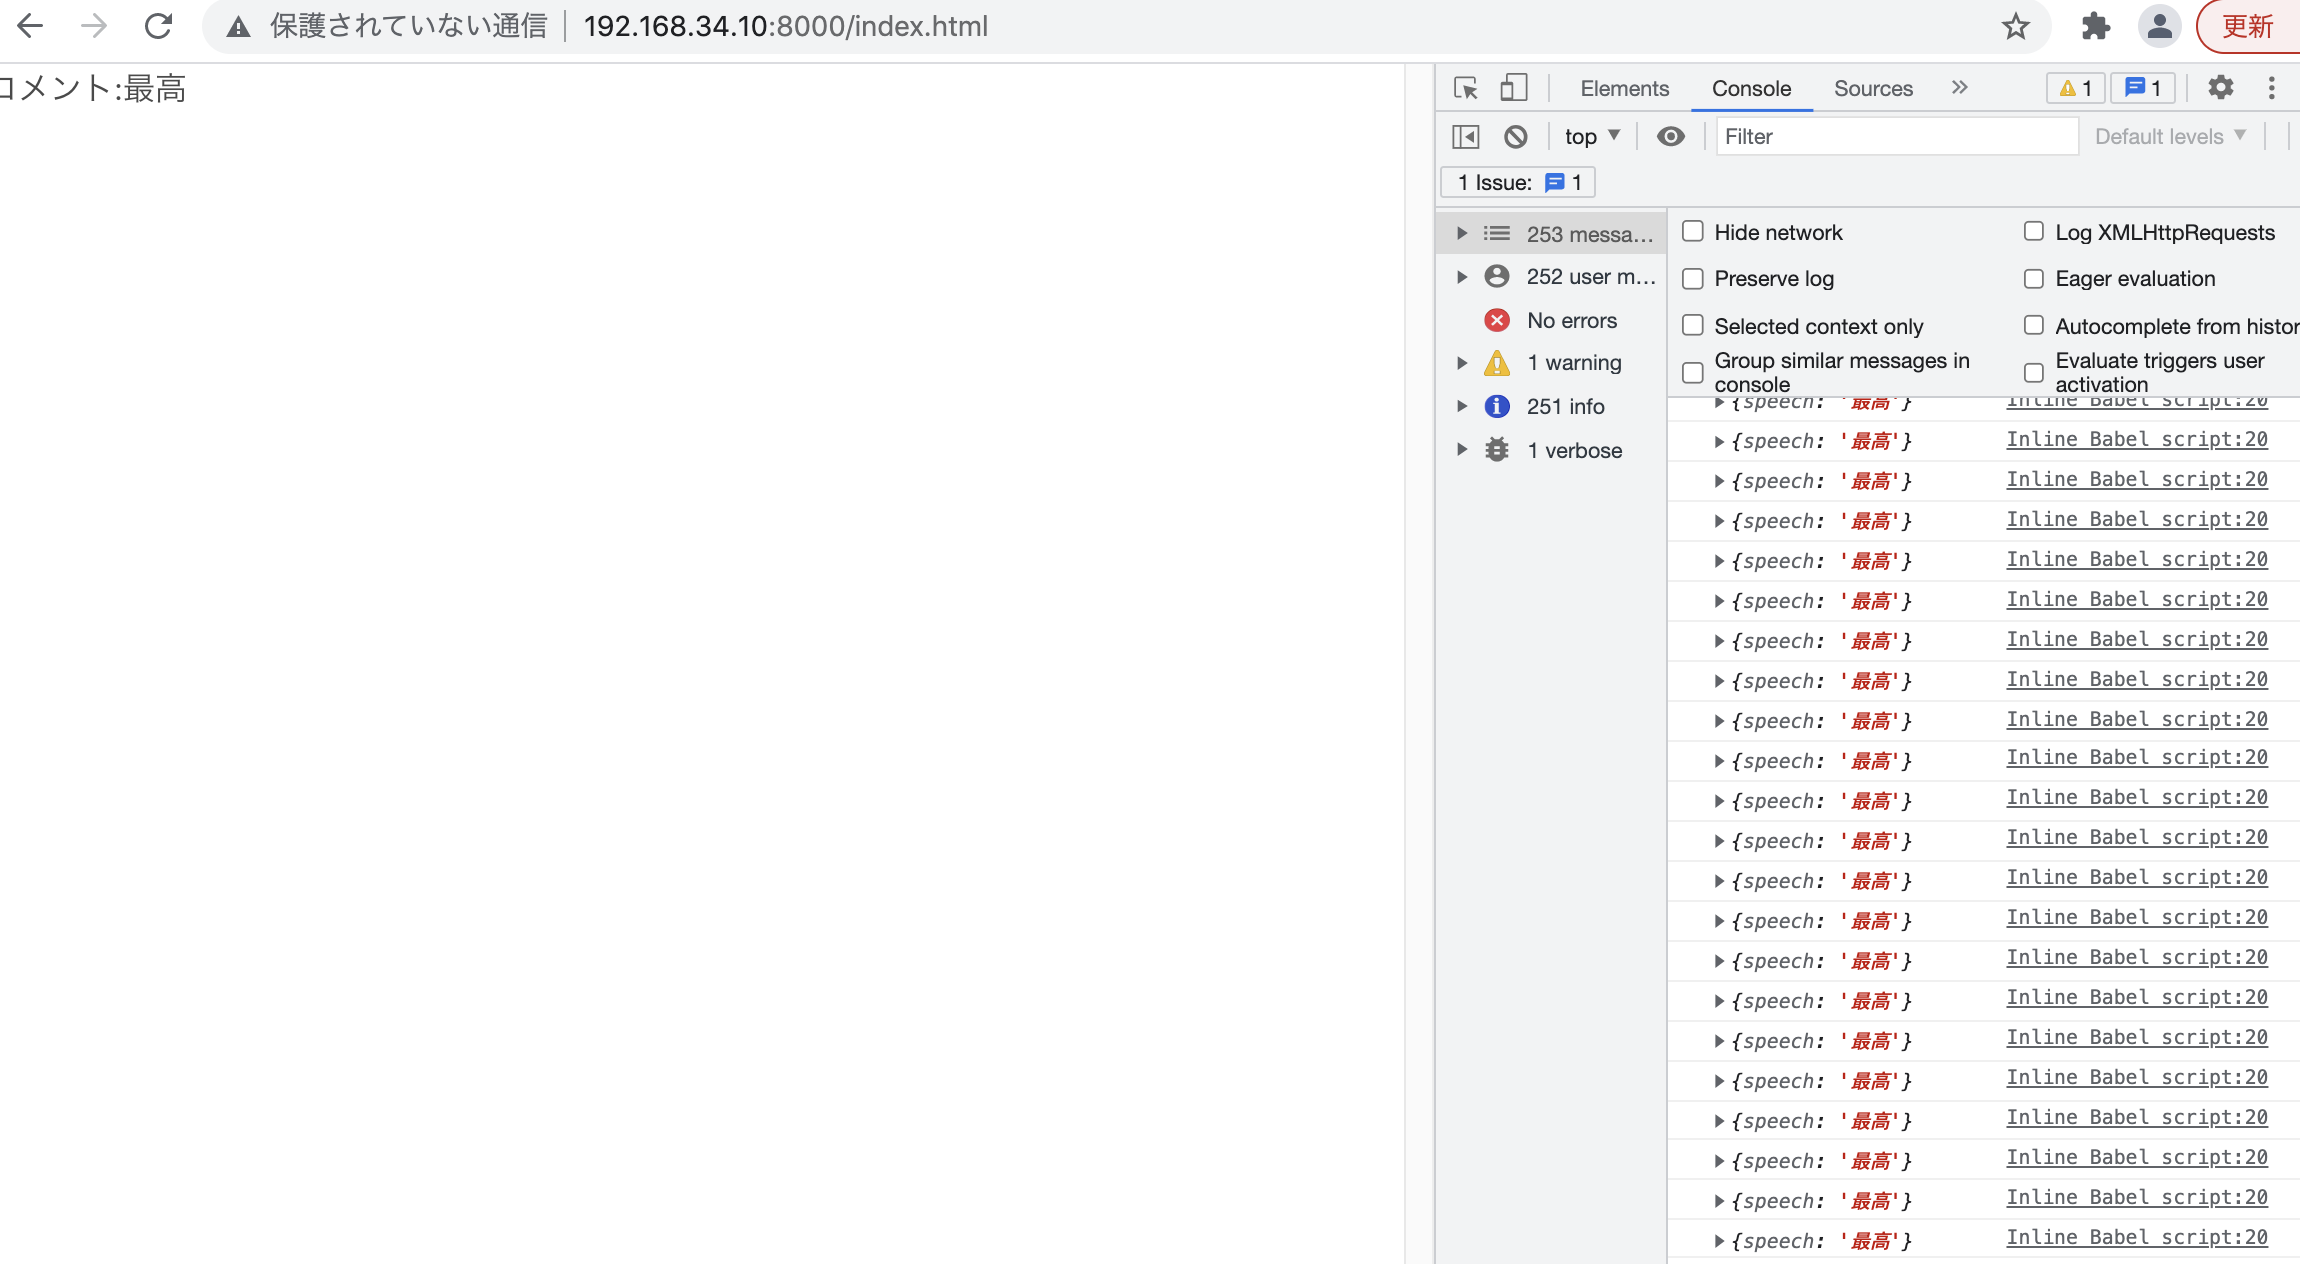
pythonでuploadしたワードがブラウザの更新なくHTML側に表示されます。
OK、後はUIを作っていく

[Python3] jsonを生成してS3にuploadする

strのところは、mufj, 1375で作ってますが、本来はpython3で処理した値をuploadする想定です。

1
2
3
4
5
6
7
8
9
10
11
12
13
14
15
16
17
18
19
20
21
22
23
24
25
import boto3
import json
 
accesskey = ""
secretkey = ""
region = ""
 
// 機械学習等の処理
 
str = {
    "三菱UFJフィナンシャル・グループ":668.3,
    "日経ダブルインバース上場投信":367
}
 
with open("stock.json", "w") as f:
    json.dump(str, f, ensure_ascii=False)
 
  
s3 = boto3.client('s3', aws_access_key_id=accesskey, aws_secret_access_key= secretkey, region_name=region)
  
filename = "stock.json"
bucket_name = "speech-dnn"
  
s3.upload_file(filename,bucket_name,filename, ExtraArgs={'ACL':'public-read'})
print("upload {0}".format(filename))

result
{“三菱UFJフィナンシャル・グループ”: 668.3, “日経ダブルインバース上場投信”: 367}

OK これをreactと接続して、インタラクティブに表示されるか確認する

### 修正
‘ContentType’: “application/json”で指定しないと、jsonファイルとして保存されない

1
s3.upload_file(filename,bucket_name,filename, ExtraArgs={'ContentType': "application/json",'ACL':'public-read'})

[Python3] botoでS3にpublicでuploadする方法

s3.upload_file で、 ExtraArgs={‘ACL’:’public-read’}を追加する

1
2
3
4
5
6
7
s3 = boto3.client('s3', aws_access_key_id=accesskey, aws_secret_access_key= secretkey, region_name=region)
  
filename = "a.json"
bucket_name = "hoge"
  
s3.upload_file(filename,bucket_name,filename, ExtraArgs={'ACL':'public-read'})
print("upload {0}".format(filename))

※追加しないとaccess denyとなるので注意が必要

[音声認識] RaspberryPI 4(model B)でJuliusを動かす

音声認識をwavファイルではなく、ラズパイでやります。

### 前準備
– ラズパイ4 model B (秋葉原で電源、microSDなどセットで1万くらい)
– モニター、キーボード, マウス(メルカリでセットで3500円くらい)
– USBマイク(amazonで300円くらい)
※初期設定でwifiの設定とキーボードをJapaneseにする必要がある

$ mkdir julius
$ cd julius
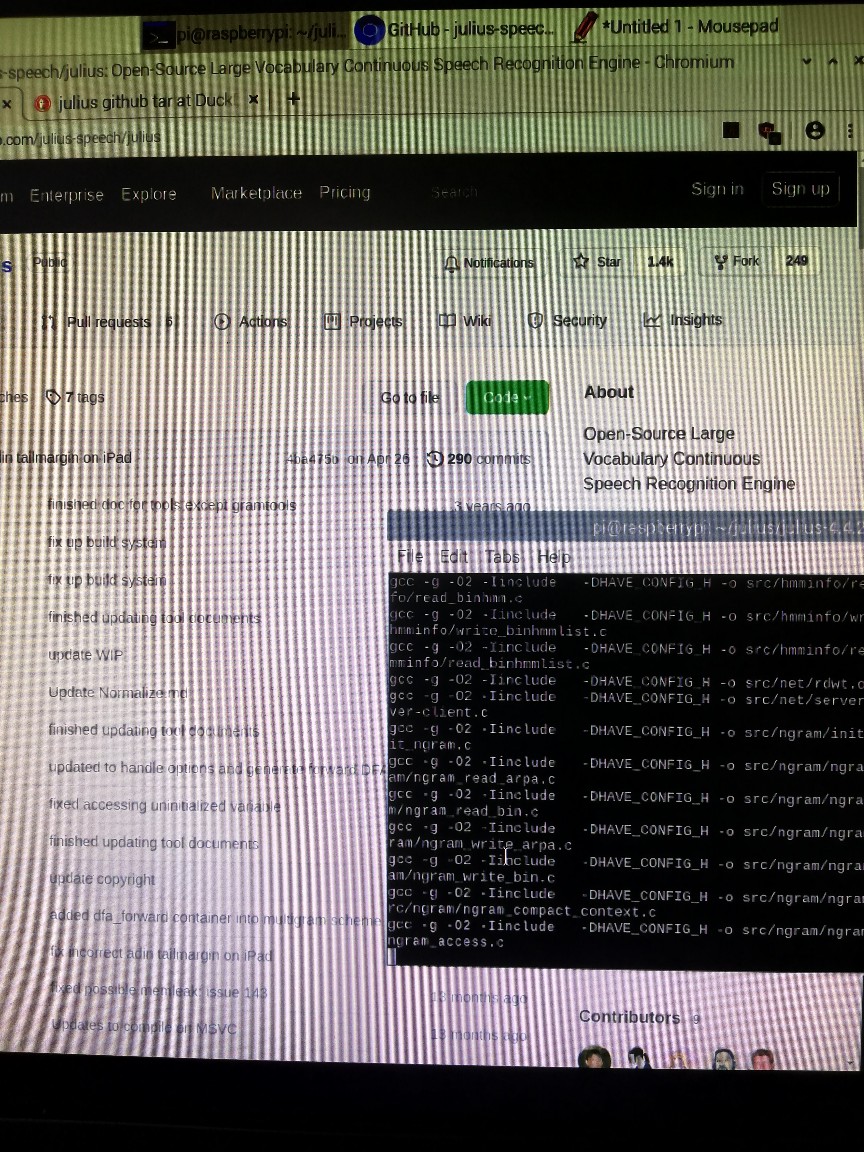
$ wget https://github.com/julius-speech/julius/archive/v4.4.2.1.tar.gz
$ tar xvzf v4.4.2.1.tar.gz
$ cd julius-4.4.2.1
$ sudo apt-get install libasound2-dev libesd0-dev libsndfile1
※libsndfile1-devはRaspberryPI 4ではinstallできなかった
$ ./configure –with-mictype=alsa
$ make
$ sudo make install

$ cd ../
$ mkdir julius-kit
$ cd julius-kit
$ wget https://osdn.net/dl/julius/dictation-kit-v4.4.zip
$ unzip dictation-kit-v4.4.zip

$ sudo vim /etc/modprobe.d/alsa-base.conf

1
2
3
options snd slots=snd_usb_audio,snd_bcm2835
options snd_usb_audio index=0
options snd_bcm2835 index=1

$ sudo vim ~/.profile
一番最後の行に追加

1
export ALSADEV="plughw:0,0"

$ sudo apt-get install alsa-utils sox libsox-fmt-all
$ sudo sh -c “echo snd-pcm >> /etc/modules”

ラズパイ再起動

$ cd ~/julius/julius-kit/dicration-kit-v4.4/
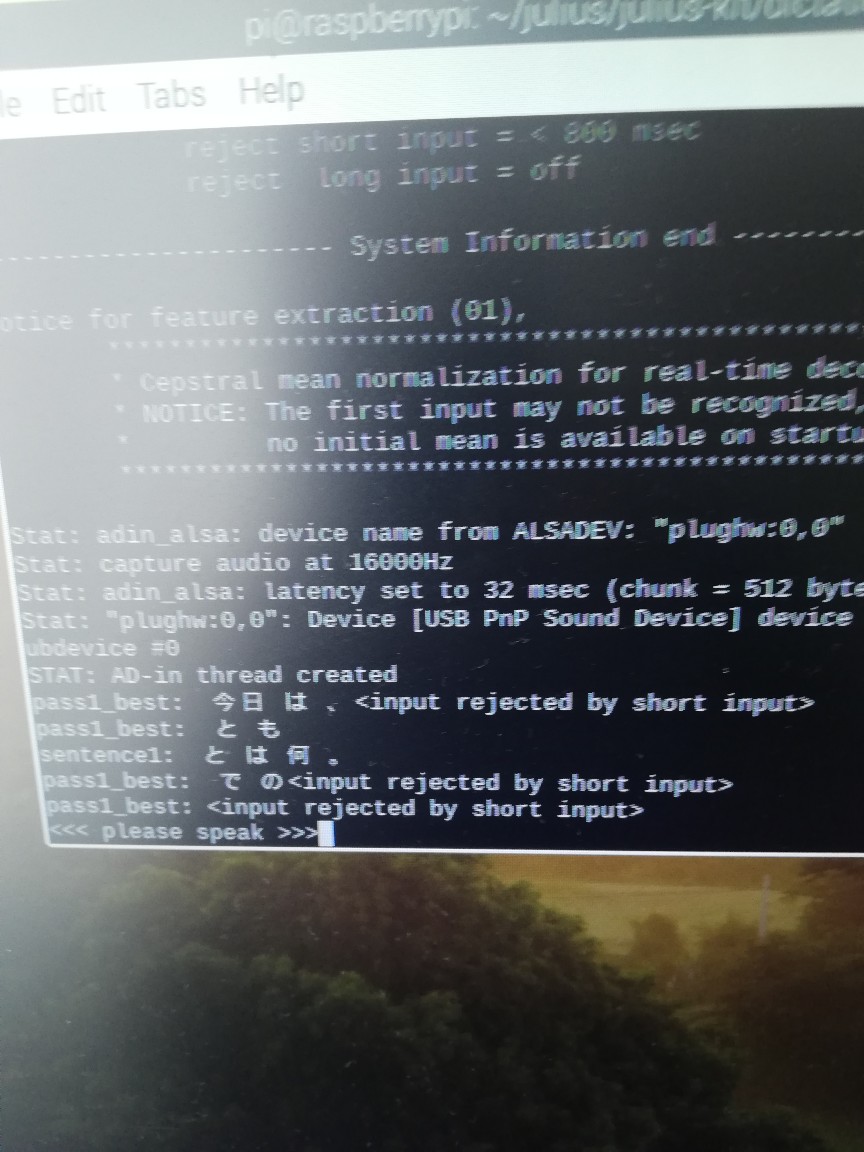
$ julius -C main.jconf -C am-gmm.jconf -demo

AWSにjsonを送信したい
-> S3に保存すれば良いのかな
そこさえできれば、ほぼ基本的な挙動は完成

[ TypeScript ] 環境構築でWebsocketServer.js:10エラーになる時

### コンパイラ導入
$ node -v
v10.19.0
$ sudo npm install -g typescript
$ tsc -v
Version 4.4.3

hello.ts

1
2
const message:string = 'Hello! TypeScript!'
console.log(message);

$ tsc hello.ts
$ ls
hello.js hello.ts
$ node hello.js
Hello! TypeScript!

### npm環境
$ npm install typescript ts-loader webpack webpack-cli webpack-dev-server –save-dev

package.json

1
2
3
4
5
6
7
// 省略
"scripts": {
  "test": "echo \"Error: no test specified\" && exit 1",
  "build": "webpack --mode=development",
  "start": "webpack-dev-server --mode=development"
},
  // 省略

webpack.config.js

1
2
3
4
5
6
7
8
9
10
11
12
13
14
15
16
17
18
19
20
21
22
23
const path = require('path');
module.exports = {
    entry: {
        bundle: './src/app.ts'
    },
    output: {
        path: path.join(__dirname,'dist'),
        filename: '[name].js'
    },
    resolve: {
        extensions:['.ts','.js']
    },
    devServer: {
        contentBase: path.join(__dirname,'dist')
    },
    module: {
        rules: [
            {
                test:/\.ts$/,loader:'ts-loader'
            }
        ]
    }
}

$ tsc –init
-> tsconfig.json が生成される

dist, srcフォルダを作成する

src/app.ts

1
2
3
4
import {Item} from './item';
var elem = document.getElementById('output');
var aBook = new Item('はじめてのTypeScript', 2020);
aBook.say(elem);

src/item.ts

1
2
3
4
5
6
7
8
9
export class Item {
    constructor(private name:string, private price:number){}
 
    public say(elem: HTMLElement | null) : void {
        if(elem){
            elem.innerHTML = '書名:' + this.name + ' 価格: ' + this.price + '円';
        }
    }
}

dist/index.html

1
2
3
4
5
<body>
    <div id="output"></div>
    <script src="bundle.js"></script>
</body>
</html>

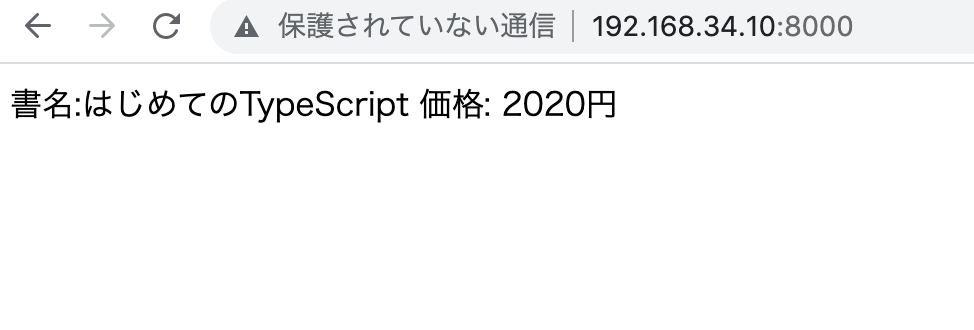
$ npm run start

> tutorial@1.0.0 start /home/vagrant/dev/typescript/tutorial
> webpack-dev-server –mode=development

[webpack-cli] /home/vagrant/dev/typescript/tutorial/node_modules/webpack-dev-server/lib/servers/WebsocketServer.js:10
static heartbeatInterval = 1000;

何でだろう? なんかエラーになるな。。

$ sudo apt-get purge nodejs

▼この記事を参考に最新版を入れる
https://www.digitalocean.com/community/tutorials/how-to-install-node-js-on-ubuntu-20-04-ja

$ cd ~
$ curl -sL https://deb.nodesource.com/setup_14.x -o nodesource_setup.sh
$ sudo bash nodesource_setup.sh
$ sudo apt install nodejs
$ node -v
v14.17.6
$ npm run start

http://192.168.34.10:8000/

nodeがv10だとwebpack-dev-serverでエラーになるみたい 
https://github.com/VickScarlet/lifeRestart/issues/176
v14にupgradeするとエラー解消
マジかよ~~~~ もうやだー

[JavaScript] Classの追加(add)を操作する

タブメニューで、URLのパスに応じてメニューのis-activeをつけたい時
L ulのli要素にclassで”is-active”をつけたい
html

1
2
3
4
5
6
7
8
9
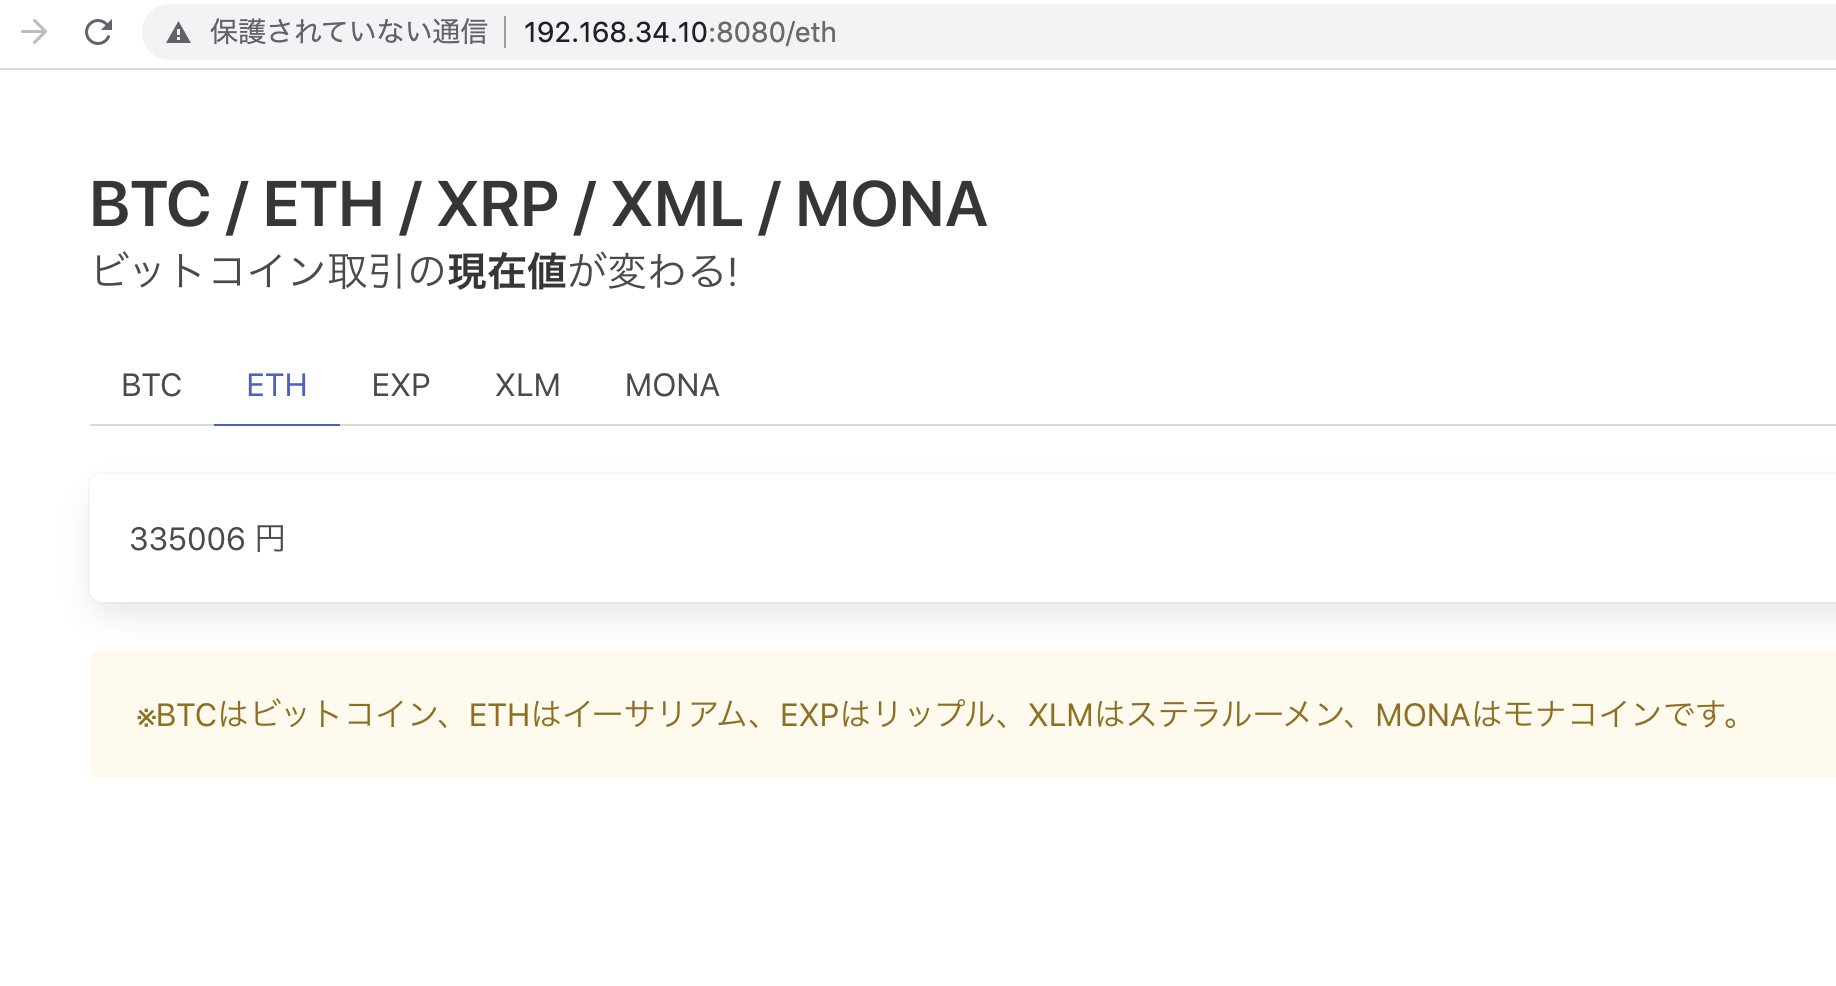
<div class="tabs">
        <ul id="mylist">
            <li><a href="/btc">BTC</a></li>
            <li><a href="/eth">ETH</a></li>
            <li><a href="/xrp">EXP</a></li>
            <li><a href="/xlm">XLM</a></li>
            <li><a href="/mona">MONA</a></li>
        </ul>
      </div>

javascript側
L location.pathnameでURLを取得する
  L querySelectorAllでli要素を全て取得する
  L classList.addでclassを付与する

1
2
3
4
5
6
7
8
9
10
11
12
13
14
15
16
const pathname = location.pathname;
    var i;
    switch(pathname){
        case '/btc':
            i = 0;break;
        case '/eth':
            i = 1;break;
        case '/xrp':
            i = 2;break;
        case '/xlm':
            i = 3;break;
        case '/mona':
            i = 4;break;
    }
    var cols = document.querySelectorAll('#mylist li');
    cols[i].classList.add('is-active');

OK
やりたいことの7割くらいまでは出来た

[Go] HandleFuncのhandlerをswitchでまとめて実装する

ルーティングによって処理を変えたいが、handlerの中身はほとんど一緒なため、handlerの中でswitch文を使って切り分ける
L html.EscapeString(r.URL.Path) でパスの値を取得できる

1
2
3
4
5
6
7
8
9
10
11
12
13
14
15
16
17
18
19
20
21
22
23
24
25
26
27
28
29
30
31
32
33
func apiHandler(w http.ResponseWriter, r *http.Request){
 
    var code string // 変数として宣言
    switch html.EscapeString(r.URL.Path) {
    case "/btc":
        code = "BTC_JPY" // ビットコイン
    case "/eth":
        code = "ETH_JPY" // イーサリアム
    case "/xrp":
        code = "XRP_JPY" // リップル
    case "/xlm":
        code = "XML_JPY" // ステラルーメン
    case "/mona":
        code = "MONA_JPY" // モナコイン
    default:
        code = "BTC_JPY"
    }
 
    req, _ := http.NewRequest("GET", uri, nil)
 
    // 省略
}
 
 
func main() {
    http.HandleFunc("/btc", apiHandler)
    http.HandleFunc("/eth", apiHandler)
    http.HandleFunc("/xrp", apiHandler)
    http.HandleFunc("/xlm", apiHandler)
    http.HandleFunc("/mona", apiHandler)
    log.Fatal(http.ListenAndServe(":8080",nil))
}

code := “BTC_JPY” とすると定数になるので、 var code string と変数として宣言する必要がある
なるほど、後はテンプレート側の処理

bulma cssとtypescriptを使いたい