[WordPress][vagrant] オリジナルテーマ作成手順2

作成手順1からの続きです。
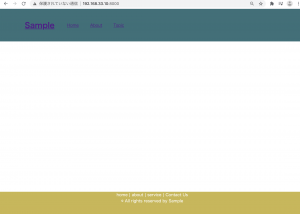
続いて、テーマに使用するHTMLファイルを用意します。
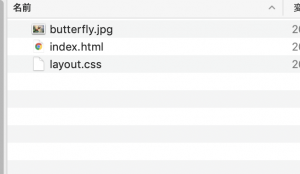
ここでは単純にHTML1枚と、CSS、jpgにします。

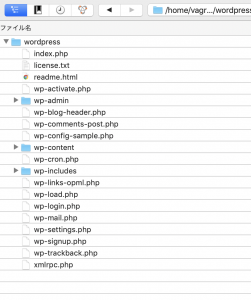
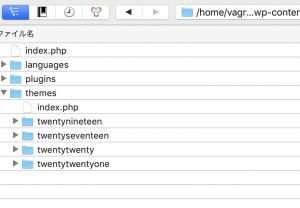
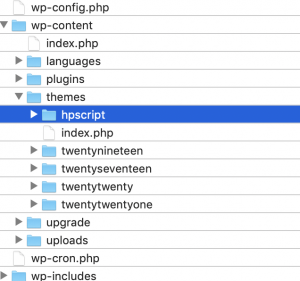
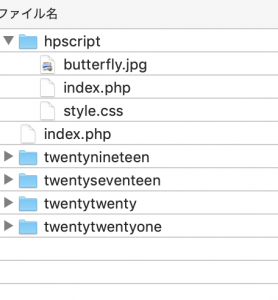
wp-content/themesのフォルダ配下にテーマのフォルダを作ります。
ここではhpscriptにしておきましょう。
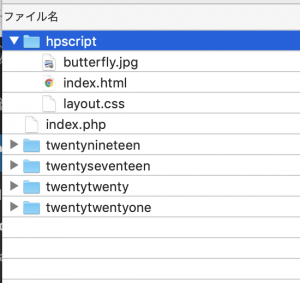
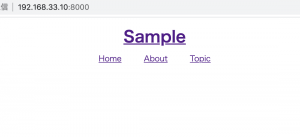
index.html

<!DOCTYPE html>
<html lang="en">
<head>
	<meta charset="UTF-8">
	<meta name="viewport" content="width=device-width, initial-scale=1.0">
	<link rel="stylesheet" href="style.css">
	<title>Document</title>
</head>
<body>
<div class="wrapper">
	<header>
		<h1 class="headline">
			<a href="">Sample</a>
		</h1>
		<ul class="nav-list">
			<li class="nav-list-item"><a href="">Home</a></li>
			<li class="nav-list-item"><a href="">About</a></li>
			<li class="nav-list-item"><a href="">Topic</a></li>
		</ul>
	</header>
	<div class="main">
	<img src="butterfly.jpg">
	<h1>Butterfly</h1>
	<p>Lorem ipsum dolor sit amet, consectetur adipiscing elit, sed do eiusmod tempor incididunt ut labore et dolore magna aliqua. Ut enim ad minim veniam, quis nostrud exercitation ullamco laboris nisi ut aliquip ex ea commodo consequat. Duis aute irure dolor in reprehenderit in voluptate velit esse cillum dolore eu fugiat nulla pariatur. Excepteur sint occaecat cupidatat non proident, sunt in culpa qui officia deserunt mollit anim id est laborum.</p>
	<p>Lorem ipsum dolor sit amet, consectetur adipiscing elit, sed do eiusmod tempor incididunt ut labore et dolore magna aliqua. Ut enim ad minim veniam, quis nostrud exercitation ullamco laboris nisi ut aliquip ex ea commodo consequat. Duis aute irure dolor in reprehenderit in voluptate velit esse cillum dolore eu fugiat nulla pariatur. Excepteur sint occaecat cupidatat non proident, sunt in culpa qui officia deserunt mollit anim id est laborum.</p>

	</div>
	<footer>
		<ul class="footer-menu">
			<li>home |</li>
			<li>about |</li>
			<li>service |</li>
			<li>Contact Us</li>
		</ul>
		<p>&copy; All rights reserved by Sample</p>
	</footer>
</div>
</body>
</html>

style.css ※layout.cssだと都合が悪そうなので、style.cssに変更します。
L テーマの名前の入力が必須のため、hpscriptと書いておく。Theme Name(必須)の他、Theme URL、Description、Versionなどがある。

/*
Theme Name : Hpscript
*/
* {
	margin:0; padding:0;
}
.wrapper {
	min-height: 100vh;
	position:relative;
	padding-bottom: 120px;
	box-sizing: border-box;
}
header {
	height: 100px;
	width: 100%;
	padding: 15px 0;
	background-color: #337079;
	color: white;
	margin-top: 0px;
	position: fixed;
}
header .headline {
	line-height: 100px;
	float: left;
	font-size: 30px;
	margin-left: 100px;
}
.nav-list {
	line-height: 100px;
	float: left;
	margin-left: 30px;
	list-style:none;
}
.nav-list-item {
	list-style: none;
	display: inline-block;
	margin: 0 20px;
}
.main {
	width: 80vw;
	padding-top: 170px;
	margin: 0px auto;
}
footer {
	width: 100%;
	height: 100px;
	background-color: #cab64a;
	color: #fff;
	text-align: center;
	position: absolute;
	bottom:0;
}
ul.footer-menu li {
	display: inline;
}

index.htmlをindex.phpに変更する

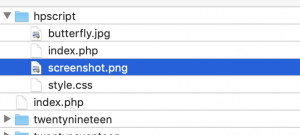
screenshot.pngという画像をテーマのフォルダ内におくと、サムネイルで表示できる。

準備ができました。
adminのテーマの画面を表示します。
http://192.168.33.10:8000/wp-admin/themes.php
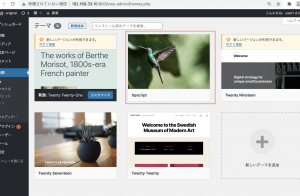
おおおおおおおお、こんな簡単だったけ?
前にやった時はもっと面倒だった印象があるが。。

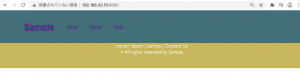
テーマを有効化して、トップページを表示します。
あれ? CSSやimgのパスが繋がってないですね。
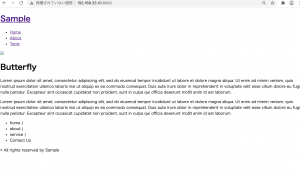
続けてやっていきます。

[WordPress][vagrant] オリジナルテーマ作成手順1

ワードプレスのオリジナルテーマを作る方法を学習したい。
さくらなど、レンタルサーバーですぐにWordPressを作成できるが、開発環境としてはレンタルサーバーだとやりにくいので、vagrant(amazon linux2)で開発する。

### 1.公式サイトよりダウンロード
まず、公式サイトのWORDPRESS.ORGよりダウンロードします。
https://ja.wordpress.org/download/
ダウンロードしたファイルを配置します。

### フォルダ構成
wp-content: テーマ、プラグイン、画像データなど
wp-admin: 管理画面用フォルダ
wp-includes: システム全般
wp-config.php: WPの設定ファイル
wp-login.php: ログイン画面
wp-load.php: 動作に必要なファイル
index.php: 最初に読み込まれるファイル

テーマの格納場所
wp-content/temes/

### 2.WPのインストール
事前準備として、Wordpress用のデータベースを作成します。mysql8.0.21を使います。
mysql> create database wordpress;

ダウンロードしたフォルダのディレクトリでサーバを起動します。
$ php -S 192.168.33.10:8000

初期ページが表示されます。

DBの設定画面が表示されるので、作成したDBを設定します。

続いて、インストール画面が表示されます。

各種入力すると、ローカル環境でインストールができました。

続いて、wp-contentフォルダの配下にテーマを作っていきます。

[Java][STS4] Pivotal tc Server Delevoper Editionが無い時

STS4.9.0でPivotal tc Server Delevoper Editionが無い。
と思ったら、stack over flowを見ていたらVMware tc Serverに変わったらしい。
https://stackoverflow.com/questions/54148054/pivotal-tc-server-is-not-included-in-sts-4

Javaって人気あるって思ってたけど、全然STSに関する日本語のドキュメントが無いな。。

[Java][STS4] new maven project

そもそもmavenとは?
-> Javaをビルドするためのツール
-> C言語のmakeのようなもの
-> 似たツールにAntやGradleなどがある
-> XMLを書くと色々できる

pom.xml
-> POMとは、「Project Object Model」の略で、プロジェクトのさまざまな情報を扱うためのオブジェクトモデル
-> プロジェクトの設定をXMLのタグとして記述

  <dependencyManagement>
  	<dependencies>
    <dependency>
      <groupId>io.spring.platform</groupId>
      <artifactId>platform-bom</artifactId>
      <version>2.0.5.RELEASE</version>
      <type>pom</type>
      <scope>import</scope>
    </dependency>
  </dependencies>
  </dependencyManagement>

  <dependencies>
    <dependency>
      <groupId>javax.servlet</groupId>
      <artifactId>javax.servlet-api</artifactId>
      <scope>provided</scope>
    </dependency>
    <dependency>
      <groupId>org.apache.taglibs</groupId>
      <artifactId>taglibs-standard-jstlel</artifactId>
    </dependency>
  </dependencies>

saveすると、src/main/webapp/index.jspのエラーが解消される

[Java][STS4] macでspringの環境構築

$ brew cask install java
-> エラーになるので
$ brew install cask
-> 更にエラーになるので
$ git -C /usr/local/Homebrew/Library/Taps/homebrew/homebrew-core fetch –unshallow

$ brew install java
$ export JAVA_HOME=`/usr/libexec/java_home -v 15`
$ echo $JAVA_HOME
$ export PATH=$JAVA_HOME/bin:$PATH
$ echo $PATH
$ brew install maven
$ export M3_HOME=/usr/local/apache-maven-3.6.3
$ M3=$M3_HOME/bin
$ export PATH=$M3:$PATH
$ mvn –version

https://spring.io/tools

mavenのパスを通す

環境構築はこれでOKっぽい?

[filmora9] 動画編集の始め方

### 1. filmora9インストール
macにfilmora9をインストールします

### 2. filmora9を起動
16:9ワイドスクリーンを選択した状態で、「新しいプロジェクトを作成」を押下します。

### 3. 編集画面表示

– クリップウィンドウ: 動画、音、エフェクト、トランジションなどの素材を選ぶウィンドウ
– タイムラインウィンドウ: 上で選んだクリップを並べて動画にするウィンドウ
– プレビューウィンドウ: タイムラインを再生するウィンドウ

### 4. 動画をドラック&ドロップ
用意した動画を取り込みます。とりあえず適当に3本

### 5. タイトル作成
クリップウィンドウのタイトルタブを選択する

オーナー1を選択し、下にドラッグ&ドロップし、更にダブルクリックしてタイトルを編集します。
適当にMy First Videoとします。

### 6.動画挿入
タイトルに動画をつなげていきます。時間は自由にハサミで編集(切り抜き)できます。

### 7.音声追加

音量のフェードアウトも調整できる

### 8.トランジションの設定
動画の切り替え時にトランジションを設定できる

### 9. videoをエクスポート

なるほど、なんか凄え。こんな簡単にできるんや。。。

[CSS] SVGの使い方

SVGとは
– XMLをベースにした二次元ベクターデータ

SVGのメリット
– 拡大・縮小に強い
– 軽い
– CSSで装飾させたりアニメーションも可

デメリット
– 写真やイラスト等に向かない

### SVG作成
まずPhotoshopでSVG画像を作ります

あれ、保存できない。。
というか、SVGはillustratorで作るらしい。 なるほど。。。。

気を取り直して、illustratorで画像を作ります。

保存した状態

sublimeに当ててみると。。。

<?xml version="1.0" encoding="utf-8"?>
<!-- Generator: Adobe Illustrator 23.0.1, SVG Export Plug-In . SVG Version: 6.00 Build 0)  -->
<svg version="1.1" id="レイヤー_1" xmlns="http://www.w3.org/2000/svg" xmlns:xlink="http://www.w3.org/1999/xlink" x="0px"
	 y="0px" viewBox="0 0 500 500" style="enable-background:new 0 0 500 500;" xml:space="preserve">
<style type="text/css">
	.st0{fill:none;}
	.st1{font-family:'KozGoPr6N-Regular-83pv-RKSJ-H';}
	.st2{font-size:261px;}
</style>
<rect x="14" y="106.68" class="st0" width="478" height="269.86"/>
<text transform="matrix(1 0 0 1 14 336.3662)" class="st1 st2">SVG</text>
</svg>

ほう、こんなんなってるのか。

	<h1>SVG</h1>
	<img src="/img/sample.svg">

### css表示

<div class="test"></div>
.test {
	background-image: url("img/sample.svg");
}

– fill, fill-opacity, stroke, stroke-width, stroke-dasharray, stroke-dashoffsetなど使用可能

### objectで表示

<object type="image/svg+xml" data="/img/sample.svg" width="200" height="100"></object>

### fillの例

	<svg id="test" xmlns="http://www.w3.org/2000/svg">
		<circle class="icon" cx="50" cy="50" r="50"/>
	</svg>
#test {
	fill: red;
}

[position:fixed;] ヘッダー固定

<body>
<div class="wrapper">
	<header>
		<h1 class="headline">
			<a href="">Sample</a>
		</h1>
		<ul class="nav-list">
			<li class="nav-list-item"><a href="">Home</a></li>
			<li class="nav-list-item"><a href="">About</a></li>
			<li class="nav-list-item"><a href="">Topic</a></li>
		</ul>
	</header>
	<div class="main">
	<img src="butterfly.jpg">
	<h1>Butterfly</h1>
	<p>Lorem ipsum dolor sit amet, consectetur adipiscing elit, sed do eiusmod tempor incididunt ut labore et dolore magna aliqua. Ut enim ad minim veniam, quis nostrud exercitation ullamco laboris nisi ut aliquip ex ea commodo consequat. Duis aute irure dolor in reprehenderit in voluptate velit esse cillum dolore eu fugiat nulla pariatur. Excepteur sint occaecat cupidatat non proident, sunt in culpa qui officia deserunt mollit anim id est laborum.</p>
	<p>Lorem ipsum dolor sit amet, consectetur adipiscing elit, sed do eiusmod tempor incididunt ut labore et dolore magna aliqua. Ut enim ad minim veniam, quis nostrud exercitation ullamco laboris nisi ut aliquip ex ea commodo consequat. Duis aute irure dolor in reprehenderit in voluptate velit esse cillum dolore eu fugiat nulla pariatur. Excepteur sint occaecat cupidatat non proident, sunt in culpa qui officia deserunt mollit anim id est laborum.</p>

	</div>
	<footer>
		<ul class="footer-menu">
			<li>home |</li>
			<li>about |</li>
			<li>service |</li>
			<li>Contact Us</li>
		</ul>
		<p>&copy; All rights reserved by Sample</p>
	</footer>
</div>
</body>
* {
	margin:0; padding:0;
}
.wrapper {
	min-height: 100vh;
	position:relative;
	padding-bottom: 120px;
	box-sizing: border-box;
}
header {
	height: 100px;
	width: 100%;
	padding: 15px 0;
	background-color: #337079;
	color: white;
	margin-top: 0px;
	position: fixed;
}
header .headline {
	line-height: 100px;
	float: left;
	font-size: 30px;
	margin-left: 100px;
}
.nav-list {
	line-height: 100px;
	float: left;
	margin-left: 30px;
	list-style:none;
}
.nav-list-item {
	list-style: none;
	display: inline-block;
	margin: 0 20px;
}
.main {
	width: 80vw;
	padding-top: 170px;
	margin: 0px auto;
}
footer {
	width: 100%;
	height: 100px;
	background-color: #cab64a;
	color: #fff;
	text-align: center;
	position: absolute;
	bottom:0;
}
ul.footer-menu li {
	display: inline;
}

レポジトリに登録しておこう。

[position:relative;] footer下固定

<!DOCTYPE html>
<html lang="en">
<head>
	<meta charset="UTF-8">
	<meta name="viewport" content="width=device-width, initial-scale=1.0">
	<link rel="stylesheet" href="layout.css">
	<title>Document</title>
</head>
<body>
<header>
	<h1 class="headline">
		<a href="">Sample</a>
	</h1>
	<ul class="nav-list">
		<li class="nav-list-item"><a href="">Home</a></li>
		<li class="nav-list-item"><a href="">About</a></li>
		<li class="nav-list-item"><a href="">Topic</a></li>
	</ul>
</header>
	<footer>
		<ul class="footer-menu">
			<li>home |</li>
			<li>about |</li>
			<li>service |</li>
			<li>Contact Us</li>
		</ul>
		<p>&copy; All rights reserved by Sample</p>
	</footer>
</body>
</html>
* {
	margin:0; padding:0;
}
header {
	height: 100px;
	width: 100%;
	padding: 15px 0;
	background-color: #337079;
	color: white;
}
header .headline {
	line-height: 100px;
	float: left;
	font-size: 30px;
	margin-left: 100px;
}
.nav-list {
	line-height: 100px;
	float: left;
	margin-left: 30px;
	list-style:none;
}
.nav-list-item {
	list-style: none;
	display: inline-block;
	margin: 0 20px;
}
footer {
	width: 100%;
	height: 100px;
	background-color: #cab64a;
	color: #fff;
	text-align: center;
}
ul.footer-menu li {
	display: inline;
}

.wrapper {
	min-height: 100vh;
	position:relative;
	padding-bottom: 120px;
	box-sizing: border-box;
}

footer {
	width: 100%;
	height: 100px;
	background-color: #cab64a;
	color: #fff;
	text-align: center;
	position: absolute;
	bottom:0;
}

意外とするできる。

[Google Analytics API] PHPでリアルタイムユーザ数を取得して表示する

GA APIでページビューやセッションだけでなく、rt:activeUsersでリアルタイムユーザを取得できる。

require_once '../google-api-php-client/src/Google/autoload.php';
$service_account_email = '*.iam.gserviceaccount.com';
$key = file_get_contents('*.p12');
$profile = '*';

$client = new Google_Client();
$analytics = new Google_Service_Analytics($client);

$cred = new Google_Auth_AssertionCredentials(
  $service_account_email,
  array(Google_Service_Analytics::ANALYTICS_READONLY),
  $key
);

$client->setAssertionCredentials($cred);
if($client->getAuth()->isAccessTokenExpired()){
  $client->getAuth()->refreshTokenWithAssertion($cred);
}

$optParams = array(
'dimensions' => 'rt:medium');

try {
$results = $analytics->data_realtime->get(
  'ga:' . $profile,
  'rt:activeUsers',
  $optParams);
} catch (apiServiceException $e) {
  $error = $e->getMessage();
}
print("<pre>");
// print_r($results["totalsForAllResults"]["rt:activeUsers"]);
print_r($results);
print("</pre>");

$array[“totalsForAllResults”][“rt:activeUsers”] でアクティブユーザすうを取れるが、配列で何が取れるか確認した方が良い。

GAの場合、analytics.jsでajaxで処理しているので、ELBのアクセスログから例えば過去5分間のアクセス数を数えてログインユーザとして表示するってよりは、GA APIの方が現実的か。

ちなみに、rtって、リツイートの略かと思ったけど、real timeの略っぽいね。なんじゃそりゃw