Dockerfileを使おう

vi Dockerfile

From centos
MAINTAINER Tetsu <hogehoge@gmail.com>
# Run: execute in build
RUN echo "now building..."
# CMD: execute in run
CMD ["echo", "now running..."]

vagrant@vagrant-ubuntu-trusty-64:~$ sudo docker build -t shibuya/echo .
Sending build context to Docker daemon 13.31kB
Step 1/4 : From centos
—> 5182e96772bf
Step 2/4 : MAINTAINER Tetsu
—> Running in 48a636f08d6c
Removing intermediate container 48a636f08d6c
—> a532962fac42
Step 3/4 : RUN echo “now building…”
—> Running in 266d3e002a78
now building…
Removing intermediate container 266d3e002a78
—> 42e0d4397d0a
Step 4/4 : CMD [“echo”, “now running…”]
—> Running in 66419b3311b9
Removing intermediate container 66419b3311b9
—> b503e170fb73
Successfully built b503e170fb73
Successfully tagged shibuya/echo:latest

なんじゃこりゃーーーーーーーー

vagrant@vagrant-ubuntu-trusty-64:~$ sudo docker images
REPOSITORY TAG IMAGE ID CREATED SIZE
shibuya/echo latest b503e170fb73 46 seconds ago 200MB
ab93f4f1679d 15 minutes ago 200MB
hello-world latest 4ab4c602aa5e 2 days ago 1.84kB
centos latest 5182e96772bf 4 weeks ago 200MB
vagrant@vagrant-ubuntu-trusty-64:~$ sudo docker run b503
now running…

vagrant@vagrant-ubuntu-trusty-64:~$ sudo docker build -t hpscript/httpd .
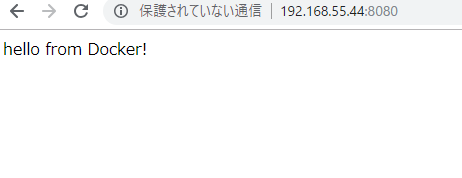
vagrant@vagrant-ubuntu-trusty-64:~$ sudo docker run -p 8080:80 -d hpscript/httpd
32e7d390b05826510945df2468a3e98a5762586080ec508ac3543a068ec3390f

わかったような解らんような分からんw

コンテナ内に入って作業しよう

コンテナ内のcentosに入ります。

vagrant@vagrant-ubuntu-trusty-64:~$ sudo docker run -i -t centos /bin/bash
[root@83a948642dbe /]# touch hello.text
[root@83a948642dbe /]# ls
anaconda-post.log dev hello.text lib media opt root sbin sys usr
bin etc home lib64 mnt proc run srv tmp var
[root@83a948642dbe /]# exit
exit

vagrant@vagrant-ubuntu-trusty-64:~$ sudo docker ps -a
CONTAINER ID IMAGE COMMAND CREATED STATUS PORTS NAMES
83a948642dbe centos “/bin/bash” 2 minutes ago Exited (0) About a minute ago elated_swartz
45e5501bd8ef centos “free -s 3” 10 minutes ago Up 10 minutes compassionate_mccarthy
0b8011965ea0 centos “echo ‘hello world'” 19 minutes ago Exited (0) 19 minutes ago romantic_kapitsa
c6490f99e041 hello-world “/hello” About an hour ago Exited (0) About an hour ago distracted_wilson
1abf8bdb8845 hello-world “/hello” About an hour ago Exited (0) About an hour ago sad_colden

sudo docker commitでcontainerからimageを作る。
vagrant@vagrant-ubuntu-trusty-64:~$ sudo docker commit 83a
sha256:ab93f4f1679d8efa1843606ea3d8741b35fe3f9b73e1ddb8acbfbd2ddf25f468
vagrant@vagrant-ubuntu-trusty-64:~$ sudo docker images
REPOSITORY TAG IMAGE ID CREATED SIZE
ab93f4f1679d 35 seconds ago 200MB
hello-world latest 4ab4c602aa5e 2 days ago 1.84kB
centos latest 5182e96772bf 4 weeks ago 200MB
vagrant@vagrant-ubuntu-trusty-64:~$ sudo docker run -i -t ab9 /bin/bash
[root@5e92b8233188 /]# ls
anaconda-post.log dev hello.text lib media opt root sbin sys usr
bin etc home lib64 mnt proc run srv tmp var

なるほどなるほど。

コンテナを走らせよう

vagrant@vagrant-ubuntu-trusty-64:~$ sudo docker run centos echo “hello world”
hello world

何!? どういう事? 

vagrant@vagrant-ubuntu-trusty-64:~$ sudo docker run centos echo "hello world"
hello world

docker psで一覧を見ることができる。
vagrant@vagrant-ubuntu-trusty-64:~$ sudo docker ps

動作が終了したものを見るのは docker ps -a
vagrant@vagrant-ubuntu-trusty-64:~$ sudo docker ps -a
CONTAINER ID IMAGE COMMAND CREATED STATUS PORTS NAMES
0b8011965ea0 centos “echo ‘hello world'” 5 minutes ago Exited (0) 5 minutes ago romantic_kapitsa
c6490f99e041 hello-world “/hello” 40 minutes ago Exited (0) 40 minutes ago distracted_wilson
1abf8bdb8845 hello-world “/hello” 40 minutes ago Exited (0) 40 minutes ago sad_colden

vagrant@vagrant-ubuntu-trusty-64:~$ sudo docker run -d centos free -s 3
45e5501bd8ef3b3dd8ec4a717e992550222cb68743d78bcc4dd88db5f3673cba
vagrant@vagrant-ubuntu-trusty-64:~$ sudo docker ps
CONTAINER ID IMAGE COMMAND CREATED STATUS PORTS NAMES
45e5501bd8ef centos “free -s 3” 11 seconds ago Up 10 seconds compassionate_mccarthy

$ sudo docker logs 45e
total used free shared buff/cache available
Mem: 501708 155076 82484 416 264148 325451
Swap: 0 0 0

total used free shared buff/cache available
Mem: 501708 155068 82484 416 264156 325467
Swap: 0 0 0

total used free shared buff/cache available
Mem: 501708 155068 82484 416 264156 325467
Swap: 0 0 0

total used free shared buff/cache available
Mem: 501708 155060 82484 416 264164 325467
Swap: 0 0 0

total used free shared buff/cache available
Mem: 501708 155056 82484 416 264168 325479
Swap: 0 0 0

total used free shared buff/cache available
Mem: 501708 155048 82484 416 264176 325479
Swap: 0 0 0

total used free shared buff/cache available
Mem: 501708 155048 82484 416 264176 325487
Swap: 0 0 0

total used free shared buff/cache available
Mem: 501708 155040 82484 416 264184 325487
Swap: 0 0 0

total used free shared buff/cache available
Mem: 501708 155164 82360 416 264184 325363
Swap: 0 0 0

total used free shared buff/cache available
Mem: 501708 155156 82360 416 264192 325363
Swap: 0 0 0

total used free shared buff/cache available
Mem: 501708 155156 82360 416 264192 325363
Swap: 0 0 0

total used free shared buff/cache available
Mem: 501708 155148 82360 416 264200 325387
Swap: 0 0 0

total used free shared buff/cache available
Mem: 501708 155148 82360 416 264200 325387
Swap: 0 0 0

total used free shared buff/cache available
Mem: 501708 155136 82360 416 264212 325387
Swap: 0 0 0

total used free shared buff/cache available
Mem: 501708 155136 82360 416 264212 325387
Swap: 0 0 0

total used free shared buff/cache available
Mem: 501708 155128 82360 416 264220 325387
Swap: 0 0 0

total used free shared buff/cache available
Mem: 501708 155128 82360 416 264220 325407
Swap: 0 0 0

total used free shared buff/cache available
Mem: 501708 155120 82360 416 264228 325415
Swap: 0 0 0

total used free shared buff/cache available
Mem: 501708 155120 82360 416 264228 325415
Swap: 0 0 0

total used free shared buff/cache available
Mem: 501708 155112 82360 416 264236 325415
Swap: 0 0 0

total used free shared buff/cache available
Mem: 501708 155496 81616 416 264596 325039
Swap: 0 0 0

total used free shared buff/cache available
Mem: 501708 155484 81616 416 264608 325047
Swap: 0 0 0

total used free shared buff/cache available
Mem: 501708 155484 81616 416 264608 325047
Swap: 0 0 0

total used free shared buff/cache available
Mem: 501708 155476 81616 416 264616 325047
Swap: 0 0 0

total used free shared buff/cache available
Mem: 501708 155228 81864 416 264616 325307
Swap: 0 0 0

total used free shared buff/cache available
Mem: 501708 155228 81856 416 264624 325299
Swap: 0 0 0

total used free shared buff/cache available
Mem: 501708 155232 81852 416 264624 325295
Swap: 0 0 0

total used free shared buff/cache available
Mem: 501708 155172 81844 416 264692 325363
Swap: 0 0 0

total used free shared buff/cache available
Mem: 501708 155172 81844 416 264692 325363
Swap: 0 0 0

total used free shared buff/cache available
Mem: 501708 155164 81844 416 264700 325371
Swap: 0 0 0

total used free shared buff/cache available
Mem: 501708 155160 81844 416 264704 325371
Swap: 0 0 0

total used free shared buff/cache available
Mem: 501708 155152 81844 416 264712 325383
Swap: 0 0 0

total used free shared buff/cache available
Mem: 501708 155152 81844 416 264712 325383
Swap: 0 0 0

こんなのやった記憶ねーぞ
docker pull

docker pullでDocker Indexからimageを持ってくる
Containerができる。docker runで実行する。
docker commitでImageを作る。
docker pushでDocker indexにimageが入る。
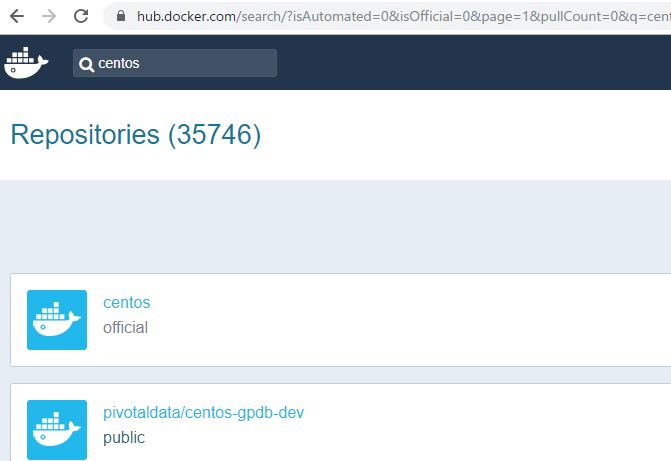
あ、docker indexはdocker hub

docker hub

コマンドラインからもsearchできる。
vagrant@vagrant-ubuntu-trusty-64:~$ sudo docker search centos | more

Imageが取得できたかどうかは、sudo docker imagesで確認できる。
vagrant@vagrant-ubuntu-trusty-64:~$ sudo docker images
REPOSITORY TAG IMAGE ID CREATED SIZE
hello-world latest 4ab4c602aa5e 2 days ago 1.84kB
centos latest 5182e96772bf 4 weeks ago 200MB

sudo docker inspectで詳細を見ることができる。
vagrant@vagrant-ubuntu-trusty-64:~$ sudo docker inspect centos:latest
[
{
“Id”: “sha256:5182e96772bf11f4b912658e265dfe0db8bd314475443b6434ea708784192892”,
“RepoTags”: [
“centos:latest”
],
“RepoDigests”: [
“centos@sha256:6f6d986d425aeabdc3a02cb61c02abb2e78e57357e92417d6d58332856024faf”
],
“Parent”: “”,
“Comment”: “”,
“Created”: “2018-08-06T19:21:48.235227329Z”,
“Container”: “d60ffc9ddd12462af4bdcdbe45b74f3b3f99b46607ada80c3ed877b7def84250”,
“ContainerConfig”: {
“Hostname”: “d60ffc9ddd12”,
“Domainname”: “”,
“User”: “”,
“AttachStdin”: false,
“AttachStdout”: false,
“AttachStderr”: false,
“Tty”: false,
“OpenStdin”: false,
“StdinOnce”: false,
“Env”: [
“PATH=/usr/local/sbin:/usr/local/bin:/usr/sbin:/usr/bin:/sbin:/bin”
],
“Cmd”: [
“/bin/sh”,
“-c”,
“#(nop) “,
“CMD [\”/bin/bash\”]”
],
“ArgsEscaped”: true,
“Image”: “sha256:748eacc0f236df2fc9ba87c4d76a66cb10742120387e99e2acdb9454915c841d”,
“Volumes”: null,
“WorkingDir”: “”,
“Entrypoint”: null,
“OnBuild”: null,
“Labels”: {
“org.label-schema.build-date”: “20180804”,
“org.label-schema.license”: “GPLv2”,
“org.label-schema.name”: “CentOS Base Image”,
“org.label-schema.schema-version”: “1.0”,
“org.label-schema.vendor”: “CentOS”
}
},
“DockerVersion”: “17.06.2-ce”,
“Author”: “”,
“Config”: {
“Hostname”: “”,
“Domainname”: “”,
“User”: “”,
“AttachStdin”: false,
“AttachStdout”: false,
“AttachStderr”: false,
“Tty”: false,
“OpenStdin”: false,
“StdinOnce”: false,
“Env”: [
“PATH=/usr/local/sbin:/usr/local/bin:/usr/sbin:/usr/bin:/sbin:/bin”
],
“Cmd”: [
“/bin/bash”
],
“ArgsEscaped”: true,
“Image”: “sha256:748eacc0f236df2fc9ba87c4d76a66cb10742120387e99e2acdb9454915c841d”,
“Volumes”: null,
“WorkingDir”: “”,
“Entrypoint”: null,
“OnBuild”: null,
“Labels”: {
“org.label-schema.build-date”: “20180804”,
“org.label-schema.license”: “GPLv2”,
“org.label-schema.name”: “CentOS Base Image”,
“org.label-schema.schema-version”: “1.0”,
“org.label-schema.vendor”: “CentOS”
}
},
“Architecture”: “amd64”,
“Os”: “linux”,
“Size”: 199716491,
“VirtualSize”: 199716491,
“GraphDriver”: {
“Data”: {
“DeviceId”: “7”,
“DeviceName”: “docker-8:1-263323-d5a0c73632bbe71e2ab66b6f6d04da6bca10076e1f9f787ba6adcf10844a9b67”,
“DeviceSize”: “10737418240”
},
“Name”: “devicemapper”
},
“RootFS”: {
“Type”: “layers”,
“Layers”: [
“sha256:1d31b5806ba40b5f67bde96f18a181668348934a44c9253b420d5f04cfb4e37a”
]
},
“Metadata”: {
“LastTagTime”: “0001-01-01T00:00:00Z”
}
}
]

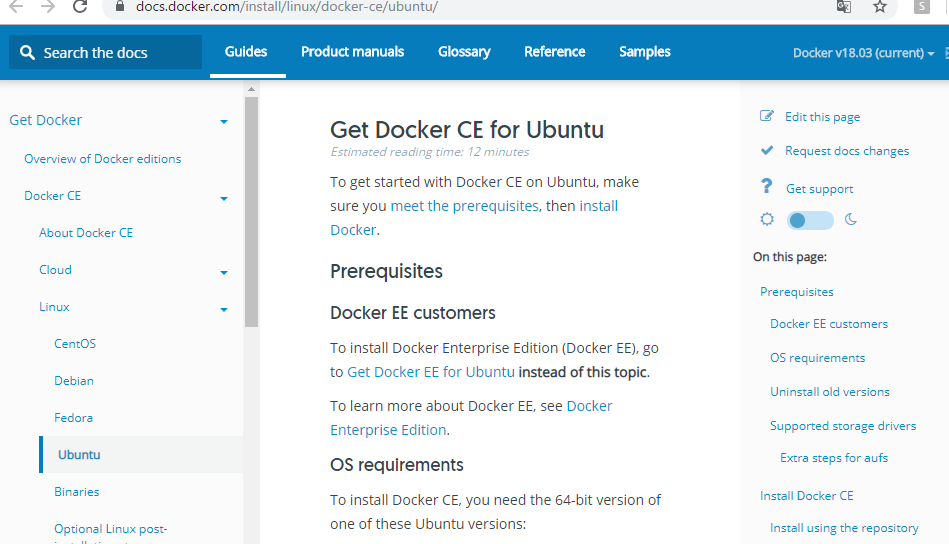
set up the repository for docker

公式を参考にします。
https://docs.docker.com/install/linux/docker-ce/ubuntu/#install-from-a-package

$ sudo apt-get update

$ sudo apt-get install \
apt-transport-https \
ca-certificates \
curl \
software-properties-common

vagrant@vagrant-ubuntu-trusty-64:~$ curl -fsSL https://download.docker.com/linux/ubuntu/gpg | sudo apt-key add –
OK

vagrant@vagrant-ubuntu-trusty-64:~$ sudo apt-key fingerprint 0EBFCD88
/etc/apt/trusted.gpg
——————–
pub 1024D/437D05B5 2004-09-12
Key fingerprint = 6302 39CC 130E 1A7F D81A 27B1 4097 6EAF 437D 05B5
uid Ubuntu Archive Automatic Signing Key
sub 2048g/79164387 2004-09-12

pub 1024D/FBB75451 2004-12-30
Key fingerprint = C598 6B4F 1257 FFA8 6632 CBA7 4618 1433 FBB7 5451
uid Ubuntu CD Image Automatic Signing Key

pub 4096R/C0B21F32 2012-05-11
Key fingerprint = 790B C727 7767 219C 42C8 6F93 3B4F E6AC C0B2 1F32
uid Ubuntu Archive Automatic Signing Key (2012)

pub 4096R/EFE21092 2012-05-11
Key fingerprint = 8439 38DF 228D 22F7 B374 2BC0 D94A A3F0 EFE2 1092
uid Ubuntu CD Image Automatic Signing Key (2012)

pub 4096R/0EBFCD88 2017-02-22
Key fingerprint = 9DC8 5822 9FC7 DD38 854A E2D8 8D81 803C 0EBF CD88
uid Docker Release (CE deb)
sub 4096R/F273FCD8 2017-02-22

sudo add-apt-repository \
“deb [arch=amd64] https://download.docker.com/linux/ubuntu \
$(lsb_release -cs) \
stable”

さあ、遂にdockerを入れていきます。
$ sudo apt-get install docker-ce

vagrant@vagrant-ubuntu-trusty-64:~$ sudo docker run hello-world

Hello from Docker!
This message shows that your installation appears to be working correctly.

To generate this message, Docker took the following steps:
1. The Docker client contacted the Docker daemon.
2. The Docker daemon pulled the “hello-world” image from the Docker Hub.
(amd64)
3. The Docker daemon created a new container from that image which runs the
executable that produces the output you are currently reading.
4. The Docker daemon streamed that output to the Docker client, which sent it
to your terminal.

To try something more ambitious, you can run an Ubuntu container with:
$ docker run -it ubuntu bash

Share images, automate workflows, and more with a free Docker ID:
https://hub.docker.com/

For more examples and ideas, visit:
https://docs.docker.com/get-started/

vagrant@vagrant-ubuntu-trusty-64:~$ docker –version
Docker version 18.06.1-ce, build e68fc7a

OKKKKKKKKKKKKKKKKKKKKKKKKKKKK!

ubuntuを入れていこう

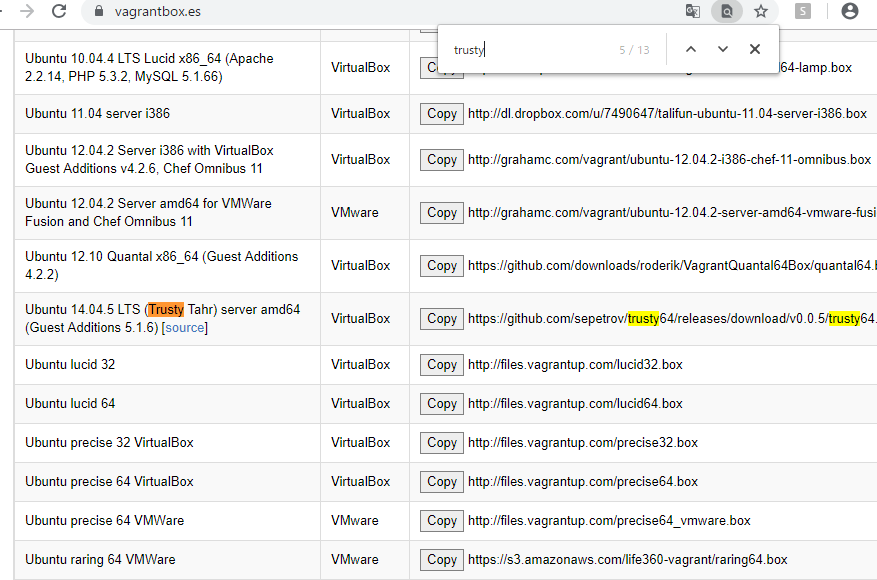
まずvagrant box
https://www.vagrantbox.es/

まず、trustyをひっぱってくる
vagrant box add trusty64 https://github.com/sepetrov/trusty64/releases/download/v0.0.5/trusty64.box

cd trusty

vagrant init trusty64

vagrant file line54
config.vm.network “private_network”, ip: “192.168.55.44”

login as: vagrant
vagrant@192.168.55.44’s password:
Welcome to Ubuntu 14.04.5 LTS (GNU/Linux 3.13.0-100-generic x86_64)

* Documentation: https://help.ubuntu.com/

System information as of Mon Sep 10 00:10:54 UTC 2018

System load: 0.57 Processes: 75
Usage of /: 3.5% of 39.34GB Users logged in: 0
Memory usage: 26% IP address for eth0: 10.0.2.15
Swap usage: 0% IP address for eth1: 192.168.55.44

Graph this data and manage this system at:
https://landscape.canonical.com/

Get cloud support with Ubuntu Advantage Cloud Guest:
http://www.ubuntu.com/business/services/cloud

New release ‘16.04.5 LTS’ available.
Run ‘do-release-upgrade’ to upgrade to it.

OK!

apt-get updateする。
vagrant@vagrant-ubuntu-trusty-64:~$ sudo apt-get update
Ign http://archive.ubuntu.com trusty InRelease
Get:1 http://security.ubuntu.com trusty-security InRelease [65.9 kB]
Get:2 http://archive.ubuntu.com trusty-updates InRelease [65.9 kB]
Get:3 http://security.ubuntu.com trusty-security/main Sources [162 kB]
Get:4 http://archive.ubuntu.com trusty-backports InRelease [65.9 kB]
Get:5 http://security.ubuntu.com trusty-security/universe Sources [80.4 kB]
Hit http://archive.ubuntu.com trusty Release.gpg
Get:6 http://security.ubuntu.com trusty-security/main amd64 Packages [765 kB]
Get:7 http://archive.ubuntu.com trusty-updates/main Sources [422 kB]
Get:8 http://security.ubuntu.com trusty-security/universe amd64 Packages [246 kB]
Get:9 http://archive.ubuntu.com trusty-updates/restricted Sources [6,322 B]
Get:10 http://archive.ubuntu.com trusty-updates/universe Sources [208 kB]
Get:11 http://archive.ubuntu.com trusty-updates/multiverse Sources [7,441 B]
Get:12 http://security.ubuntu.com trusty-security/main Translation-en [413 kB]
Get:13 http://archive.ubuntu.com trusty-updates/main amd64 Packages [1,101 kB]
Get:14 http://security.ubuntu.com trusty-security/universe Translation-en [134 kB]
Get:15 http://archive.ubuntu.com trusty-updates/restricted amd64 Packages [17.2 kB]
Get:16 http://archive.ubuntu.com trusty-updates/universe amd64 Packages [474 kB]
Get:17 http://archive.ubuntu.com trusty-updates/multiverse amd64 Packages [14.6 kB]
Get:18 http://archive.ubuntu.com trusty-updates/main Translation-en [547 kB]
Get:19 http://archive.ubuntu.com trusty-updates/multiverse Translation-en [7,616 B]
Get:20 http://archive.ubuntu.com trusty-updates/restricted Translation-en [4,021 B]
Get:21 http://archive.ubuntu.com trusty-updates/universe Translation-en [253 kB]
Get:22 http://archive.ubuntu.com trusty-backports/main Sources [9,709 B]
Get:23 http://archive.ubuntu.com trusty-backports/restricted Sources [28 B]
Get:24 http://archive.ubuntu.com trusty-backports/universe Sources [35.4 kB]
Get:25 http://archive.ubuntu.com trusty-backports/multiverse Sources [1,896 B]
Get:26 http://archive.ubuntu.com trusty-backports/main amd64 Packages [13.3 kB]
Get:27 http://archive.ubuntu.com trusty-backports/restricted amd64 Packages [28 B]
Get:28 http://archive.ubuntu.com trusty-backports/universe amd64 Packages [43.1 kB]
Get:29 http://archive.ubuntu.com trusty-backports/multiverse amd64 Packages [1,567 B]
Get:30 http://archive.ubuntu.com trusty-backports/main Translation-en [7,503 B]
Get:31 http://archive.ubuntu.com trusty-backports/multiverse Translation-en [1,215 B]
Get:32 http://archive.ubuntu.com trusty-backports/restricted Translation-en [28 B]
Get:33 http://archive.ubuntu.com trusty-backports/universe Translation-en [36.8 kB]
Hit http://archive.ubuntu.com trusty Release
Get:34 http://archive.ubuntu.com trusty/main Sources [1,064 kB]
Get:35 http://archive.ubuntu.com trusty/restricted Sources [5,433 B]
Get:36 http://archive.ubuntu.com trusty/universe Sources [6,399 kB]
Get:37 http://archive.ubuntu.com trusty/multiverse Sources [174 kB]
Hit http://archive.ubuntu.com trusty/main amd64 Packages
Hit http://archive.ubuntu.com trusty/restricted amd64 Packages
Hit http://archive.ubuntu.com trusty/universe amd64 Packages
Hit http://archive.ubuntu.com trusty/multiverse amd64 Packages
Hit http://archive.ubuntu.com trusty/main Translation-en
Hit http://archive.ubuntu.com trusty/multiverse Translation-en
Hit http://archive.ubuntu.com trusty/restricted Translation-en
Hit http://archive.ubuntu.com trusty/universe Translation-en
Ign http://archive.ubuntu.com trusty/main Translation-en_US
Ign http://archive.ubuntu.com trusty/multiverse Translation-en_US
Ign http://archive.ubuntu.com trusty/restricted Translation-en_US
Ign http://archive.ubuntu.com trusty/universe Translation-en_US
Fetched 12.9 MB in 50s (255 kB/s)
Reading package lists… Done

なんだ、Docker CEって。。

あ、CE…無償のコミュニティエディション
なるほど

久しぶりにperlを触ってみる

[vagrant@localhost perl]$ vi hello_world.pl
[vagrant@localhost perl]$ ls
hello.pl  hello_world.pl  test.dat
[vagrant@localhost perl]$ chmod 755 hello_world.pl
[vagrant@localhost perl]$ ls
hello.pl  hello_world.pl  test.dat
[vagrant@localhost perl]$ ./hello_world.pl
hello, world!
[vagrant@localhost perl]$ perl -e 'print "hello_world\n";'
hello_world

さーどうしようか。。とりあえず思い出すまで基礎かな。

tomcatにデプロイ

[vagrant@localhost apache-tomcat-8.5.33]$ sudo chmod 777 webapps

デプロイとは、WebアプリケーションをWebコンテナにインストール
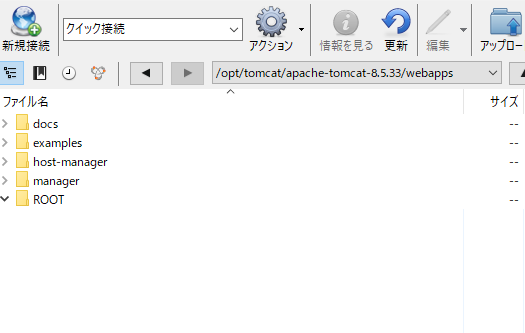
tomcatがインストールされているwebappsフォルダにwarファイルをコピーすると、アプリケーションが動作可能になる。

こりゃ素人には無理だな。ちゃんと勉強しないと、立ち行きできんわ。

centosにtomcatを入れる

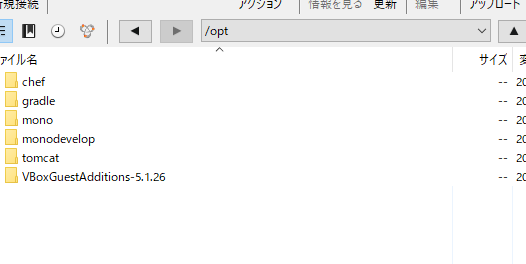
/optにtomcatのディレクトリを作成します。

[vagrant@localhost opt]$ ls
VBoxGuestAdditions-5.1.26 chef gradle mono monodevelop
[vagrant@localhost opt]$ sudo mkdir tomcat
[vagrant@localhost opt]$ ls
VBoxGuestAdditions-5.1.26 chef gradle mono monodevelop tomcat

どうやら、v8.5.33が新しいそうなので、8.5.33をwgetします。
[vagrant@localhost tomcat]$ sudo wget http://ftp.meisei-u.ac.jp/mirror/apache/dist/tomcat/tomcat-8/v8.5.33/bin/apache-tomcat-8.5.33.tar.gz
–2018-09-09 21:37:54– http://ftp.meisei-u.ac.jp/mirror/apache/dist/tomcat/tomcat-8/v8.5.33/bin/apache-tomcat-8.5.33.tar.gz
ftp.meisei-u.ac.jp をDNSに問いあわせています… 160.194.204.25
ftp.meisei-u.ac.jp|160.194.204.25|:80 に接続しています… 接続しました。
HTTP による接続要求を送信しました、応答を待っています… 200 OK
長さ: 9621331 (9.2M) [application/x-gzip]
`apache-tomcat-8.5.33.tar.gz’ に保存中

100%[======================================>] 9,621,331 175K/s 時間 37s

2018-09-09 21:38:31 (256 KB/s) – `apache-tomcat-8.5.33.tar.gz’ へ保存完了 [9621331/9621331]

[vagrant@localhost tomcat]$ ls
apache-tomcat-8.5.33.tar.gz

アーカイブファイルを展開する
[vagrant@localhost tomcat]$ sudo tar xvf apache-tomcat-8.5.33.tar.gz
[vagrant@localhost tomcat]$ ls
apache-tomcat-8.5.33 apache-tomcat-8.5.33.tar.gz

[vagrant@localhost ~]$ cd /etc/profile.d
[vagrant@localhost profile.d]$ ls
colorls.csh cvs.sh gnat-project.csh lang.csh less.sh which2.sh
colorls.sh glib2.csh gnat-project.sh lang.sh vim.csh
cvs.csh glib2.sh gradle.sh less.csh vim.sh
[vagrant@localhost profile.d]$ sudo vi tomcat.sh

これでいいのか??

JRE_HOME=/usr/bin/java
CATALINA_HOME=/opt/tomcat/apache-tomcat-8.5.33
export JRE_HOME CATALINA_HOME

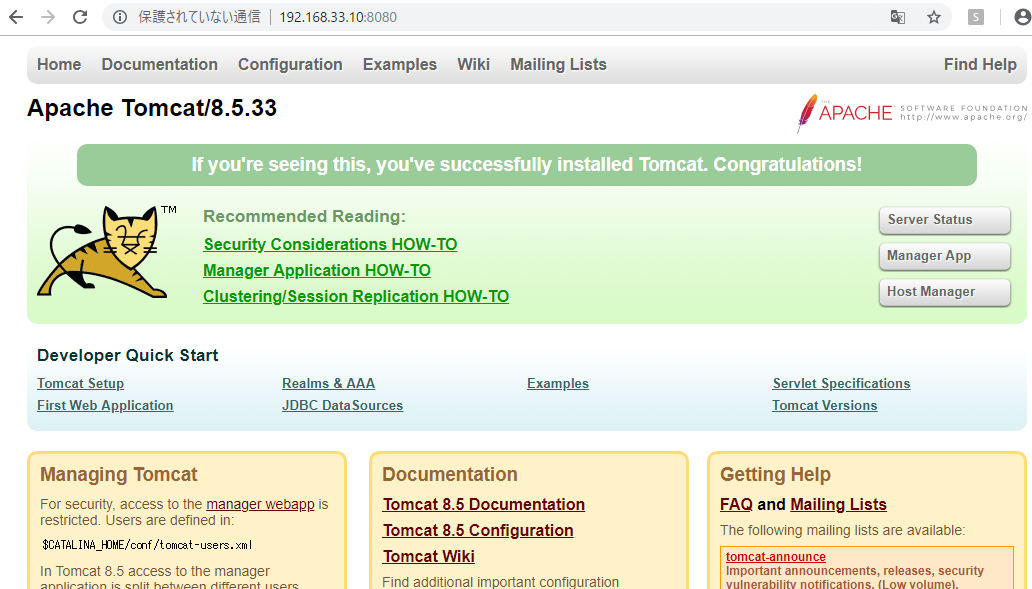
うお、tomcat started.ってなってる!?
[vagrant@localhost apache-tomcat-8.5.33]$ sudo /opt/tomcat/apache-tomcat-8.5.33/bin/startup.sh
Using CATALINA_BASE: /opt/tomcat/apache-tomcat-8.5.33
Using CATALINA_HOME: /opt/tomcat/apache-tomcat-8.5.33
Using CATALINA_TMPDIR: /opt/tomcat/apache-tomcat-8.5.33/temp
Using JRE_HOME: /usr
Using CLASSPATH: /opt/tomcat/apache-tomcat-8.5.33/bin/bootstrap.jar:/opt/tomcat/apache-tomcat-8.5.33/bin/tomcat-juli.jar
Tomcat started.

iptableのポート設定
[vagrant@localhost profile.d]$ iptables -A INPUT -m state –state NEW -m tcp -p tcp –dport 8080 -j ACCEPT

うおおおおおおおおおおおおおおおおおおおおおおおおおおおおおおおおおおおおおおおおお

怖くなったので、撤退
[vagrant@localhost profile.d]$ sudo /opt/tomcat/apache-tomcat-8.5.33/bin/shutdown.sh
Using CATALINA_BASE: /opt/tomcat/apache-tomcat-8.5.33
Using CATALINA_HOME: /opt/tomcat/apache-tomcat-8.5.33
Using CATALINA_TMPDIR: /opt/tomcat/apache-tomcat-8.5.33/temp
Using JRE_HOME: /usr
Using CLASSPATH: /opt/tomcat/apache-tomcat-8.5.33/bin/bootstrap.jar:/opt/tomcat/apache-tomcat-8.5.33/bin/tomcat-juli.jar

Java Servletとは

Java Servletは、業務用のWEBシステムを開発するときに幅広く利用されている

>Java Servlet(ジャバ サーブレット)とは、サーバ上でウェブページなどを動的に生成したりデータ処理を行うために、Javaで作成されたプログラム及びその仕様である。単にサーブレットと呼ばれることが多い。

サーブレット自体は、WEBページをはじめとし画面に関する処理はいっさい行わず、WEBブラウザからの要求に応えたり、送られてきたデータを処理したりする役割をする。

サーブレット単独では、WEBアプリ作成するための機能が不十分なので、後述する「JSP」や「Tomcat」と呼ばれる他のプログラムと連携してアプリを作る必要がある。

ライフサイクルとは、処理が始まってから終了するまでの一連の流れ
サーブレットは、このライフサイクルを管理する機能をもっていて、効率よく仕事をするようにできている。

通常は、一連の処理が完了したらそれまでに使ったデータを破棄してしまいます。
しかし、サーブレットは一連の処理が終わっても、データを保持して再利用できるようにする。最初の1回目は処理に時間がかかりますが、2回目はデータを再利用するので処理が早くなる。

マルチスレッドに対応
プラットフォームに依存しない

「JSP (JSP)」 は、HTML内にJavaのコードを埋め込み、動的にWEBページを生成する技術のことです。サーブレットはWEBアプリ内部の処理を担当していますが、JSPは主にWEBページを担当しています。サーブレットとJSPが連携することで、動的にWEBページを作ることが可能になります。

Tomcat
Tomcatは、サーブレットを動かすソフトの1つ
Tomcatはサーブレットを動かすエンジンの役割をしていて、必要に応じて命令を出してサーブレットを動かす