Vue.jsを触ってみよう

CDNで読み込みます。

<script src="https://cdn.jsdelivr.net/npm/vue@2.5.17/dist/vue.js"></script>
<div id="demo">
	<p>{{message}}</p>
	<input v-model="message">
</div>

<script>
	var demo = new Vue({
		el: "#demo",
		data: {
			message: "hello Vue.js!"
		}
	})
</script>

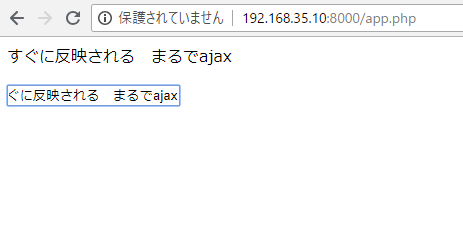
Ajaxのような動きをする。
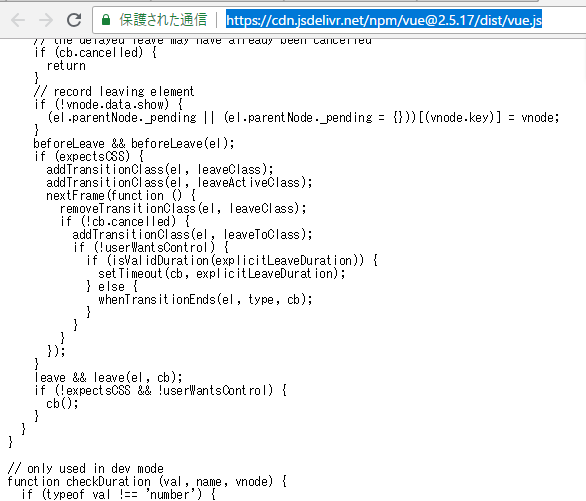
CDNのvue.jsの中を見てみる。
https://cdn.jsdelivr.net/npm/vue@2.5.17/dist/vue.js

XMLHttpRequestがないのでAjaxではないのか。。これだけではちょっとわかりません。

v-modelは双方向データバインディング
v-ifはifでレンダリング
v-onはv-on:click=”doSomething”など、イベントリスナ
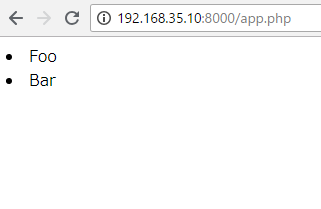
v-forはfor文

<script src="https://cdn.jsdelivr.net/npm/vue@2.5.17/dist/vue.js"></script>
<div id="demo">
	<li v-for="item in items">
		{{item.message}}
	</li>
</div>

<script>
	var demo = new Vue({
		el: "#demo",
		data: {
			items: [
				{message: 'Foo'},
				{message: 'Bar'}
			]
		}
	})
</script>

なるほど。書きやすそうな印象はありますね。

pythonでopenweathermapのAPIを叩こう

まず、jsonのapi request
http://api.openweathermap.org/data/2.5/weather?q=Tokyo,JP&APPID={apikey}

レスポンス

{"coord":{"lon":139.76,"lat":35.68},"weather":[{"id":701,"main":"Mist","description":"mist","icon":"50n"}],"base":"stations","main":{"temp":301.81,"pressure":1009,"humidity":66,"temp_min":301.15,"temp_max":302.15},"visibility":16093,"wind":{"speed":1.5,"deg":120},"clouds":{"all":1},"dt":1533250560,"sys":{"type":1,"id":7622,"message":0.0074,"country":"JP","sunrise":1533153003,"sunset":1533203030},"id":1850147,"name":"Tokyo","cod":200}

pythonで書きます。

import requests
import json

apikey = "hoge"

cities = ["Tokyo,JP", "London,UK", "New York, US"]
api = "http://api.openweathermap.org/data/2.5/weather?q={city}&APPID={key}"

k2c = lambda k: k - 273.15

for name in cities:
	url = api.format(city=name, key=apikey)
	r = requests.get(url)
	data = json.loads(r.text)
	print("+ 都市=", data["name"])
	print("| 天気=", data["weather"][0]["description"])
	print("| 最低気温=", k2c(data["main"]["temp_min"]))
	print("| 最高気温=", k2c(data["main"]["temp_max"]))
	print("| 湿度=", data["main"]["humidity"])
	print("| 気圧=", data["main"]["pressure"])
	print("| 風向き=", data["wind"]["deg"])
	print("| 風速度=", data["wind"]["speed"])
	print("")

コマンドライン
[vagrant@localhost python]$ python3 app.py
+ 都市= Tokyo
| 天気= mist
| 最低気温= 28.0
| 最高気温= 29.0
| 湿度= 66
| 気圧= 1009
| 風向き= 120
| 風速度= 1.5

+ 都市= London
| 天気= clear sky
| 最低気温= 20.0
| 最高気温= 24.0
| 湿度= 64
| 気圧= 1023
| 風向き= 230
| 風速度= 2.6

+ 都市= New York
| 天気= light rain
| 最低気温= 27.0
| 最高気温= 29.0
| 湿度= 69
| 気圧= 1019
Traceback (most recent call last):
File “app.py”, line 21, in
print(“| 風向き=”, data[“wind”][“deg”])
KeyError: ‘deg’

New Yorkの風向きがエラーになりますね。
new yorkのjsonを叩きます。
http://api.openweathermap.org/data/2.5/weather?q=New%20York,US&APPID={key}

{“coord”:{“lon”:-73.99,”lat”:40.73},”weather”:[{“id”:500,”main”:”Rain”,”description”:”light rain”,”icon”:”10d”}],”base”:”stations”,”main”:{“temp”:300.55,”pressure”:1019,”humidity”:69,”temp_min”:300.15,”temp_max”:302.15},”visibility”:16093,”wind”:{“speed”:2.6},”clouds”:{“all”:75},”dt”:1533250560,”sys”:{“type”:1,”id”:2121,”message”:0.0072,”country”:”US”,”sunrise”:1533203668,”sunset”:1533254951},”id”:5128581,”name”:”New York”,”cod”:200}

NewYorkのwindはspeedだけのようです。何故だ?wall streetは風向きなんて関係ないのかな。
execute_script()メソッド

from selenium import webdriver

browser = webdriver.PhantomJS()
browser.implicitly_wait(3)

browser.get("https://google.com")

r = browser.execute_script("return 100 + 50")
print(r)

[vagrant@localhost python]$ python3 app.py
/home/vagrant/.pyenv/versions/3.5.2/lib/python3.5/site-packages/selenium/webdriver/phantomjs/webdriver.py:49: UserWarning: Selenium support for PhantomJS has been deprecated, please use headless versions of Chrome or Firefox instead
warnings.warn(‘Selenium support for PhantomJS has been deprecated, please use headless ‘
150

r = browser.execute_script("var date = new Date(), console.log(date)")

windows10でIIS

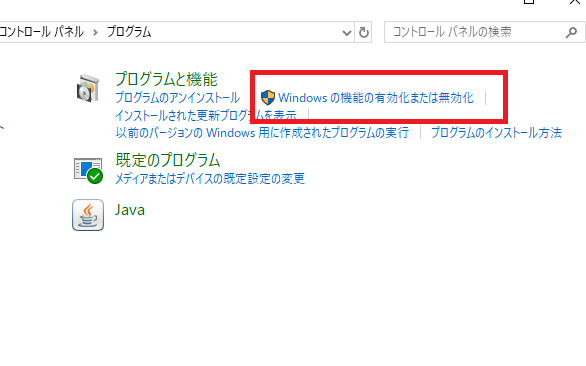
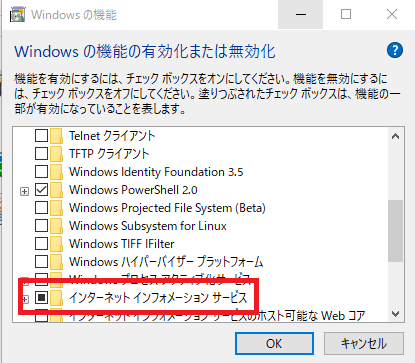
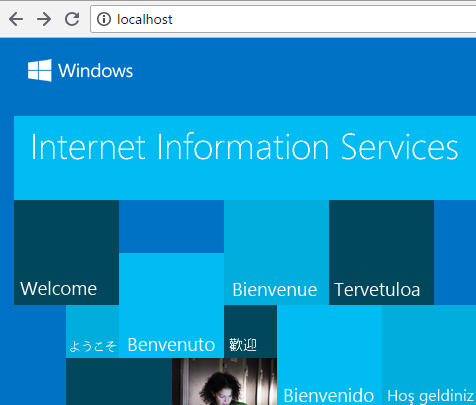
コントロールパネル → プログラム → Windowsの機能の有効化または無効化 → インターネットインフォメーションサービス で有効にする。

phantomjs

cd /usr/local/src/
wget https://bitbucket.org/ariya/phantomjs/downloads/phantomjs-2.1.1-linux-x86_64.tar.bz2
tar jxf phantomjs-2.1.1-linux-x86_64.tar.bz2
cp phantomjs-2.1.1-linux-x86_64/bin/phantomjs /usr/bin/

[vagrant@localhost src]$ phantomjs –version
2.1.1

from selenium import webdriver
url = "http://www.aozora.gr.jp/cards/000081/files/46268_23911.html"

browser = webdriver.PhantomJS()
browser.implicitly_wait(3)
browser.get(url)
browser.save_screenshot("Website.png")
browser.quite()

[vagrant@localhost python]$ python3 app.py
/home/vagrant/.pyenv/versions/3.5.2/lib/python3.5/site-packages/selenium/webdriver/phantomjs/webdriver.py:49: UserWarning: Selenium support for PhantomJS has been deprecated, please use headless versions of Chrome or Firefox instead
warnings.warn(‘Selenium support for PhantomJS has been deprecated, please use headless ‘
Traceback (most recent call last):
File “app.py”, line 8, in
browser.quite()
AttributeError: ‘WebDriver’ object has no attribute ‘quite’

from selenium import webdriver
url = "http://www.aozora.gr.jp/cards/000081/files/46268_23911.html"

browser = webdriver.PhantomJS()
browser.implicitly_wait(3)
browser.get(url)
browser.save_screenshot("Website.png")
browser.quit()

[vagrant@localhost python]$ python3 app.py
/home/vagrant/.pyenv/versions/3.5.2/lib/python3.5/site-packages/selenium/webdriver/phantomjs/webdriver.py:49: UserWarning: Selenium support for PhantomJS has been deprecated, please use headless versions of Chrome or Firefox instead
warnings.warn(‘Selenium support for PhantomJS has been deprecated, please use headless ‘

[vagrant@localhost src]$ cat /etc/fonts/conf.d/51-local.conf


local.conf

[vagrant@localhost src]$ cat /etc/fonts/fonts.conf


/usr/share/fonts
/usr/share/X11/fonts/Type1 /usr/share/X11/fonts/TTF /usr/local/share/fonts
~/.fonts


mono


monospace


sans serif


sans-serif


sans


sans-serif


conf.d

/var/cache/fontconfig
~/.fontconfig


0x0020
0x00A0
0x00AD
0x034F
0x0600
0x0601
0x0602
0x0603
0x06DD
0x070F
0x115F
0x1160
0x1680
0x17B4
0x17B5
0x180E
0x2000
0x2001
0x2002
0x2003
0x2004
0x2005
0x2006
0x2007
0x2008
0x2009
0x200A
0x200B
0x200C
0x200D
0x200E
0x200F
0x2028
0x2029
0x202A
0x202B
0x202C
0x202D
0x202E
0x202F
0x205F
0x2060
0x2061
0x2062
0x2063
0x206A
0x206B
0x206C
0x206D
0x206E
0x206F
0x2800
0x3000
0x3164
0xFEFF
0xFFA0
0xFFF9
0xFFFA
0xFFFB


30

mono, sans, san-serifがあるのはわかったが、migmixを入れろってか。

seleniumをインストール

[vagrant@localhost python]$ pip3 install selenium
Collecting selenium
Downloading https://files.pythonhosted.org/packages/41/c6/78a9a0d0150dbf43095c6f422fdf6f948e18453c5ebbf92384175b372ca2/selenium-3.13.0-py2.py3-none-any.whl (946kB)
100% |████████████████████████████████| 952kB 552kB/s
Installing collected packages: selenium
Successfully installed selenium-3.13.0

R社にpythonからログイン

まさか、できるわけないよね。

import requests
from bs4 import BeautifulSoup
from urllib.parse import urljoin

USER = "hoge"
PASS = "hogehoge"

session = requests.session()

login_info = {
	"u" : USER,
	"p": PASS,
}
url_login = "https://grp01.id.rakuten.co.jp/rms/nid/vc?__event=login&service_id=top"
res = session.post(url_login, data=login_info)
res.raise_for_status()
print("success")

おい、ちょっと待て、ちょっと待て。マジこれ?これ、やばくないか。。。
[vagrant@localhost python]$ python3 app.py
success

bs4でログイン後の情報をスクレイピングする

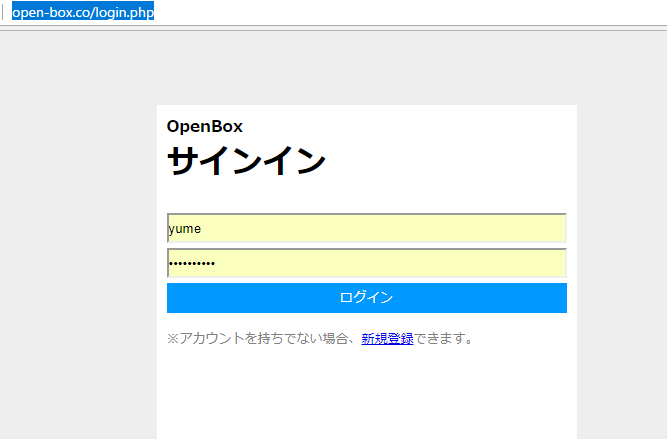
まず、login.phpで、sessionのusernameとpasswordがokなら、メールトップ画面にリダイレクトする処理を書いています。

<?php elseif($status == "ok"): header('Location: mail.php?path=u0'); ?> 

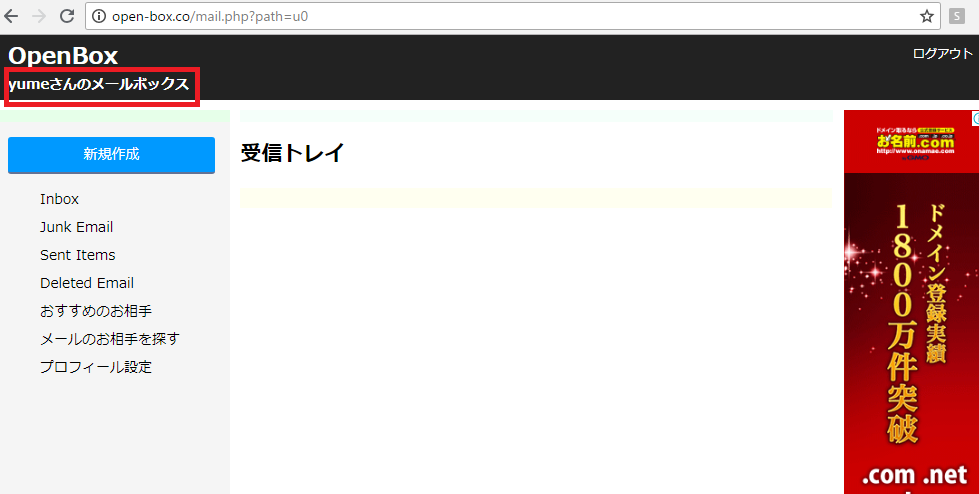
こちらがログイン後の画面。outlookのUIを参考にしています。

「yumeさんのメールボックス」がh2です。

続いて、python。 sessionのusernameをyumeでpostして、beautifulsoupでh2をselect_oneします。

import requests
from bs4 import BeautifulSoup
from urllib.parse import urljoin

USER = "yume"
PASS = "hogehoge"

session = requests.session()

login_info = {
	"username" : USER,
	"password": PASS,
}
url_login = "http://open-box.co/login.php"
res = session.post(url_login, data=login_info)
res.raise_for_status()
print("success")

soup = BeautifulSoup(res.text, "html.parser")
a = soup.select_one("h2").string
if a is None:
	print("取得できませんでした")
	quit()
print(a)

[vagrant@localhost python]$ python3 app.py
success
yumeさんのメールボックス

おいおいおい。まてまてまて、頭が追い付かない。
すげー、python!

え、それなら、もしかして、twitterもいける?

import requests
from bs4 import BeautifulSoup
from urllib.parse import urljoin

USER = "hoge"
PASS = "hogehoge"

session = requests.session()

login_info = {
	"signin-email" : USER,
	"signin-password": PASS,
}
url_login = "https://twitter.com/login"
res = session.post(url_login, data=login_info)
res.raise_for_status()
print("success")

[vagrant@localhost python]$ python3 app.py
Traceback (most recent call last):
File “app.py”, line 16, in
res.raise_for_status()
File “/home/vagrant/.pyenv/versions/3.5.2/lib/python3.5/site-packages/requests/models.py”, line 939, in raise_for_status
raise HTTPError(http_error_msg, response=self)
requests.exceptions.HTTPError: 403 Client Error: Forbidden for url: https://twitter.com/login

Forbiddenだ。さすがにあかんか。
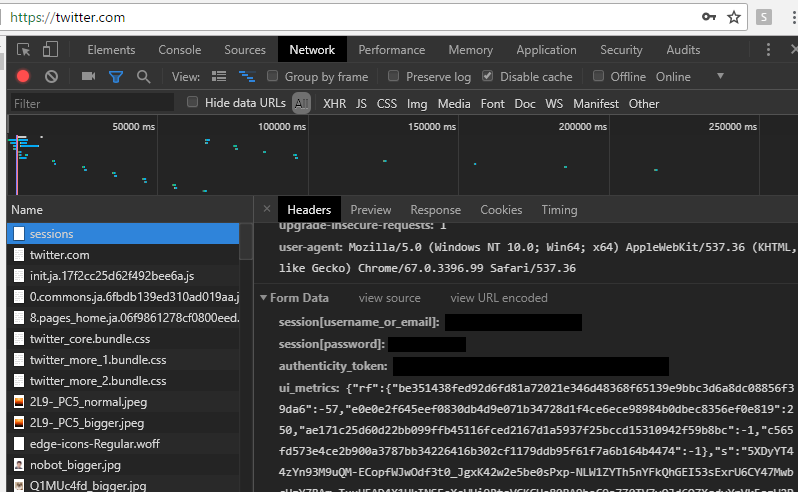
twitterに限らず、requests.session()では、ログインできないようにできるらしいですね。
なるほどね。

pythonからusernameとpasswordのsessionをpostしてログインする

よく、不正ログインの防ぐために、画像認証などありますが、どうやってプログラムからログインしてるのか、やっとわかりました。
まず、以前自作したメールボックス
http://open-box.co/login.php

phpで、username, passwordをmysqlと照合してcheckしています。

public function login($username, $password){
		$stmt = $this->mysqli->prepare(
			"SELECT password FROM users WHERE username = ?");
		$stmt->bind_param('s', $_POST["username"]);
		$stmt->execute();

		$stmt->store_result();
		if($stmt->num_rows == 1){
			$stmt->bind_result($hash);
			while ($stmt->fetch()){
				if(password_verify($_POST['password'], $hash)){
					$_SESSION["username"] = $_POST["username"];
					return true;
				}
			}
		}
		return false;
	}

pythonでusernameとpasswordのsessionをpostします。

import requests
from bs4 import BeautifulSoup
from urllib.parse import urljoin

USER = "hoge"
PASS = "hogehoge"

session = requests.session()

login_info = {
	"username" : USER,
	"password": PASS,
}
url_login = "http://open-box.co/login.php"
res = session.post(url_login, data=login_info)
res.raise_for_status()
print("success")

エラーだと、res.raise_for_status()でエラーが表示される筈ですが、、、
来た!!!!!
[vagrant@localhost python]$ python3 app.py
success

bs4も使いたい。