new THREE.Scene();

%e7%84%a1%e9%a1%8c

%e7%84%a1%e9%a1%8c

%e7%84%a1%e9%a1%8c

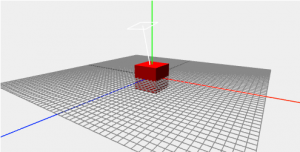
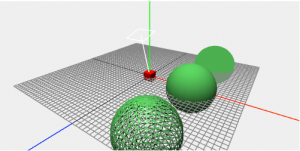
three.jsで作成しまています。なにかunityと似てると思ったら、WebGLという技術ですね。

https://threejs.org/

reference
WebGL (Web Graphics Library) is a JavaScript API for rendering interactive 3D computer graphics and 2D graphics within any compatible web browser without the use of plug-ins.

<!DOCTYPE html>
<html lang="ja">
<head>
	<meta charset="UTF-8">
	<title>threejs</title>
</head>
<body>
	<div id="stage"></div>
  <script src="js/three.min.js"></script>
  <script src="js/OrbitControls.js"></script>
  <script>
  (function(){
    'use strict'

    var scene;
    var person;
    var head;
    var body;
    var box;
    var sphere1;
    var sphere2;
    var sphere3;
    var plane;
    var light;
    var ambient;
    var camera;
    var gridHelper;
    var axisHelper;
    var lightHelper;
    var renderer;
    var width = 500;
    var height = 250;
    var controls;
    var theta = 0;
    var shadowHelper;
  // scene stage
    scene = new THREE.Scene();

  // mesh -geometry, material
    box = new THREE.Mesh(
      new THREE.BoxGeometry(20, 20, 20),
      new THREE.MeshLambertMaterial({
        color: new THREE.Color(0xff0000)})
    );
    box.position.set(0, 0, 0);
    scene.add(box);

    plane = new THREE.Mesh(
      new THREE.PlaneGeometry(200, 200),
      new THREE.MeshLambertMaterial({
        color: new THREE.Color(0x0096d6), side: THREE.DoubleSide})
    );
    plane.position.set(0, -50, 0);
    plane.rotation.x = 90 * Math.PI/180;
    scene.add(plane);


    // light
    light = new THREE.DirectionalLight(0xffffff, 1);
    light.position.set(0, 100, 30);
    scene.add(light);
    // ambient
    ambient = new THREE.AmbientLight(0x404040);
    scene.add(ambient);

  // camera
    camera = new THREE.PerspectiveCamera(45, width / height, 1, 1000);
    camera.position.set(200, 100, 300);
    camera.lookAt(scene.position);

    // helper
    gridHelper = new THREE.GridHelper(200, 50);
    scene.add(gridHelper);
    axisHelper = new THREE.AxisHelper(1000);
    scene.add(axisHelper);
    lightHelper = new THREE.DirectionalLightHelper(light, 20);
    scene.add(lightHelper);

    // controls
    controls = new THREE.OrbitControls(camera);
    // controls.autoRotate = true;

  // render
  renderer = new THREE.WebGLRenderer({ antialias: true});
  renderer.setSize(width, height);
  renderer.setClearColor(0xefefef);
  renderer.setPixelRatio(window.devicePixelRatio);
  document.getElementById('stage').appendChild(renderer.domElement);

  // shadow
  renderer.shadowMap.enabled = true;
  light.castShadow = true;
  light.shadow.camera.left = -200;
  light.shadow.camera.right = 200;
  light.shadow.camera.top = 200;
  light.shadow.camera.bottom = -200;
  shadowHelper = new THREE.CameraHelper(light.shadow.camera);
  scene.add(shadowHelper);
  box.castShadow = true;
  plane.receiveShadow = true;

  function render(){
    requestAnimationFrame(render);

    controls.update();
    renderer.render(scene, camera);
  }
  render();

  })();
  </script>
</body>
</html>

playbookによるapache起動

---
- hosts: all
  sudo: yes
  tasks:
    - name: add a new user
      user: name=sakura

- hosts: web
  sudo: yes
  tasks:
    - name: install apache
      yum: name=httpd state=latest
    - name: start apache and enabled
      service: name=httpd state=started enabled=yes
[vagrant@host ~]$ vi playbook.yml
[vagrant@host ~]$ ansible-playbook playbook.yml
---
- hosts: all
  sudo: yes
  tasks:
    - name: add a new user
      user: name=sakura
    - name: install libselinux-python
      yum: name=libselinux-python state=latest

- hosts: web
  sudo: yes
  tasks:
    - name: install apache
      yum: name=httpd state=latest
    - name: start apache and enabled
      service: name=httpd state=started enabled=yes
    - name: change owner
      file: dest=/var/www/html owner=vagrant recurse=yes
    - name: copy index.html
      copy: src=./index.html dest=/var/www/html/index.html owner=vagrant

playbook.yml

---
- hosts: all
  sudo: yes
  tasks:
    - name: add a new user
      user: name=sakura
    - name: install libselinux-python
      yum: name=libselinux-python state=latest

- hosts: web
  sudo: yes
  tasks:
    - name: install apache
      yum: name=httpd state=latest
    - name: start apache and enabled
      service: name=httpd state=started enabled=yes
    - name: change owner
      file: dest=/var/www/html owner=vagrant recurse=yes
    - name: copy index.html
      copy: src=./index.html dest=/var/www/html/index.html owner=vagrant
    - name: install php packages
      yum: name={{item}} state=latest
      with_items:
       - php
       - php-devel
       - php-mbstring
       - php-mysql
      notify:
       - restart apache
    - name: copy hello.php
      copy: src=./hello.php dest=/var/www/html/hello.php owner=vagrant
  handlers:
    - name: restart apache
      service: name=httpd state=restarted

- hosts: db
  sudo: yes
  tasks:
    - name: install mysql
      yum: name=mysql-server state=latest
    - name: start mysql and enabled
      service: name=mysqld state=started enabled=yes
    - name: create a database
      mysql_db: name=db state=present
    - name: create a user for mydb
      mysql_user: name=dbuser password=dbpassword priv=mydb.*:All state=present

playbook.yml

hostでplaybookを作成します。

[vagrant@host ~]$ vi playbook.yml
---
 hosts: all
 sudo: yes
 tasks:
  - name: add a new user
    user: name=sakura

playbookを実行します。

[vagrant@host ~]$ ansible-playbook playbook.yml
[DEPRECATION WARNING]: Instead of sudo/sudo_user, use become/become_user and make sure
become_method is 'sudo' (default).
This feature will be removed in a future release.
Deprecation warnings can be disabled by setting deprecation_warnings=False in ansible.cfg.

PLAY [all] *********************************************************************

TASK [setup] *******************************************************************
ok: [192.168.43.52]
ok: [192.168.43.53]

TASK [add a new user] **********************************************************
changed: [192.168.43.53]
changed: [192.168.43.52]

PLAY RECAP *********************************************************************
192.168.43.52              : ok=2    changed=1    unreachable=0    failed=0
192.168.43.53              : ok=2    changed=1    unreachable=0    failed=0

ansible-playbook playbook.yml –syntax-check
ansible-playbook playbook.yml –check

getting started ansible


centOSを3つ立ち上げて、そのうちの一つにepel、ansibleをインストールします。

vagrant.file

  config.vm.define "host" do |node|
    node.vm.box = "bento/centos-6.7"
    node.vm.hostname = "host"
    node.vm.network :private_network, ip: "192.168.43.51"
  end

  config.vm.define "web" do |node|
  node.vm.box = "bento/centos-6.7"
    node.vm.hostname = "web"
    node.vm.network :private_network, ip: "192.168.43.52"
  end

  config.vm.define "db" do |node|
  node.vm.box = "bento/centos-6.7"
    node.vm.hostname = "db"
    node.vm.network :private_network, ip: "192.168.43.53"
  end
vagrant ssh host
[vagrant@host ~]$ wget http://dl.fedoraproject.org/pub/epel/6/x86_64/epel-release-6-8.noarch.rpm
[vagrant@host ~]$ sudo rpm -Uvh epel-release-6-8.noarch.rpm
[vagrant@host ~]$ sudo yum -y install ansible
[vagrant@host ~]$ ansible --version
ansible 2.2.0.0
  config file = /etc/ansible/ansible.cfg
  configured module search path = Default w/o overrides

vi .ssh/config

Host web
 HostName 192.168.43.52
Host db
 HostName 192.168.43.53

アクセス権を変更し、秘密鍵、公開鍵を作成して、web, dbにcopy。

vagrant@host ~]$ chmod 600 .ssh/config
[vagrant@host ~]$ ssh-keygen -t rsa
[vagrant@host ~]$ ssh-copy-id web
[vagrant@host ~]$ ssh-copy-id db

すると、web, dbにログインできるようになります。

[vagrant@host ~]$ ssh web
[vagrant@web ~]$ exit
logout
Connection to 192.168.43.52 closed.
[vagrant@host ~]$ ssh db
[vagrant@db ~]$

hostファイルの作成

[vagrant@host ~]$ vi hosts
[web]
192.168.43.52

[db]
192.168.43.53
[vagrant@host ~]$ vi ansible.cfg
[defaults]
hostfile = ./hosts

Chef template

chef-repo > site-cookbooks > hello > recipes > default.rb

template "index.html" do 
	path "/var/www/html/index.html"
	source "index.html.erb"
	mode 0644
end

chef-repo > site-cookbooks > hello > templates > default > index.html.erb

<!DOCTYPE html>
<html lang="en">
<head>
	<meta charset="UTF-8">
	<title>Document</title>
</head>
<body>
	hello
</body>
</html>

MinGW mysys-opensshとmsys-rsyncのインストール

mysys-opensshとmsys-rsyncをインストールし、windowsの環境変数に、C:\MinGW\bin;C:\MinGW\msys\1.0\binを追加。C:\MinGW\msys\1.0\etc\fstabにc: /cygdrive/cを追加して、再度\chef\chef-repo> knife solo cook 192.168.33.10 –ssh-user vagrantを実行。

resolving cookbooks for run list: ["hello"]
Synchronizing Cookbooks:
  - hello (0.1.0)
Installing Cookbook Gems:
Compiling Cookbooks...
Converging 1 resources
Recipe: hello::default
  * log[Hello world] action write


Running handlers:
Running handlers complete
Chef Client finished, 1/1 resources updated in 46 seconds

出来ました!長かった。。。

workstationからvimをインストール
chef-repo > site-cookbooks > hello > recipes > default.rb

package "vim-enhanced" do 
 action :install 
end
Running Chef: sudo chef-solo -c ~/chef-solo/solo.rb -j ~/chef-solo/dna.json
Starting Chef Client, version 12.16.42
resolving cookbooks for run list: ["hello"]
Synchronizing Cookbooks:
  - hello (0.1.0)
Installing Cookbook Gems:
Compiling Cookbooks...
Converging 1 resources
Recipe: hello::default
  * yum_package[vim-enhanced] action install
    - install version 7.4.629-5.el6 of package vim-enhanced

Running handlers:
Running handlers complete
Chef Client finished, 1/1 resources updated in 02 minutes 02 seconds

a

iptable: stop

service "iptables" do
	action :stop
end
[vagrant@localhost ~]$ sudo service iptables status
iptables: ファイアウォールが稼働していません。

getting started Chef

Chefはインフラをコードで記述する技術で、workstationからchef serverにcookbookを送って、nodeの管理を行います。
Chef

workstationにchefのインストール

gem install chef
gem install knife-solo

knife-configureで設定していきます。

knife configure

1. Chefのリポジトリ(cookbook)を作成…workstation
2. Nodeをchefに対応する
3. cookbookを作る
4. cookbookをnodeに反映

リポジトリ作成

> knife solo init chef-repo
> cd chef-repo

nodeをchef対応にする

> knife solo prepare 192.168.33.10 --ssh-user vagrant
Bootstrapping Chef...
vagrant@192.168.33.10's password:
Thank you for installing Chef!
Generating node config 'nodes/192.168.33.10.json'...

workstationよりcookbookの作成

\chef-repo> knife cookbook create hello -o site-cookbooks

chef-repo > site-cookbooks > hello > recipes > default.rb

#
# Cookbook Name:: hello
# Recipe:: default
#
# Copyright 2016, YOUR_COMPANY_NAME
#
# All rights reserved - Do Not Redistribute
#
log "hello world"

chef-repo > nodes > 192.168.33.10.json

{
  "run_list": [
  	"recipe[hello]"
  ],
  "automatic": {
    "ipaddress": "192.168.33.10"
  }
}
\chef\chef-repo> knife solo cook 192.168.33.10 --ssh-user vagrant
ERROR: RuntimeError: Failed to launch command ["rsync", "-rL", "--chmod=ugo=rwX", "--rsh=ssh vag
--exclude=revision-deploys", "--exclude=.git", "--exclude=.hg", "--exclude=.svn", "--exclude=.bz
/gems/knife-solo-0.6.0/lib/knife-solo/resources/patch_cookbooks/", ":~/chef-solo/cookbooks-1"]

rsyncコマンドがないとのエラー表示

Processing Classとanimation

int num = 500;
Point[] points = new Point[num];

void setup() {
  size(640, 360, P3D);
  pixelDensity(displayDensity());

  for (int i = 0; i < num; i++) {
    points[i] = new Point();
  }
}

void draw() {
  background(255);
  translate(width/2, height/2, 0);
  rotateY(frameCount * 0.01);

  for (int i = 0; i < num; i++) {
    points[i].update();
    points[i].display();
  }

  for (int i = 0; i < num; i++) {
    for (int j = i + 1; j < num; j++) {
      float d = dist(
        points[i].x, 
        points[i].y, 
        points[i].z, 
        points[j].x, 
        points[j].y, 
        points[j].z
        );
      if (d < 40) {
        stroke((int) map(d, 0, 40, 0, 255));
        strokeWeight(1);
        line(
          points[i].x, 
          points[i].y, 
          points[i].z, 
          points[j].x, 
          points[j].y, 
          points[j].z
          );
      }
    }
  }
}

Point.java

class Point {
  float x;
  float y;
  float z;
  float targetX;
  float targetY;
  float targetZ;
  float radius;
  
  Point() {
    setTarget();
    x = targetX;
    y = targetY;
    z = targetZ;
  }
  
  void update(){
    if (frameCount % 120 == 0){
      setTarget();
    }
    x += (targetX - x) * 0.05;
    y += (targetY - y) * 0.05;
    z += (targetZ - z) * 0.05;
  }
  
  void setTarget(){
    if (random(2) < 1){
      radius = 150;
    } else {
      radius = 75;
    }
    float phi = random(TWO_PI);
    float unitZ = random(-1, 1);
    targetX = radius * sqrt(1 - unitZ * unitZ) * cos(phi);
    targetY = radius * sqrt(1 - unitZ * unitZ) * sin(phi);
    targetZ = radius * unitZ;
  }
  
  void display() {
    stroke(0);
    strokeWeight(3);
    point(x, y, z);
  }

}

Processingで球体の描画

for文でdThetaを増やしながら、rotateYをframeCountで増やして回転させています。

float radius = 150;
float dPhiStep = 0;
float dPhiStepVelocity = 0.05;

void setup(){
  size(640, 360, P3D);
  pixelDensity(displayDensity());
}

void draw(){
  background(255);
  translate(width/2, height/2, 0);
  rotateY(frameCount * 0.02);
  
  float lastX = 0;
  float lastY = 0;
  float lastZ = 0;
  
  for(float dTheta = 0, dPhi = 0; dTheta <= 180; dTheta++, dPhi += dPhiStep){
    float theta = radians(dTheta);
    float phi = radians(dPhi);
    
    float x = radius * sin(theta) * cos(phi);
    float y = radius * sin(theta) * sin(phi);
    float z = radius * cos(theta);


    stroke(0);
    if (lastX != 0){
    strokeWeight(1);
    line(lastX, lastY, lastZ, x, y, z);
    }
    strokeWeight(8);
    point(x, y, z);
    
    lastX = x;
    lastY = y;
    lastZ = z;
  }
  dPhiStep += dPhiStepVelocity;
  
}

Todo list by vue.js

v-on, v-attr, v-classで機能追加しています。データの追加はpush,削除はspliceです。

<!DOCTYPE html>
<html lang="en">
<head>
	<meta charset="UTF-8">
	<title>My ToDos</title>
	<meta name="viewport" content="width=device-width, initial-scale=1">
	<link rel="stylesheet" href="styles.css">
	<style>
		body {
			font-size: 13px;
			font-family: Arial;
		}
		h1 {
			font-size: 14px;
			border-bottom:1px solid #ddd;
			padding: 0 0 5px;
		}
		ul {
			list-style-type: none;
			padding: 0;
			margin: 0 0 5px;
		}
		ul > li {
			padding: 0 0 5px;
		}
		input[type=text]{
			padding: 4px;
			border-radius: 4px;
		}
		.done {
			text-decoration: line-through;
			color: #aaa;
		}
		.linkLike {
			color: blue;
			cursor: pointer;
			font-weight: normal;
		}
	</style>
</head>
<body>
	<div id="myapp">
		<h1>
			My ToDos
			<small>({{remaining}}/{{todos.length}})</small>
			<span class="linkLike" v-on="click:purge">[purge]</span>
		</h1>
		<ul>
			<li v-repeat="todos">
				<input type="checkbox" v-attr="checked: done" v-on="click: done = !done">
				<span v-class="done: done">{{task}}</span>
				<span class="linkLike" v-on="click:del($index)">[x]</span>
			</li>
		</ul>
		<input type="text" v-model="newTask" placeholder="new task..." v-on="keyup:add | key enter">
	</div>
	<script src="http://cdnjs.cloudflare.com/ajax/libs/vue/0.11.4/vue.min.js"></script>
	<script>
	var vm = new Vue({
            el: '#myapp',
            data: {
            	newTask: '',
            	todos : [
            	 {task: 'task 1', done: false},
            	 {task: 'task 2', done: true},
            	 {task: 'task 3', done: false}
            	]
            },
            computed: {
            	remaining: function(){
            		var count = 0;
            		for (var i = 0, j = this.todos.length; i < j; i++){
            			if(!this.todos&#91;i&#93;.done){
            				count++;
            			}	
            		}
            		return count;
            	}
            },
            methods: {
            	add: function(){
            		this.todos.push({
            			task: this.newTask,
            			done: false
            		});
            		newTask = ''
            	},
            	del: function(index){
            		if (confirm("are you sure?")){
            			this.todos.splice(index, 1);
            		}
            	},
            	purge: function(){
            		var i = this.todos.length;
            		while (i--){
            			if(this.todos&#91;i&#93;.done){
            				this.todos.splice(i, 1);
            			}
            		}
            	}
            }
        });
	</script>
</body>
</html>