Python基礎

python3とpython2では記法が異なっている点があるので注意が必要です。

print ("hello world!")

変数

msg = "hello world"
print (msg)

整数と小数の演算は小数、整数同士の割り算は、小数点以下切り捨てとなります。

繰り返し処理

print (u"無駄"*10)

\\, \*なども

改行表現

print ("""<html>
<body>
</body>
</html>""")

整数値と文字列はpythonでは明示する

print (5 + int("5"))
print ("i am " + str(20) + "years old.")

配列、存在チェック

sales = [200, 100, 342, 1230, 122]
print (100 in sales)

ソート、reverse

sales = [52, 100, 80, 45]
sales.sort()
print (sales)

タプル:変更不可

a = (2, 5, 8)
print (a * 3)

セット:重複を許さない

a = set([1, 2, 3, 4])
print (a)

差集合

a = set([1, 2, 3, 4])
b = set([4, 5, 6, 7])
print (b - a)

辞書

sales = {"yamada": 200, "yoshida": 300, "sakura": 240}
print (sales)

key、value、items(一覧)

sales = {"yamada": 200, "yoshida": 300, "sakura": 240}
print (sales.values())

文字列へのデータ組み込み

a = 10
b = 123.345
c = "sakaki"
d = {"yamada":200, "yoshimoto": 300}
print ("age: %d" % a)

条件分岐

score = 70
if score > 60:
    print ("ok")

条件分岐2

score = 55
if score > 60:
    print ("ok")
elif score > 50:
    print ("soso")
else:
    print ("NG!")

forループ

sales = [13, 235, 312, 2232]
for sale in sales:
    print (sale)

繰り返し処理 ※インデントに注意

for i in range(10):
    print(i)

空処理

def hello2():
    pass

python module:
https://docs.python.org/3/library/index.html

wp mytheme

mythemeを作成していく際には、indexをまず作成し、それをheader, sidebar, footer, functions, style.cssなどにファイル分割していきます。wp_header、wp_footer、ウェジェットなど独自のルールが幾つかありますが、調べながら進めるとよいでしょう。
ショートコードなども簡単に作成できます。

<?php get_header(); ?>
    <div id="main" class="container">
      <div id="posts">

        <?php
        if (have_posts()):
          while(have_posts()):
            the_post();
          ?>
        <div class="post">
            <div class="post-header">
              <h2>
                <a href="<?php echo the_permalink(); ?>"><php the_title(); ?></a>
              </2>
              <div class="post-meta">
                <?php echo get_the_date(); ?>【<?php the_category(', '); ?>】
              </div>
            </div>
            <div class="post-content">
                <div class="post-image">
                  <?php if (has_post_thumbnail()): ?>
                  <?php the_post_thumbnail(array(100, 100)); ?>
                  <?php else: ?>
                    <img src="<?php echo get_template_directory_uri();?>img/noimage.png" width="100" height="100">
                  <?php endif; ?>
                </div>
                <div class="post-body">
                  <p>
                    <?php the_excerpt(); ?>
                  </p>
                </div>
            </div>
        </div>

      <?php endwhile;
    else:
      ?>
      <p>記事はありません! </p>
      <?php
    endif;
     ?>

        <div class="navigation">
            <div class="prev"><?php previous_posts_link(); ?></div>
            <div class="next"><?php next_posts_link(); ?></div>
        </div>
      </div><!-- /posts -->

      <?php get_sidebar(); ?>
    </div><!-- /main -->
<?php get_footer(); ?>
<?php

add_theme_support('menus');
register_sidebar(
  array(
    'before_widget' => '<div class="widget">',
    'after_widget' => '<div>',
    'before_title' => '<h3>',
    'after_title' => '</h3>',
  )
);

add_theme_support('post_thumbnails');

function shortcode_tw(){
  return '<a href="http://twitter.com/hogehoge">@hogehoge</a>をフォローしてね'
}
add_shortcode('tw','shortcode_tw');

WP mytheme header情報の挿入

mythemを作る場合は、stylecssにヘッダー情報を挿入しなければなりません。
wordpress codexよりコピーします。
wordpress codex them_Development

/*
Theme Name: Twenty Thirteen
Theme URI: http://wordpress.org/themes/twentythirteen
Author: the WordPress team
Author URI: http://wordpress.org/
Description: The 2013 theme for WordPress takes us back to the blog, featuring a full range of post formats, each displayed beautifully in their own unique way. Design details abound, starting with a vibrant color scheme and matching header images, beautiful typography and icons, and a flexible layout that looks great on any device, big or small.
Version: 1.0
License: GNU General Public License v2 or later
License URI: http://www.gnu.org/licenses/gpl-2.0.html
Tags: black, brown, orange, tan, white, yellow, light, one-column, two-columns, right-sidebar, flexible-width, custom-header, custom-menu, editor-style, featured-images, microformats, post-formats, rtl-language-support, sticky-post, translation-ready
Text Domain: twentythirteen

This theme, like WordPress, is licensed under the GPL.
Use it to make something cool, have fun, and share what you've learned with others.
*/

そうすると、管理画面からテーマの編集ができるようになります。

開発環境にwordpressのインストール

mysqlでまずwodpress用のデータベースを作成します。

[vagrant@localhost wordpress]$ mysql -u root
Welcome to the MySQL monitor.  Commands end with ; or \g.
Your MySQL connection id is 2
Server version: 5.6.34 MySQL Community Server (GPL)

Copyright (c) 2000, 2016, Oracle and/or its affiliates. All rights reserved.

Oracle is a registered trademark of Oracle Corporation and/or its
affiliates. Other names may be trademarks of their respective
owners.

Type 'help;' or '\h' for help. Type '\c' to clear the current input statement.

mysql> create database wordpress;
Query OK, 1 row affected (0.11 sec)

mysql> grant all on wordpress.* to dbuser@localhost identified by 'xxxx';

その後、wp-config-sample.phpをコピーして、wp-config.phpに変更し、ファイルの中身を編集します。

define('DB_NAME', 'wordpress');

/** MySQL データベースのユーザー名 */
define('DB_USER', 'dbuser');

/** MySQL データベースのパスワード */
define('DB_PASSWORD', 'xxxx');

/** MySQL のホスト名 */
define('DB_HOST', 'localhost');

/** データベースのテーブルを作成する際のデータベースの文字セット */
define('DB_CHARSET', 'utf8');

/** データベースの照合順序 (ほとんどの場合変更する必要はありません) */
define('DB_COLLATE', '');

さらに、認証用ユニークキーを追加し、PHPサーバーを立ち上げると、wordpress初期画面が表示されるはずです。

Android studioのインストール

androidのサイトより、android studioをインストールします。ダウンロード・起動に相当の時間がかかります。また、メモリを沢山使用するので確認しておきましょう。

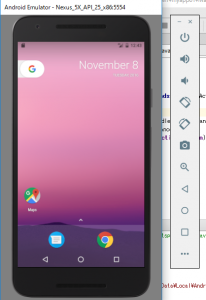
ADVでエミュレーターを立ち上げて、動作確認します。
%e7%84%a1%e9%a1%8c

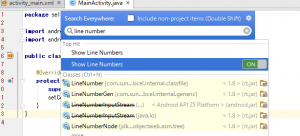
shiftキーを2回押して、line numberをonに切り替えます。
%e7%84%a1%e9%a1%8c

androidはjavaで書いていきます。画面のクラスの読み込みは、R.idです。

public void changeLabel(View view){
        TextView tv = (TextView)findViewById(R.id.mytextview);
        tv.setText("Changed!");
    }

php ビンゴシート

乱数を生成し、n個切り取る際は、range, shuffle, array_sliceで作ります。
$col = range($i * 15 + 1, $i * 15 + 15);
shuffle($col);
$nums[$i] = array_slice($col, 0, 5);
index.php

<?php
require_once(__DIR__ . '/config.php');
require_once(__DIR__ . '/Bingo.php');

$bingo = new \MyApp\Bingo();
$nums = $bingo->create();

?>
<!DOCTYPE html>
<html lang="ja">
  <head>
    <meta charset="utf-8">
    <meta name="viewport" content="width=device-width, initial-scale=1.0">
    <title>jQueryスライドショー</title>
    <link rel="stylesheet" href="styles.css">
  </head>
  <body>
    <div id="container">
      <table>
        <tr>
          <th>B</th><th>I</th><th>N</th><th>G</th><th>O</th>
        </tr>
        <?php for ($i = 0; $i < 5; $i++) : ?>
        <tr>
          <?php for ($j = 0; $j< 5; $j++) : ?>
          <td><?= h($nums&#91;$j&#93;&#91;$i&#93;); ?></td>
          <?php endfor; ?>
        </tr>
      <?php endfor; ?>
      </table>
    </div>
  </body>
</html>

php基礎

データの型を確認

var_dump($msg);

定数

var_dump(__LiNE__);
var_dump(__FILE__);
var_dump(__DIR__);

文字列の連結

$s = "hello " . "world";

真偽値

$x = 5;
if ($x){
  echo "great";
}

三項演算子

$max = ($a > $b) ? $a : $b;

配列

$sales = array(
  "yama" => 200,
  "sato" => 400,
  "ito" => 600,
);
var_dump($sales["sato"]);

コロン構文

<ul>
<?php foreach ($colors as $value): ?>
  <li><?php echo "$value"; ?></li>
<?php endforeach; ?>
</ul>

クラス(オーバライドの禁止はメソッド名の前にfinalを付けます)

class User{
  public $name;
  public function __construct($name){
    $this->name = $name;
  }

  public function sayHi(){
    echo "hi, i am $this->name!";
  }
}

$tom =  new User("Tom");
$bob = new User("Bob");

echo $tom->name;
$bob->sayHi();

抽象クラス 

abstract class BaseUser{
  public $name;
  abstract public function sayHi();
}

class User extends BaseUser{
  public function sayHi(){
    echo "hello from user";
  }
}

インターフェイス

interface sayHi {
  public function sayHi();
}

interface sayHello {
  public function sayHello();
}

class User Implements sayHi, sayHello {
  public function sayHi{
    echo "hi";
  }
  public function sayHello{
    echo "hello";
  }
}

Cloud9

Cloud9はクラウドの統合開発環境で、ブラウザ上で手軽に開発環境を用意することができます。
Cloud9

sign inすると、クレジットカードの入力項目があり、ドキッとしますが、登録によるチャージはありません。
%e7%84%a1%e9%a1%8c

初期画面
%e7%84%a1%e9%a1%8c

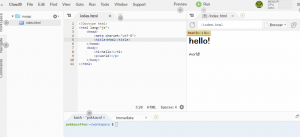
インターフェイスはdreamweaverっぽいですが、嫌いではないですね。javaのコンソールもあります。
%e7%84%a1%e9%a1%8c

apacheを起動して、サーバー上で確認することも可能です。
JavaScript Consoleはブラウザで閲覧します。php, ruby, pythonはコマンドラインから作っていきましょう。

sqliteはsqliteコマンド、mysqlはmysql-ctl cliを打ち込みます。

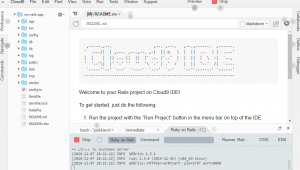
cloud9を使えば、railsも簡単に環境をつくることができます。
%e7%84%a1%e9%a1%8c

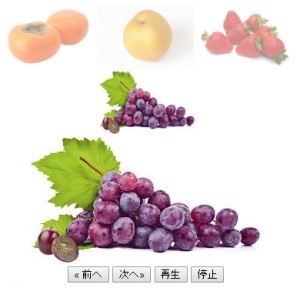
jQuery thumbnail スライドショー

タイマー処理を使って、自動再生のスライドショーを作成します。
timer = setTimeout(function(){
autoPlay();

<!DOCTYPE html>
<html lang="ja">
  <head>
    <meta charset="utf-8">
    <meta name="viewport" content="width=device-width, initial-scale=1.0">
    <title>jQueryスライドショー</title>
    <style>
    body {
      margin: 10px auto;
      text-align: center;
    }
     .thumbnail{
          width: 125px;
          height:83px;
          opacity: 0.5;
          cursor:pointer;
     }
     .current {
      opacity: 1;
     }
     .thumbnail + .thumbnail {
      margin-left: 4px;
     }
    </style>
    <link rel="stylesheet" href="styles.css">
  </head>
  <body>
      <div id="thumbnails"></div>
      <div id="main"></div>
      <div id="nav">
          <button id="prev">&laquo; 前へ</button>
          <button id="next">次へ&raquo; </button>
          <button id="play">再生</button>
          <button id="stop">停止</button>
      </div>
      <script src="https://ajax.googleapis.com/ajax/libs/jquery/3.1.1/jquery.min.js"></script>
      <script>
      $(function(){
          var files = [
            '01.jpg',
            '02.jpg',
            '03.jpg',
            '04.jpg'
          ];
            var img;
            var timer;
            var currentNum = 0;
            var nowPlaying = false;
            for (var i = 0; i < files.length; i++){
              img = $('<img>').attr('src', files[i]).addClass('thumbnail');
              $('#thumbnails').append(img);
            }
            $('#main').append(
                $('<img>').attr('src', files[0])
              );
            $('.thumbnail:first').addClass('current');
            $('.thumbnail').click(function(){
              $('#main img').attr('src', $(this).attr('src'));
              currentNum = $(this).index();
              $(this).addClass('current').siblings().removeClass('current');
            });
            $('#prev').click(function(){
              currentNum--;
              if (currentNum < 0){
                currentNum = files.length -1;
              }
              $('#main img').attr('src', files&#91;currentNum&#93;);
              $('.thumbnail').removeClass('current');
              $('.thumbnail').eq(currentNum).addClass('current');
            });
            $('#next').click(function(){
              currentNum++;
              if (currentNum > files.length - 1){
                currentNum = 0;
              }
              $('#main img').attr('src', files[currentNum]);
              $('.thumbnail').removeClass('current');
              $('.thumbnail').eq(currentNum).addClass('current');
            });
            function autoPlay(){
              $('#next').click();
              timer = setTimeout(function(){
                  autoPlay();
              }, 1000);
            }
            $('#play').click(function(){
                  if (nowPlaying) return;
                  nowPlaying = true;
                autoPlay();
            });
            $('#stop').click(function(){
                    clearTimeout(timer);
                    nowPlaying = false;
            });
      });
      </script>
  </body>
</html>

%e7%84%a1%e9%a1%8c

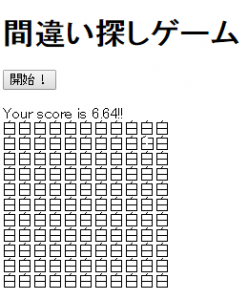
jQuery 間違い探しゲーム

ランダムで、数列に一か所に文字を挿入します。
var offset = Math.floor(Math.random() * chars.length);
chars.splice(offset, 1, seikai);

<!DOCTYPE html>
<html lang="ja">
  <head>
    <meta charset="utf-8">
    <meta name="viewport" content="width=device-width, initial-scale=1.0">
    <title>間違い探しゲーム</title>
    <style>
        span {
          cusor:pointer;
        }
    </style>
    <link rel="stylesheet" href="styles.css">
  </head>
  <body>
      <h1>間違い探しゲーム</h1>
      <p><input type="button" value="開始!" onclick="gameStart();"></p>
      <div id="score"></div>
      <div id="cells"></div>

      <script src="https://ajax.googleapis.com/ajax/libs/jquery/3.1.1/jquery.min.js"></script>
      <script>
          var level = 0;
          var games = [
              ['問', '間'],
              ['大', '太'],
              ['白', '臼']
          ];
          var MAX_LEVEL = games.length - 1;
          var DIM_FIRST = 5;
          var DIM_DELTA = 3;
          var dim = DIM_FIRST;
          var t1;
          var t2;

          function gameStart(){
            var dummy = games[level][0];
            var seikai =games[level][1];

            if (level == 0){
              $('#score').empty();
              t1 = new Date().getTime();
            }
            

            var cells = '';
            for (var i = 1; i <= dim * dim; i++){
              cells += '<span id="s' + i + '"></span>';
              if (i % dim == 0){
                cells += '<br />';
              }
            }
            $('#cells').html(cells);

            var chars = [];
            for (var i = 0; i < dim * dim; i++){
              chars.push(dummy);
            }

            var offset = Math.floor(Math.random() * chars.length);
            chars.splice(offset, 1, seikai);

            // console.log(chars);
            for (var i = 1; i <= chars.length; i++){
              $('#s'+i).text(chars&#91;i-1&#93;);
              $('#s'+i).click(function(){
                if ($(this).text() == seikai){
                  level++;
                  dim += DIM_DELTA;
                  if (level > MAX_LEVEL){
                        t2 = new Date().getTime();
                      $('#score').text('Your score is '+(t2 - t1)/1000 +'!!');
                      level = 0;
                      dim = DIM_FIRST;
                      return false;
                  }
                  gameStart();
                }
              });
            }

          }
      </script>
  </body>
</html>

%e7%84%a1%e9%a1%8c