jQuery mobile

<!DOCTYPE html>
<html lang="ja">
  <head>
    <meta charset="utf-8">
    <title>D3.js</title>
      <meta name="viewport" content="width=device-width, initial-scale=1">
      <link rel="stylesheet" href="http://code.jquery.com/mobile/1.4.5/jquery.mobile-1.4.5.min.css" />
      <script src="http://code.jquery.com/jquery-1.11.1.min.js"></script>
      <script src="http://code.jquery.com/mobile/1.4.5/jquery.mobile-1.4.5.min.js"></script>
  </head>
  <body>
      <div data-role="page">
        <div data-role="header">
          <h1>ホーム</h1>
        </div>
        <div data-role="content">
          <p>こんにちは!</p>
        </div>
        <div data-role="footer">
          <h4>copyright 2016</h4>
        </div>
      </div>
  </body>
</html>

ページ内に複数ページ作成することも可能です。

  <body>
      <div data-role="page" id="home">
        <div data-role="header">
          <h1>ホーム</h1>
        </div>
        <div data-role="content">
          <p>こんにちは!</p>
          <p><a href="#home">ホーム</a></p>
          <p><a href="#menu">メニュー</a></p>
        </div>
        <div data-role="footer">
          <h4>copyright 2016</h4>
        </div>
      </div>

      <div data-role="page" id="menu">
        <div data-role="header">
          <h1>メニュー</h1>
        </div>
        <div data-role="content">
          <p>こんにちは!</p>
          <p><a href="#home">ホーム</a></p>
          <p><a href="#menu">メニュー</a></p>
        </div>
        <div data-role="footer">
          <h4>copyright 2016</h4>
        </div>
      </div>
  </body>

リンク設定

<div data-role="content">
          <p>こんにちは!</p>
          <p><a href="#home">ホーム</a></p>
          <p><a href="#menu">メニュー</a></p>
          <p><a href="http://google.com" rel="external">google</a></p>
          <p><a href="a.html">a</a></p>
          <p><a href="a.html" data-ajax="false">b</a></p>
        </div>

Haml

HamlはHTML Abstraction Markup Languageの略でhtmlのtemplate engineと呼ばれたりもします。rubyで書かれており、railsなどにも使われています。

index.haml -> (hamlコマンド) -> index.html

[vagrant@localhost haml]$ sudo gem install haml

以下のように字下げ・空白を作って記載します。

!!!
%html{:lang => "ja"}
  %head
    %meta(charset="UTF-8")
  %body
    hello world!

hamlで変換します。

[vagrant@localhost haml]$ haml index.haml index.html
[vagrant@localhost haml]$ haml -q -f html5 index.haml index.html

改行のコントロール

!!!
%html{:lang => "ja"}
  %head
    %meta(charset="UTF-8")
  %body
    %p hello
    %ul
      %li<>
        item

属性の記述

!!!
%html{:lang => "ja"}
  %head
    %meta(charset="UTF-8")
  %body
    $div{:id => "main", :class => "myClass"}
    %div(id="main" class="myClass")
    %div#main.myClass

フィルターの生成

!!!
%html{:lang => "ja"}
  %head
    %meta(charset="UTF-8")
  %body
    :css
      .myStyle {
        color: red;
      }
    :javascript
      alert(1)
        if(1){
         alret(2);
        }

ruby

!!!
%html{:lang => "ja"}
  %head
    %meta(charset="UTF-8")
  %body
    %p total is #{5 * 3}
    %p= Time.now
    - x = 5
    %p = x

    -(1..10).each do |i|
      %p = i

Compass

[vagrant@localhost sass]$ compass -v
Compass 1.0.3 (Polaris)
Copyright (c) 2008-2016 Chris Eppstein
Released under the MIT License.
Compass is charityware.
Please make a tax deductable donation for a worthy cause: http://umdf.org/compass
[vagrant@localhost sass]$ compass create
directory sass/
directory stylesheets/
   create config.rb
   create sass/screen.scss
   create sass/print.scss
   create sass/ie.scss
    write stylesheets/ie.css
    write stylesheets/print.css
    write stylesheets/screen.css

*********************************************************************
Congratulations! Your compass project has been created.

You may now add and edit sass stylesheets in the sass subdirectory of your project.

Sass files beginning with an underscore are called partials and won't be
compiled to CSS, but they can be imported into other sass stylesheets.

You can configure your project by editing the config.rb configuration file.

You must compile your sass stylesheets into CSS when they change.
This can be done in one of the following ways:
  1. To compile on demand:
     compass compile [path/to/project]
  2. To monitor your project for changes and automatically recompile:
     compass watch [path/to/project]

More Resources:
  * Website: http://compass-style.org/
  * Sass: http://sass-lang.com
  * Community: http://groups.google.com/group/compass-users/
@import "compass";

.sample {
  @include border-radius();
}
[vagrant@localhost sass]$ compass watch
@import "compass";

.sample {
  // @include border-radius(3px);
  // @include opacity(0.5);
  @include box-shadow(0 0 1px #ccc);
}
@import "compass";

.sample {
  // @include border-radius(3px);
  // @include opacity(0.5);
  // @include box-shadow(0 0 1px #ccc);
  @include rotate();
  @include clearfix;
}

画像

@import "compass";

$padding: 10px;

.sample {
  width: image-width("baby.jpg") + ($padding * 2);
}

sprites

@import "compass";

@import "icons/*.png";
@include all-icons-sprites;

sass build in function

Function module
http://sass-lang.com/documentation/Sass/Script/Functions.html

lighten, darken

$brandColor: red;

#main {
  width: 90%;
  p {
    color: lighten($brandColor, 30%);
    font-size: $baseFontSize;    
  }
}

if文

$debugMode: true;

#main {
  @if $debugMode == true {
    color: red;
  } @else {
    color: green;
  }
}

for文

@for $i from 10 through 14 {
  .fs#{i} { font-size:#{$i}px; }
}

while文

$i: 10;
@while $i <= 14 {
  .fs#{i} { font-size:#{i}px; }
  $i: $i + 1;
}

リスト

$animals: cat, dog, tiger;

@each $animal in $animals {
  .#{$animal}-icon {background: url("#{$animal}-.png");}
}

関数

$totalWidth: 940px;
$columnCount: 5;
@function getColumnWidth($width, $count){
  $padding: 10px;
  $columnWidth: floor(($width - ($padding * ($count - 1)) / $count));
  @debug: $columnWidth;
  @return $columnWidth;
}

.grid {
  float: left;
  width: getColumWidth($totalWidth, $columnCount);
}

別ファイル・パーシャルの読み込み
@import "setting";
@import "functions";

mixin

@mixin round{
  border-radius: 4px;
}

.label {
  font-size: 12px;
  @include round:
}

sass / scss

gemでsassをインストールします。

[vagrant@localhost ~]$ sudo gem install sass
Successfully installed sass-3.4.22

sass記法でcssを記載していきます。

#main {
  width: 90%;
  p {
    font-size: 14px;
  }
}

sassコマンドで、main.cssに変換します。

sass --style expanded scss/main.scss:css/main.css

変換結果です。

#main {
  width: 90%;
}
#main p {
  font-size: 14px;
}

sassからcssへの自動変換コマンド

[vagrant@localhost sass]$ sass --style expanded --watch scss:css
>>> Sass is watching for changes. Press Ctrl-C to stop.
>>> Change detected to: scss/main.scss
      write css/main.css
      write css/main.css.map

scssの特徴である入れ子構造

#main {
  width: 90%;
  p {
    font-size: 18px;
    a {
      text-decoration: none;
      &:hover {
        font-weight: bold;
      }
    }
  }
}

変数

$baseFontSize: 14px;

#main {
  width: 90%;
  p {
    font-size: $baseFontSize;
    .sub {
      font-size: $baseFontSize - 2px;
    }
  }
}

文字列

$imgDir: "../img/";

#main {
  width: 90%;
  background: url($imgDir + "bg.png");
  p {
    font-size: $baseFontSize;
    
  }
}

3d.jsで遊ぼう

appendとremove

<script src="https://d3js.org/d3.v4.min.js"></script>
      <script>
          d3.select("body").append("p").text("hello 4").remove();
      </script>

値の代入

          var dataset = [12, 24, 36];
          var p = d3.select("body").selectAll("p");

          p.data(dataset).text(function(d, i){
              return i + 1 + "番目は" + d + "です!";
          });

update, enter

          var dataset = [12, 24, 36, 48];
          var p = d3.select("body").selectAll("p");

          var update = p.data(dataset);
          var enter = update.enter();

          update.text(function(d){
              return "update: " + d;
          });

          enter.append("p").text(function(d){
            return "enter:" + d;
          });

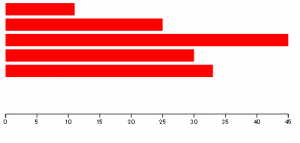
棒グラフ

<script src="https://d3js.org/d3.v3.min.js" charset="utf-8"></script>
      <script>
         var dataset = [11, 25, 45, 30, 33];

         var w = 500;
         var h = 200;

         var svg = d3.select("body").append("svg").attr({width:w, height:h});

         svg.selectAll("rect")
         .data(dataset)
         .enter()
         .append("rect")
         .attr({
          x:0,
          y: function(d, i){ return i * 25; },
          width: function(d){ return d;},
          height: 20,
          fill: "red"
         });

      </script>

%e7%84%a1%e9%a1%8c

<!DOCTYPE html>
<html lang="ja">
  <head>
    <meta charset="utf-8">
    <title>D3.js</title>
    <style>
        .axis path, .axis line{
          fill: none;
          stroke: black;
        }
        .axis text {
          font-size: 11px;
        }
    </style>
  </head>
  <body>
      <script src="https://d3js.org/d3.v3.min.js" charset="utf-8"></script>
      <script>
         var dataset = [11, 25, 45, 30, 33];

         var w = 500;
         var h = 200;
         var padding = 20;

         var xScale = d3.scale.linear()
            .domain([0, d3.max(dataset)])
            .range([padding, w - padding])
            .nice();

         var svg = d3.select("body").append("svg").attr({width:w, height:h});

         var xAxis = d3.svg.axis()
            .scale(xScale)
            .orient("bottom");

          svg.append("g")
              .attr({
                class: "axis",
                transform: "translate(0, 180)"
              })
              .call(xAxis);

         svg.selectAll("rect")
         .data(dataset)
         .enter()
         .append("rect")
         .attr({
          x:padding,
          y: function(d, i){ return i * 25; },
          width: function(d){ return xScale(d) - padding;},
          height: 20,
          fill: "red"
         });

      </script>
  </body>
</html>

ランダムなテキストサイズ表示 d3.js

Math.floor(Math.random() * n+1)で28pxのランダム表示を実現しています。

<!DOCTYPE html>
<html lang="ja">
  <head>
    <meta charset="utf-8">
    <title>D3.js</title>
  </head>
  <body>
      <p>hello 1</p>
      <p>hello 2</p>
      <p>hello 3</p>
      <script src="https://d3js.org/d3.v4.min.js"></script>
      <script>
      var p = d3.select("body").selectAll("p");

      p.style("font-size", function(){
        return Math.floor(Math.random() * 29) + "px";
      });
      </script>
  </body>
</html>

svg set.attribute

<!DOCTYPE html>
<html lang="ja">
  <head>
    <meta charset="utf-8">
    <title>SVG</title>
  </head>
  <body>
    <svg width="600" height="300" onload="
      var c = document.getElementsByTagName('circle');
      for (var i=0; i<c.length; i++){
          c&#91;i&#93;.setAttribute('cx', r(600));
          c&#91;i&#93;.setAttribute('cy', r(400));
          c&#91;i&#93;.setAttribute('r', r(100));
          c&#91;i&#93;.setAttribute('fill', 'rgb('+r(255)+','+r(255)+','+r(255)+')');
      }
        function r(n){
          return Math.floor(Math.random() * (n + 1));
        }

    ">
      <rect width="300" height="300" fill="red" />
      <circle cx="100" cy="100" r="20" fill="white" />
      <circle cx="100" cy="100" r="20" fill="white"/>
      <circle cx="100" cy="100" r="20" fill="white"/>
      <circle cx="100" cy="100" r="20" fill="white"/>
      <circle cx="100" cy="100" r="20" fill="white"/>
      <circle cx="100" cy="100" r="20" fill="white"/>
      <circle cx="100" cy="100" r="20" fill="white"/>
      <circle cx="100" cy="100" r="20" fill="white"/>
      <circle cx="100" cy="100" r="20" fill="white"/>
      <circle cx="100" cy="100" r="20" fill="white"/>
      <circle cx="100" cy="100" r="20" fill="white"/>
      <circle cx="100" cy="100" r="20" fill="white"/>
      <circle cx="100" cy="100" r="20" fill="white"/>

    </svg>
  </body>
</html>

svgで遊ぼう


%e7%84%a1%e9%a1%8c

<svg width="600" height="300">
      <rect width="300" height="300" fill="red" />
      <text x="100" y="100" font-size="32" fill="white" stroke="black" stroke-width="2" rotate="20">
          Google
      <text>
    </svg>

transform

<svg width="600" height="300">
      <rect width="300" height="300" fill="red" />
      <rect width="100" height="100" fill="green" transform="translate(50,50)" />
      <rect width="100" height="100" fill="green" transform="skewX(30)" />
      <rect width="100" height="100" fill="white" opacity="0.2" />
    </svg>

アニメーション

<svg width="600" height="300">
      <rect width="300" height="300" fill="red" />
      <circle cx="100" cy="100" r="20" fill="white">
          <animate attributeName="r" from="20" to="80" dur="2s" repeatCount="indefinite">
      </circle>
      <circle cx="200" cy="200" r="20" fill="blue">
          <animate attributeName="r" from="40" to="120" dur="2s" begin="1s" repeatCount="indefinite">
      </circle>
    </svg>

SVG

%e7%84%a1%e9%a1%8c

    <svg width="600" height="300">
      <rect width="100%" height="100%" fill="red"/>
    </svg>

SVGでは後ろに書いたものが前に表示されます。

    <svg width="600" height="300">
      <rect width="100%" height="100%" fill="red"/>
      <rect width="100" height="50" fill="blue"/>
    </svg>

viewBox:デバイスに合わせて反映

    <svg width="600" height="300" viewBox="0 0 400 200">
      <rect width="400" height="200" fill="red"/>
      <rect width="100" height="50" fill="blue"/>
    </svg>

色の設定

    <svg width="600" height="300">
      <rect width="600" height="300" fill="red"/>
      <rect width="500" height="250" fill="#00ff00"/>
      <rect width="400" height="200" fill="rgb(0, 0, 255)"/>
      <rect width="300" height="150" fill="rgba(255,255,255,0.4)"/>
    </svg>

枠線

    <svg width="600" height="300">
      <rect width="600" height="300" fill="red" stroke="black" stroke-width="10"/>
    </svg>

sytle属性による記述

    <svg width="600" height="300">
      <rect width="600" height="300" style="fill:red; stroke:black; stroke-dasharray:20,5"/>
    </svg>

cssのような書き方

    <svg width="600" height="300">
        <style type="text/css"><!&#91;CDATA&#91;
    #myBox{
      fill:red;
      stroke:black;
    }
        &#93;&#93;></style>
      <rect width="600" height="300" id="myBox">
    </svg>

gタグ

    <svg width="600" height="300">
    <g stroke="black">
      <rect width="600" height="300" fill="red" />
      <rect width="500" height="200" fill="green" />
      <rect width="400" height="100" fill="white"/>
    </g>
    </svg>

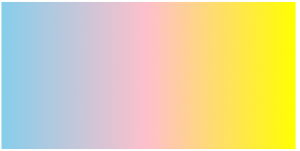
グラデーション

    <svg width="600" height="300">
    <defs>
        <linearGradient id="g1" x1="0" y1="0" x2="1" y2="1"> 
            <stop offset="0" stop-color="skyblue" />
            <stop offset="0.5" stop-color="pink" />
            <stop offset="1" stop-color="yellow" stop-opacity="0.5"/>
        </linearGradient>
    </defs>
      <rect width="600" height="300" fill="url(#g1)" />
    </svg>

円形グラデーション

    <svg width="600" height="300">
    <defs>
        <radialGradient id="g1" cx="0.5" cy="0.5" r="0.5"> 
            <stop offset="0" stop-color="skyblue" />
            <stop offset="0.5" stop-color="pink" />
            <stop offset="1" stop-color="yellow" stop-opacity="0.5"/>
        </linearGradient>
    </defs>
      <rect width="600" height="300" fill="url(#g1)" />
    </svg>

stroke

<line x="100" y1="100" x2="200" y2="200" stroke-width="20" stroke="black" stroke-linecap="raound"  />

circle, ellipse

<circle cx="200" cy="100" r="40" fill="white" />
      <ellipse cx="400" cy="100" rx="40" ry="80" fill="green" />

polygon, polyline, path

      <polyline points="100 50 150 100 50 100" stroke="black" fill="none"/>
      <polygon points="100 50 150 100 50 100" stroke="black" fill="none"/>
      <path d="M100 50 l50 50 h100 v100 h100" stroke="black" fill="none"/>