starter projectでプロジェクトを作ります。
dependencyにdevtool, jpa, postgres, spring security, thymeleaf, web, sessionを入れます。
com.exqmple.demo/WebSecurityConfig.java
package com.example.demo;

import org.springframework.beans.factory.annotation.Autowired;
import org.springframework.context.annotation.Bean;
import org.springframework.context.annotation.Configuration;
import org.springframework.security.config.annotation.authentication.builders.AuthenticationManagerBuilder;
import org.springframework.security.config.annotation.web.builders.HttpSecurity;
import org.springframework.security.config.annotation.web.configuration.EnableWebSecurity;
import org.springframework.security.config.annotation.web.configuration.WebSecurityConfigurerAdapter;
import org.springframework.security.crypto.bcrypt.BCryptPasswordEncoder;

//import com.example.demo.UserDetailsServiceImpl;

@Configuration
@EnableWebSecurity
public class WebSecurityConfig extends WebSecurityConfigurerAdapter {

	@Autowired
	private UserDetailsServiceImpl userDetailsService;

	@Bean
	public BCryptPasswordEncoder passwordEncoder() {
		BCryptPasswordEncoder bCryptPasswordEncoder = new BCryptPasswordEncoder();
		return bCryptPasswordEncoder;
	}

	@Override
	public void configure(WebSecurity web) throws Exception {
		web.ignoring().antMatcher(
				"/images/**",
				"/css/**",
				"/javascript/**"
				);
	}

	@Override
	protected void configure(HttpSecurity http) throws Exception {
		http
			.authorizeRequests()
				.anyRequest().authenticated()
				.and()
			.formLogin()
				.loginPage("/login")
				.loginProcessingUrl("/sign_in")
				.usernameParameter("username")
				.passwordParameter("password")
				.successForwardUrl("/hello")
				.failureUrl("/login?error")
				.permitAll()
				.and()
			.logout()
				.logoutUrl("/logout")
				.logoutSuccessUrl("/login?logout")
				.permitAll();
	}

	@Autowired
	public void configure(AuthenticationManagerBuilder auth) throws Exception {
		auth
			.inMemoryAuthentication()
				.withUser("user").password("{noop}password");
	}


}
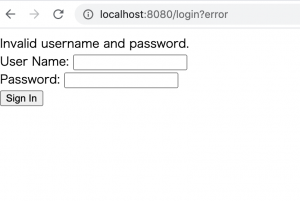
login.html
L Spring-SecurityのCSRF対策の為、th:action=”{}”と書く
<body>
<div th:if="${param.error}">
Invalid username and password.
</div>
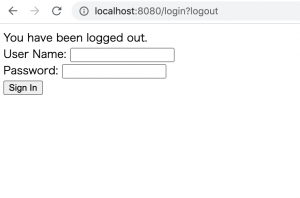
<div th:if="${param.logout}">
You have been logged out.
</div>
<form th:action="@{/sign_in}" method="post">
<div><label>User Name: <input type="text" name="username"></label></div>
<div><label>Password: <input type="text" name="password"></label></div>
<div><input type="submit" value="Login"></div>
</form>
</body>
UserDetailsServiceImpl.java
package com.example.demo;

import java.util.ArrayList;
import java.util.List;

import org.springframework.beans.factory.annotation.Autowired;
import org.springframework.security.core.GrantedAuthority;
import org.springframework.security.core.authority.SimpleGrantedAuthority;
import org.springframework.security.core.userdetails.User;
import org.springframework.security.core.userdetails.UserDetails;
import org.springframework.security.core.userdetails.UserDetailsService;
import org.springframework.security.core.userdetails.UsernameNotFoundException;
import org.springframework.security.crypto.bcrypt.BCryptPasswordEncoder;
import org.springframework.stereotype.Service;

import com.example.demo.LoginUserDao;
import com.example.demo.LoginUser;

@Service
public class UserDetailsServiceImpl implements UserDetailsService {

	@Autowired
	private LoginUserDao userDao;

	@Override
	public UserDetails loadUserByUsername(String userName) throws UsernameNotFoundException{

		LoginUser user = userDao.findUser(userName);

		if(user == null) {
			throw new UsernameNotFoundException("User" + userName + "was not found in the database");
		}

		List<GrantedAuthority> grantList = new ArrayList<GrantedAuthority>();
		GrantedAuthority authority = new SimpleGrantedAuthority("USER");
		grantList.add(authority);

		BCryptPasswordEncoder encoder = new BCryptPasswordEncoder();

		UserDetails userDetails = (UserDetails) new User(user.getUserName(), encoder.encode(user.getPassword()),grantList);

		return userDetails;
	}
}
### セッション
application.properties
spring.session.store-type=jdbc
pom.xml
		<dependency>
			<groupId>org.springframework.session</groupId>
			<artifactId>spring-session-jdbc</artifactId>
		</dependency>
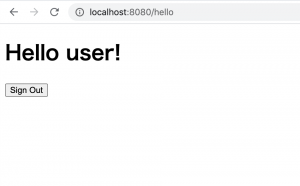
@RequestMapping("/hello")
	private String init(Model model) {
	Authentication auth = SecurityContextHolder.getContext().getAuthentication();

	String userName = auth.getName();
	model.addAttribute("userName", userName);
	return "hello";
}
うーん、Serviceの使い方などよくわからんな。