[Laravel8.x] maatwebsite/excelのExcel出力時にスタイリング

maatwebsite/excelを使ってExcelを出力する際に、stylingをしたい。

export.blade.php

<!DOCTYPE html>
<html lang="en">
<head>
  <meta charset="UTF-8">
  <title>Document</title>
  <style>
  .hoge {
    color: green;
  }
</style>
</head>
<body>
  <table>
  <thead>
  <tr>
    <th class="hoge">id</th>
    <th>name</th>
    <th>email</th>
  </tr>
  </thead>
  <tbody>
    @foreach ($users as $user)
    <tr>
      <td class="hoge">{{$user->id}}</td>
      <td style="color:red;">{{$user->name}}</td>
      <td>{{$user->email}}</td>
    </tr>
    @endforeach
  </tbody>
</table>
</body>
</html>


これだと、classで定義したcolorがexcel上に反映されない。
致し方がない、inlineで書くか。

### inline

<th style="background-color:#FF0000;color:#fff">id</th>

なるほど。

[Laravel8.x] csvではなくExcel(xlsx)を出力する

### ライブラリインストール
$ composer require maatwebsite/excel

app/config.php

'providers' => [
    Maatwebsite\Excel\ExcelServiceProvider::class,
],
'aliases' => [
    'Excel' => Maatwebsite\Excel\Facades\Excel::class,
],

$ php artisan vendor:publish –provider=”Maatwebsite\Excel\ExcelServiceProvider”

$ php artisan make:export Export
app/Exports/Export.php

namespace App\Exports;

// use Maatwebsite\Excel\Concerns\FromCollection;
use Illuminate\Contracts\View\View;
use Maatwebsite\Excel\Concerns\FromView;

class Export implements FromView
{
    /**
    * @return \Illuminate\Support\Collection
    */
    // public function collection()
    // {
    //     //
    // }
    private $view;

    public function __contruct(View $view){
    	$this->view = $view;
    }

    public function view(): View {
    	return $this->view;
    }
}

routing

Route::get('/export', [App\Http\Controllers\AdminController::class, 'export']);

controller

use App\Http\Requests\UserFormRequest;
use App\Exports\Export;

    public function export(){
        $users = User::get();
        $view = view('admin.export', compact('users'));
        return \Excel::download(new Export($view), 'users.xlsx');
    }

export.blade.php

<table>
  <thead>
  <tr>
    <th>id</th>
    <th>name</th>
    <th>email</th>
  </tr>
  </thead>
  <tbody>
    @foreach ($users as $user)
    <tr>
      <td>{{$user->id}}</td>
      <td>{{$user->name}}</td>
      <td>{{$user->email}}</td>
    </tr>
    @endforeach
  </tbody>
</table>

ほうほう、中々デキる、こやつ

[Laravel8.16.0] UserAgentを取得してPC/SPのviewを分けて表示する

UserAgentの取得には、jenssegers/agentを使います。

github: https://github.com/jenssegers/agent

$ composer require jenssegers/agent

config/app.php

    'providers' => [
        // 省略
        Jenssegers\Agent\AgentServiceProvider::class,
    ],

'aliases' => [
        //省略
        'Agent' => Jenssegers\Agent\Facades\Agent::class,
    ],

AdminController.php

use Jenssegers\Agent\Agent;

    public function useragent(){
        if(\Agent::isMobile()){
            return view('admin.sp');
        }
        return view('admin.pc');
    }


なるほど、相当簡単に実装できる。
これをunitテストでやりたい。

$ php artisan make:test UserRegisterTest

public function testExample()
    {
        $response = $this->get('/');

        $response->dumpHeaders();
    }

$ vendor/bin/phpunit tests/Feature/UserAgentTest.php

public function testExample()
    {
        $response = $this->get('/admin/useragent');
        // $response->assertStatus(200);
        $this->assertSame(2, $response);
    }

$ vendor/bin/phpunit tests/Feature/UserAgentTest.php
FAILURES!
Tests: 1, Assertions: 1, Failures: 1.

なんでだ? $this->getだとheader情報しか返ってこないのか。
UnitTestはもうちょっとやりこまないとダメやな。

[Laravel8.16.0] Google Analytics APIを使う

まず、analytics-*-*.p12ファイルですが、publicには置けないので、resourcesフォルダの下にstaticフォルダを作成し、そこに置きます。
※storageやpublicに置かない様にする。

続いて、google-api-php-clientをインストールします。
githubで最新を確認する。この記事を書いている時点では^2.7が最新です。
https://github.com/googleapis/google-api-php-client

$ composer require google/apiclient:”^2.7″

AdminController.php (*test)
L resource_path(‘static/analytics-*-*.p12’)で、p12を指定する

    public function index(){

        $client = new Google_Client();
        $client->setApplicationName("Client_Library_Examples");
        $client->setDeveloperKey(resource_path('static/analytics-*-*.p12'));
        dd($client->getAccessToken());

    	$user = Auth::user();
        return view('admin.index',compact('user'));
    }

nullが返ってくるとOKっぽい。

テスト環境と同じ様に書いてみます。

use Google_Client;
use Google_Service_Analytics;

$service_account_email = '*.iam.gserviceaccount.com';
      $key = file_get_contents(resource_path('static/analytics-*-*.p12'));
      $profile = '*';

      $client = new Google_Client();
      $analytics = new Google_Service_Analytics($client);

      $cred = new Google_Auth_AssertionCredentials(
        $service_account_email,
        array(Google_Service_Analytics::ANALYTICS_READONLY),
        $key
      );

      $client->setAssertionCredentials($cred);
      if($client->getAuth()->isAccessTokenExpired()){
        $client->getAuth()->refreshTokenWithAssertion($cred);
      }

Class ‘App\Http\Controllers\Google_Auth_AssertionCredentials’ not foundのエラー

issueに原因が載ってます。
https://github.com/GoogleCloudPlatform/nodejs-docs-samples/issues/158

Oh, I've just found https://github.com/google/google-api-php-client/blob/master/UPGRADING.md

So it's the docs at https://developers.google.com/analytics/devguides/reporting/core/v3/quickstart/service-php that are wrong.

GoogleDevコンソールで、「サービス アカウント キーの作成」からjsonファイルを作成して、以下に書き換えます。

use Google_Client;
use Google_Service_Analytics;

$profile = '*';

        $client = new Google_Client();
        $client->setScopes(array('https://www.googleapis.com/auth/analytics.readonly'));

        $client->setSubject('*.iam.gserviceaccount.com');
        $client->setAuthConfig(array(
            'type' => 'service_account',
            'client_email' => '*.iam.gserviceaccount.com',
            'client_id' => '*',
            'private_key' => "-----BEGIN PRIVATE KEY-----***-----END PRIVATE KEY-----\n"
        ));

        $analytics= new Google_Service_Analytics($client);

         $result = $analytics->data_ga->get(
         'ga:' . $profile,
         'yesterday',
         '0daysAgo',
         'ga:pageviews',
         array(
           // "dimensions" => 'ga:pageTitle',
           "dimensions" => 'ga:pagePath',
           "sort" => '-ga:pageviews',
           "max-results" => '10',
         )
        );

        $data = $result->rows;
        dd($data);

これでいけました。結局p12は使わない。
う〜ん、AnalyticsAPIは使うの緊張する。

amazon linux2(vagrant) + Laravel 7.xでDuskを使うまでの手順

Laravelでseleniumを使おうと思ったら、duskというパッケージがあるらしいので、duskをインストールして使っていきます。環境は、vagrant、amazon linux2, laravel 7.2.1です。

### 1.duskインストール
$ php composer.phar require –dev laravel/dusk
– laravel/dusk v5.10.0 requires ext-zip * -> the requested PHP extension zip is missing from your system.

$ sudo yum install php-pecl-zip.x86_64
$ php composer.phar require –dev laravel/dusk

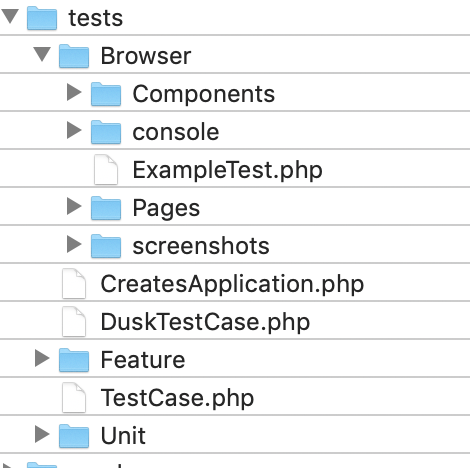
$ php artisan dusk:install
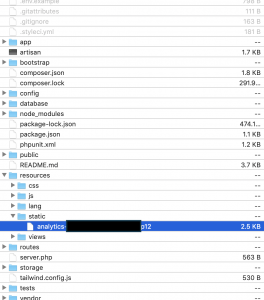
testsディレクトリにBrowserディレクトリが作られる

.env

APP_URL=http://192.168.33.10:8000

### 2.duskテスト
$ php artisan dusk:make LoginTest

/tests/Browser/LoginTest.php

public function test_can_login_successfull(){
        $this->browse(function (Browser $browser) {
            $browser->visit('/login')
                ->type('email', 'foo@hoge.com')
                ->type('password', 'hogehoge')
                ->press('Login')
                ->assertSee('this is subscriber');
        });
    }
$ php artisan dusk
1) Tests\Browser\ExampleTest::testBasicExample
Facebook\WebDriver\Exception\WebDriverCurlException: Curl error thrown for http POST to /session with params: {"capabilities":{"firstMatch":[{"browserName":"chrome","goog:chromeOptions":{"binary":"","args":["--disable-gpu","--headless","--window-size=1920,1080"]}}]},"desiredCapabilities":{"browserName":"chrome","platform":"ANY","chromeOptions":{"binary":"","args":["--disable-gpu","--headless","--window-size=1920,1080"]}}}

Failed to connect to localhost port 9515: Connection refused

ん? ChromeDriverが入っていない?

### 3.ChromeDriver インストール
$ ./vendor/laravel/dusk/bin/chromedriver-linux –verbose
./vendor/laravel/dusk/bin/chromedriver-linux: error while loading shared libraries: libX11.so.6: cannot open shared object file: No such file or directory
$ sudo yum install -y libX11
$ ./vendor/laravel/dusk/bin/chromedriver-linux –v
ChromeDriver 80.0.3987.106 (f68069574609230cf9b635cd784cfb1bf81bb53a-refs/branch-heads/3987@{#882})

$ php artisan dusk
1) Tests\Browser\ExampleTest::testBasicExample
Facebook\WebDriver\Exception\UnknownErrorException: unknown error: cannot find Chrome binary

なに、今度はChrome binary?

### 4.Chrome install
$ curl https://intoli.com/install-google-chrome.sh | bash
$ php artisan dusk

1) Tests\Browser\LoginTest::test_can_login_successfull
Facebook\WebDriver\Exception\NoSuchElementException: no such element: Unable to locate element: {"method":"css selector","selector":"body textarea[name='email']"}
  (Session info: headless chrome=80.0.3987.149)

どういうこと? 

### 5.visitでパスを直接指定

public function test_can_login_successfull(){
        $this->browse(function (Browser $browser) {
            $browser->visit('http://192.168.33.10:8000/login')
                // ->dump();
                ->type('email', 'foo@hoge.com')
                ->type('password', 'hogehoge')
                ->press('Login')
                ->assertSee('this is subscriber');
        });

    }
$ php artisan dusk
PHPUnit 8.5.2 by Sebastian Bergmann and contributors.

.                                                                   1 / 1 (100%)

Time: 2.18 seconds, Memory: 18.00 MB

OK (1 test, 1 assertion)

上手くいきました。半日かかりましたが、seleniumが何やってるかは理解できました。

laravel-websockets

Laravel WebScokets
Git hub: laravel-websockets
Official Document: laravel-websockets

– Drop-in Pusher replacement, SSL support, Laravel Echo support and a debug dashboard are just some of its features.

### How to use
https://docs.beyondco.de/laravel-websockets/1.0/getting-started/introduction.html

### package install
$ php composer.phar require beyondcode/laravel-websockets

### publish migration file
$ php artisan vendor:publish –provider=”BeyondCode\LaravelWebSockets\WebSocketsServiceProvider” –tag=”migrations”
Copied File [/vendor/beyondcode/laravel-websockets/database/migrations/create_websockets_statistics_entries_table.php.stub] To [/database/migrations/2020_02_07_062321_create_websockets_statistics_entries_table.php]

$ php artisan migrate
+——————————-+
| Tables_in_chat |
+——————————-+
| failed_jobs |
| messages |
| migrations |
| password_resets |
| users |
| websockets_statistics_entries |
+——————————-+

mysql> describe websockets_statistics_entries;
+————————-+——————+——+—–+———+—————-+
| Field | Type | Null | Key | Default | Extra |
+————————-+——————+——+—–+———+—————-+
| id | int(10) unsigned | NO | PRI | NULL | auto_increment |
| app_id | varchar(255) | NO | | NULL | |
| peak_connection_count | int(11) | NO | | NULL | |
| websocket_message_count | int(11) | NO | | NULL | |
| api_message_count | int(11) | NO | | NULL | |
| created_at | timestamp | YES | | NULL | |
| updated_at | timestamp | YES | | NULL | |
+————————-+——————+——+—–+———+—————-+
※アクセス情報が保存される

### Websocket Configuration File
$ php artisan vendor:publish –provider=”BeyondCode\LaravelWebSockets\WebSocketsServiceProvider” –tag=”config”
Copied File [/vendor/beyondcode/laravel-websockets/config/websockets.php] To [/config/websockets.php]

### config/broadcasting.php

'pusher' => [
            'driver' => 'pusher',
            'key' => env('PUSHER_APP_KEY'),
            'secret' => env('PUSHER_APP_SECRET'),
            'app_id' => env('PUSHER_APP_ID'),
            'options' => [
                'cluster' => env('PUSHER_APP_CLUSTER'),
                'encrypted' => true,
                'host' => '192.168.33.10', // ご自身のホスト名
                'port' => 6001,
                'scheme' => 'http' // or https
            ],
        ],

### .env

PUSHER_APP_ID=1
PUSHER_APP_KEY=laravelWebsockets
PUSHER_APP_SECRET=laravelWebsockets
PUSHER_APP_CLUSTER=ap1

$ php artisan serve –host 192.168.33.10 –port 8000
$ php artisan websockets:serve
Starting the WebSocket server on port 6001…

app.js:28574 WebSocket connection to ‘wss://192.168.33.10/app/laravelWebsockets?protocol=7&client=js&version=5.0.3&flash=false’ failed: Error in connection establishment: net::ERR_CONNECTION_REFUSED

何故だ。。。