設定ー> Raspberrypi設定->インターフェイス->カメラ->有効
$ vcgencmd get_camera
supported=1 detected=1
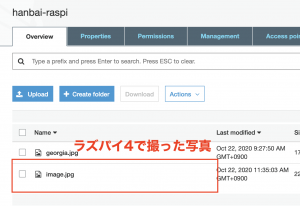
$ sudo raspistill -o image.jpg
$ raspivid -f -t 0
$ sudo apt-get install libjson-c3
$ sudo apt-get install insserv
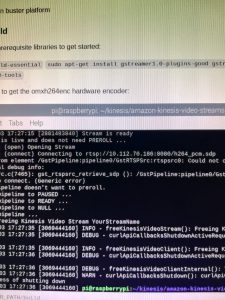
https://qiita.com/lis-hanzomon/items/896342ec1af95d42db26
https://github.com/lis-hanzomon/ONVIF-ClientApp/tree/master/bin
$ sudo apt-get install cmake
$ sudo apt-get install libxml2-dev
$ sudo apt-get install uuid-dev
$ sudo apt-get install libavformat-dev libavcodec-dev libavutil-dev libswresample-dev libswscale-dev
$ sudo apt-get install libjson-c-dev
https://download.videolan.org/pub/contrib/live555/
downloadして解凍、makeします
$ tar zxvf live.2018.02.12.tar.gz
$ cd live
$ ./genMakefiles linux
$ make
$ sudo make install
$ sudo apt-get install flex bison
$ sudo apt-get install libssl-dev
https://ja.osdn.net/projects/sfnet_gsoap2/downloads/gsoap_2.8.117.zip/
$ unzip gsoap_2.8.117.zip
$ cd gsoap-2.8
$ ./configure
$ make
$ sudo make install
$ sudo apt-get install build-essential cmake pkg-config libjpeg-dev libtiff5-dev libjasper-dev libpng-dev libavcodec-dev libavformat-dev libswscale-dev libv4l-dev libxvidcore-dev libx264-dev libfontconfig1-dev libcairo2-dev libgdk-pixbuf2.0-dev libpango1.0-dev libgtk2.0-dev libgtk-3-dev libatlas-base-dev gfortran libhdf5-dev libhdf5-serial-dev libhdf5-103 libqtgui4 libqtwebkit4 libqt4-test python3-pyqt5 python3-dev -y
$ pip3 install opencv-contrib-python==4.1.0.25
$ git clone https://github.com/lis-hanzomon/RedBrick.git
$ cd RedBrick
$ cd RedBrick
$ mkdir build
$ cd build
$ cmake ..
$ make
$ sudo make install
ラズパイ詳しくなるには、ラズパイメインでやらないと駄目だな