[画像認識] MNISTによる手書き文字の認識

手書き文字認識はMNISTのデータセットを使って、keras, kaggleからデータを取り込むことができる。

import tensorflow as tf
import numpy as np
import matplotlib.pyplot as plt

mnist = tf.keras.datasets.mnist.load_data()
train, test = mnist
(x_train, y_train),(x_test, y_test) = mnist

print(x_train.shape)
print(y_train.shape)
print(x_test.shape)
print(y_test.shape)

(60000, 28, 28) // 28x28pxのデータが60000枚
(60000,)
(10000, 28, 28) // 28x28pxのデータが10000枚
(10000,)

データセットを画像で確認

print(x_train[0])

plt.imshow(x_train[0])
plt.savefig('image.jpg',dpi=100)

### モデルの作成

x_train = x_train / 255.0  # 0-1の間に抑えるよう正規化する
x_test = x_test / 255.0

# Sequential(系列)モデル構築 インスタンスにリストを追加する
model = tf.keras.models.Sequential()
model.add(tf.keras.layers.Input((28, 28))) # 入力層は28x28
model.add(tf.keras.layers.Flatten()) # 一元配列1, 784 に変換

# 入力層から情報を受け継いで計算を行う中間層
model.add(tf.keras.layers.Dense(128)) # 128個に全結合
model.add(tf.keras.layers.Activation(tf.keras.activations.relu)) # 中間層の活性化関数の設定, reluは0以下は0、0以上は入力値を出力
model.add(tf.keras.layers.Dropout(0.2)) # 過学習を防ぐため20%ドロップアウト

# 出力
model.add(tf.keras.layers.Dense(10)) # 出力層0~9の10個
model.add(tf.keras.layers.Activation(tf.keras.activations.softmax)) # softmax関数は出力値の合計が100%になる

# コンパイル
model.compile(
	optimizer=tf.keras.optimizers.Adam(), # optimizerは逆伝播モジュール 手本と出力を比較して重みw, バイアスbを修正, AdamはAdaptive Moment Estimationの略でmomentumSGDとRMSpropを合わせたアルゴリズム
	loss=tf.keras.losses.sparse_categorical_crossentropy, # 誤差関数モジュール 正解値と予想値のズレを計算
	metrics=[tf.keras.metrics.sparse_categorical_accuracy] # 評価関数
)

# fitで学習 epochsで5回
model.fit(x_train, y_train, epochs=5)

print(model.evaluate(x_test, y_test))

plt.imshow(x_test[0])
plt.savefig('data/test_img.jpg',dpi=100)

# predict
pred = model.predict(x_test[0][np.newaxis]) # numpyのnewaxis
print(np.argmax(pred)) # 一番大きい要素


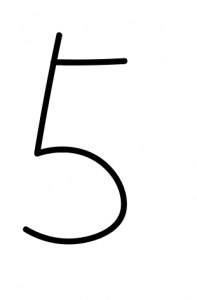
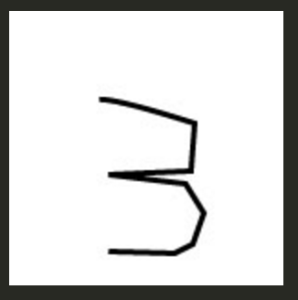
img = Image.open("data/handwriting.jpg").convert('L')
img.thumbnail((28, 28))
img = np.array(img)
pred = model.predict(img[np.newaxis]) # numpyのnewaxis
print(np.argmax(pred)) # 一番大きい要素


[0.0724998340010643, 0.9782000184059143]
7
3

ほう

[tesseract4.1.1] 免許証とマイナンバーはどこまで読み取れるのか

tesseractで免許証、マイナンバーは読み取れるのか?

$ tesseract -v
tesseract 4.1.1-rc2-25-g9707

// 運転免許 表
$ tesseract car_1.jpg output -l jpn
sl率 4*********** *

11*018 148ョlコ

// 運転免許 裏
$ tesseract car_2.jpg output -l jpn

// マイナンバー 表
$ tesseract my_1.jpg output -l jpn
個人番号
カード

性別 男

// マイナンバー 裏
$ tesseract my_2.jpg output -l jpn
れます

まともに読み取れたのは免許証番号ぐらい。
なるほど、精度の問題か。

[OpenCV4.5.0] RPAっぽい葉書から郵便番号の抽出2

元画像

scikit-learnの Handwritten Digits Data SetのSVMの学習済データから予想する。

import cv2
import matplotlib.pyplot as plt

def detect_zipno(fname):
	img = cv2.imread(fname)
	h, w = img.shape[:2]
	img = img[0:h//6, w//3:]

	gray = cv2.cvtColor(img, cv2.COLOR_BGR2GRAY)
	gray = cv2.GaussianBlur(gray, (1, 1), 0)
	im2 = cv2.threshold(gray, 140, 255, cv2.THRESH_BINARY_INV)[1]

	cnts = cv2.findContours(im2, cv2.RETR_LIST, cv2.CHAIN_APPROX_SIMPLE)[0]

	result = []
	for pt in cnts:
		x, y, w, h = cv2.boundingRect(pt)
		if not(50 < w < 70): continue
		result.append([x, y, w, h])
	result = sorted(result, key=lambda x: x[0])

	result2 = []
	lastx = -100
	for x, y, w, h in result:
		if(x - lastx) < 10: continue
		result2.append([x, y, w, h])
		lastx = x
	for x, y, w, h in result2:
		cv2.rectangle(img, (x, y), (x+w, y+h), (0, 255, 0), 3)
	return result2, img

if __name__ == '__main__':

	cnts, img = detect_zipno("postcard.png")

	cv2.cvtColor(img, cv2.COLOR_BGR2RGB)
	cv2.imwrite("result.png", img)

$ python3 predict_zip.py
[9]
[2]
[5]
[4]
[3]
[4]
[8]

駄目だ、2と4しか合ってない
ただ、やり方の流れはわかった。
データセットの量を多くして、二次元配列を8x8ピクセルではなく、もう少し細かくしたら、結果が変わりそうだ。

[OpenCV4.5.0] RPAっぽい葉書から郵便番号の抽出

まず、葉書の郵便番号部分を抽出する。
元画像

import cv2
import matplotlib.pyplot as plt

def detect_zipno(fname):
	img = cv2.imread(fname)
	h, w = img.shape[:2]
	img = img[0:h//2, w//3:]

	gray = cv2.cvtColor(img, cv2.COLOR_BGR2GRAY)
	gray = cv2.GaussianBlur(gray, (3, 3), 0)
	im2 = cv2.threshold(gray, 140, 255, cv2.THRESH_BINARY_INV)[1]

	cnts = cv2.findContours(im2, cv2.RETR_LIST, cv2.CHAIN_APPROX_SIMPLE)[0]

	result = []
	for pt in cnts:
		x, y, w, h = cv2.boundingRect(pt)
		if not(50 < w < 70): continue
		result.append([x, y, w, h])
	result = sorted(result, key=lambda x: x[0])

	result2 = []
	lastx = -100
	for x, y, w, h in result:
		if(x - lastx) < 10: continue
		result2.append([x, y, w, h])
		lastx = x
	for x, y, w, h in result2:
		cv2.rectangle(img, (x, y), (x+w, y+h), (0, 255, 0), 3)
	return result2, img

if __name__ == '__main__':

	cnts, img = detect_zipno("postcard.png")

	cv2.cvtColor(img, cv2.COLOR_BGR2RGB)
	cv2.imwrite("result.png", img)

$ python3 app.py

なんでやねん。なんで"2"と"4"が抽出されない。。。
前処理を少し変える。

	img = img[0:h//5, w//3:] # h//3 -> h//5

4が抽出されない。
なぜだ?? ぼかしの周囲のサイズを変えてみる。

	gray = cv2.GaussianBlur(gray, (1, 1), 0)

おおおおおおおおおおおおおおおおお
AI開発で、パラメータを調整するって、こういうこと????
うん、ちょっと興奮しました。
デバッグとはなんか感覚が違いますね。

あれ、というかこれ、記入する領域がわかってたらtesseractでOCRすりゃいいんだから、RPAできんじゃん。。
選挙システムとか注文書とか。。

[sklearn] SVMでillustratorで書いた数字を判定しよう

まずイラレで文字画像を作ります。


それを学習データから判定します。

import cv2
import joblib

def predict_digit(filename):
	clf = joblib.load("digits.pkl")
	# 自分で用意した手書きの画像ファイルを読み込む
	my_img = cv2.imread(filename)
	my_img = cv2.cvtColor(my_img, cv2.COLOR_BGR2GRAY)
	my_img = cv2.resize(my_img, (8, 8))
	my_img = 15 - my_img // 16 # 白黒反転

	my_img = my_img.reshape((-1, 64)) # 二次元を一次元に変換
	res = clf.predict(my_img)
	return res[0]

n = predict_digit("2.png")
print("2.png = " + str(n))
n = predict_digit("5.png")
print("5.png = " + str(n))
n = predict_digit("8.png")
print("8.png = " + str(n))

$ python3 app.py
2.png = 3
5.png = 7
8.png = 3

おいおいおい、全然合ってないじゃん
まー、2と3、5と7、8と3は似てるといえば似てるけど、せめて一個ぐらい合ってもいいのに。。

[sklearn] 手書き数字のデータセットから学習

まずmatplotlibとsklearnを入れます。

$ sudo pip3 install matplotlib
$ sudo pip3 install sklearn

scikit-learnに付属しているHandwritten Digits Data Setを使います。

import matplotlib.pyplot as plt

from sklearn import datasets
digits = datasets.load_digits()

d0 = digits.images[0]
print(d0)

$ python3 app.py
[[ 0. 0. 5. 13. 9. 1. 0. 0.]
[ 0. 0. 13. 15. 10. 15. 5. 0.]
[ 0. 3. 15. 2. 0. 11. 8. 0.]
[ 0. 4. 12. 0. 0. 8. 8. 0.]
[ 0. 5. 8. 0. 0. 9. 8. 0.]
[ 0. 4. 11. 0. 1. 12. 7. 0.]
[ 0. 2. 14. 5. 10. 12. 0. 0.]
[ 0. 0. 6. 13. 10. 0. 0. 0.]]

### 画像の学習

from sklearn.model_selection import train_test_split # 学習用データとテスト用データに分割
from sklearn import datasets, svm, metrics # データセット、SupportVectorMachine, metrics
from sklearn.metrics import accuracy_score

digits = datasets.load_digits()
x = digits.images # 画像
y = digits.target # 数字
x = x.reshape((-1, 64)) # 画像の二次元配列を一次元配列に変換

x_train, x_test, y_train, y_test = train_test_split(x, y, test_size=0.2)

# データ学習
clf = svm.LinearSVC()
clf.fit(x_train, y_train)

y_pred = clf.predict(x_test) # 学習データを元にテスト画像から数字を予測
print(accuracy_score(y_test, y_pred)) # 答えと予想の精度を確認

92%の精度
$ python3 app.py
/usr/local/lib64/python3.6/site-packages/sklearn/svm/_base.py:977: ConvergenceWarning: Liblinear failed to converge, increase the number of iterations.
“the number of iterations.”, ConvergenceWarning)
0.9277777777777778

手順としては、
(1)画像をピクセルの二次元配列データにして、データセットとラベルをセットに保存
(2)上記データセットを集める
(3)ピクセルの二次元配列を一次元配列に変換し、学習用データとテスト用データに分割する
(4)SVMで学習用データを学習
(5)テストデータから正解を予測
(6)制度をチェックする

### 学習済みデータの保存/呼び出し
※from sklearn.externals import joblibだとバインドされないので注意

import joblib
# 学習用データの保存
joblib.dump(clf, 'digits.pkl')

呼び出し

import joblib
clf = joblib.load("digits.pkl")

$ python3 app.py
0.9777777777777777

なるほど、OpenCVで画像を二次元配列にするわけだな
フローはほぼ理解した

[tesseract4.1.1] 画像から文字を認識をしたい

tesseractを使います。

### install
$ sudo yum-config-manager –add-repo https://download.opensuse.org/repositories/home:/Alexander_Pozdnyakov/CentOS_8/
$ sudo rpm –import https://build.opensuse.org/projects/home:Alexander_Pozdnyakov/public_key
$ sudo yum update
$ sudo yum install tesseract
$ sudo yum install tesseract-langpack-jpn

### バージョン確認
$ tesseract -v
tesseract 4.1.1-rc2-20-g01fb
leptonica-1.78.0
libgif 5.1.4 : libjpeg 6b (libjpeg-turbo 1.5.3) : libpng 1.6.34 : libtiff 4.0.9 : zlib 1.2.11 : libwebp 1.0.0
Found AVX2
Found AVX
Found SSE

$ cd /usr/share/tesseract/4/tessdata/
$ sudo wget https://github.com/tesseract-ocr/tessdata/raw/master/eng.traineddata
$ sudo wget https://github.com/tesseract-ocr/tessdata/raw/master/jpn.traineddata

### テスト
– eng version

$ tesseract a.png output

– jpn version

$ tesseract test_jp.png output -l jpn

#### pyocr
tesseractをpythonで使えるようにする
$ sudo pip3 install pyocr

app.py

from PIL import Image
import sys
import pyocr

tools = pyocr.get_available_tools()
langs = tools[0].get_available_languages()

img = Image.open('test.png')
txt = tools[0].image_to_string(
	img,
	lang=langs[0],
	builder=pyocr.builders.TextBuilder(tesseract_layout=6)
)
print(txt)

vuitton画像にしてみる。
$ python3 app.py
LOUIS VUITTON

さて、そろそろラズパイやるか。