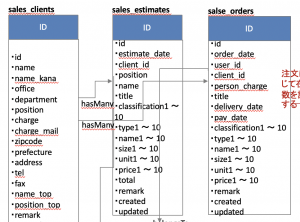
[Django3.0] PDFの見積書ダウンロード機能を作る

まずviewから

### template
対象の見積書のidを渡します。

<tbody>
						{% for item in data %}
						<tr>
							// 省略
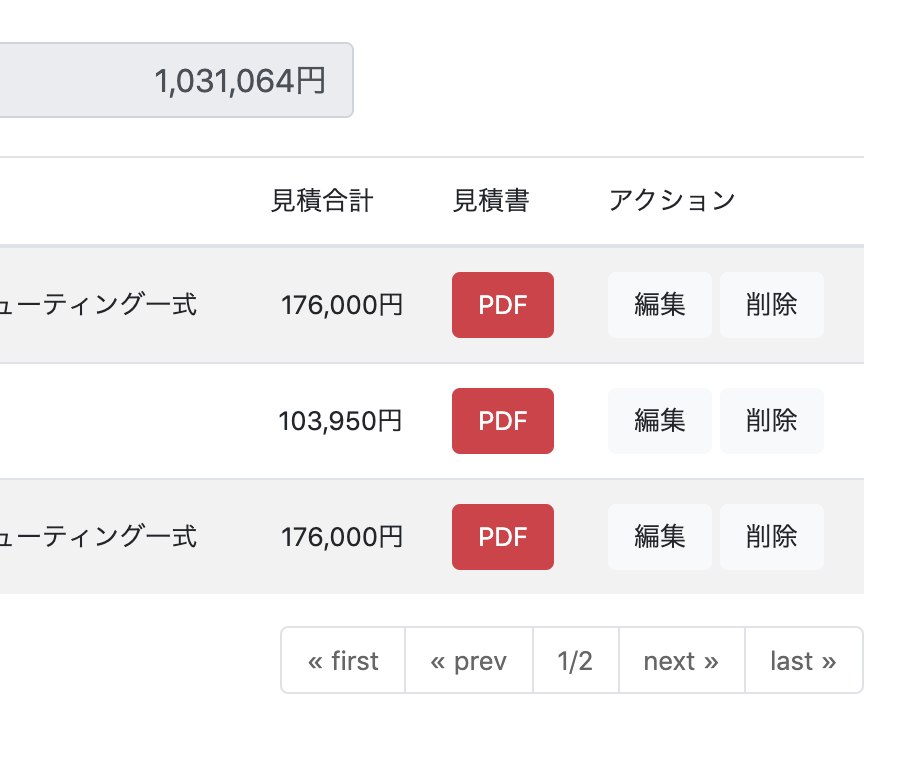
							<td class="text-nowrap"><button class="btn btn-danger" onclick="location.href='/pdf/{{item.id}}'">PDF</button></td>
							// 省略
						</tr>
						{% endfor %}
					</tbody>

### urls.py
views.pyにint:idを渡します。

urlpatterns = [
	// 省略
	path('pdf/<int:id>', views.pdf, name="pdf"),
]

### views.py
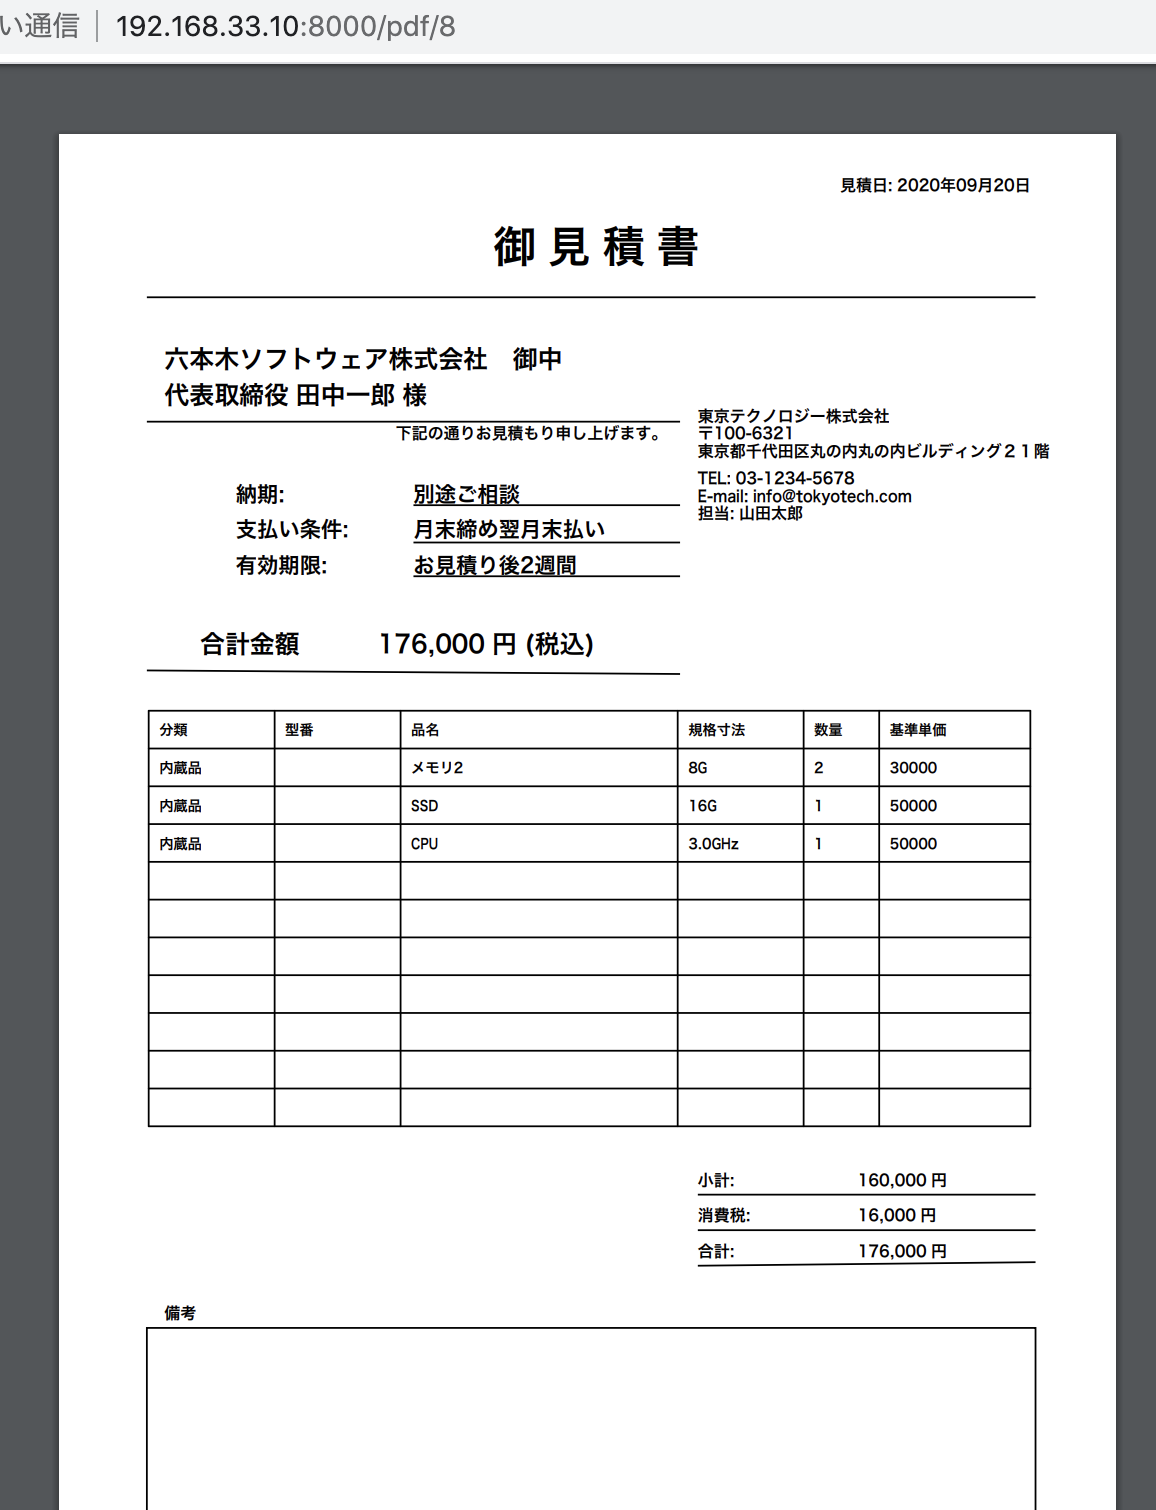
reportlabを読み込んで、対象IDの見積データおよび自社情報をmodelから引っ張ってきて見積書pdfをmake()し、作成したpdfをreturnする
modelから引っ張ってくるところ以外はdjangoを使わずにローカルでテストした書き方と同じ
3桁でカンマをつけるには”{:,d}”.format()と書く

from reportlab.pdfgen import canvas
from reportlab.pdfbase import pdfmetrics
from reportlab.pdfbase.cidfonts import UnicodeCIDFont
from reportlab.lib.pagesizes import A4, portrait
from reportlab.platypus import Table, TableStyle
from reportlab.lib.units import mm
from reportlab.lib import colors

def pdf(request, id):
	make(id)
	response = HttpResponse(open('./sales/static/sales/estimate.pdf','rb').read(), content_type='application/pdf')
	response["Content-Disposition"] = "filename=app.pdf"
	return response


def make(id): # ファイル名
    pdf_canvas = set_info(filename="estimate") # キャンバス名
    print_string(pdf_canvas, id)
    pdf_canvas.save() # 保存

def set_info(filename):
	pdf_canvas = canvas.Canvas("./sales/static/sales/{0}.pdf".format(filename))
	pdf_canvas.setAuthor("hpscript")
	pdf_canvas.setTitle("見積書")
	pdf_canvas.setSubject("見積書")
	return pdf_canvas

def print_string(pdf_canvas, id):
	try:
		data = Estimates.objects.get(id=id)
		master = Master.objects.get(id=1)
        // 省略
        except Estimates.DoesNotExist:
		return redirect('/estimate/1')

見積書のレイアウトを作るところが少し時間がかかるが、結構達成感あるね
うむ、OK 続いて受注管理を作っていこう

Python & reportlab でPDF見積書を作成

pythonでPDFの見積書を作っていきます。
reportlabでテーブルではなくテキスト配置で右寄せがわからないのが脛に傷。

# -*- coding: utf-8 -*-

from reportlab.pdfgen import canvas
from reportlab.pdfbase import pdfmetrics
from reportlab.pdfbase.cidfonts import UnicodeCIDFont
from reportlab.lib.pagesizes import A4, portrait
from reportlab.platypus import Table, TableStyle
from reportlab.lib.units import mm
from reportlab.lib import colors


def make(filename="estimate"): # ファイル名
    pdf_canvas = set_info(filename) # キャンバス名
    print_string(pdf_canvas)
    pdf_canvas.save() # 保存

def set_info(filename):
	pdf_canvas = canvas.Canvas("./{0}.pdf".format(filename))
	pdf_canvas.setAuthor("hpscript")
	pdf_canvas.setTitle("見積書")
	pdf_canvas.setSubject("見積書")
	return pdf_canvas

def print_string(pdf_canvas):
	# フォント登録
	pdfmetrics.registerFont(UnicodeCIDFont('HeiseiKakuGo-W5'))

	width, height = A4

	# 見積日
	font_size = 9
	pdf_canvas.setFont('HeiseiKakuGo-W5', font_size)
	pdf_canvas.drawString(440, 810, '見積日: 2020年10月1日')

	# title
	font_size = 24
	pdf_canvas.setFont('HeiseiKakuGo-W5', font_size)
	pdf_canvas.drawString(245, 770, '御 見 積 書')

	# 線
	pdf_canvas.line(50, 750, 550, 750)

	# 宛先
	font_size = 14
	pdf_canvas.setFont('HeiseiKakuGo-W5', font_size)
	pdf_canvas.drawString(60, 710, '六本木ソフトウェア株式会社 御中')
	pdf_canvas.drawString(60, 690, '営業部  山田太郎 様')

	# 線
	pdf_canvas.line(50, 680, 350, 680)

	# 注釈
	font_size = 9
	pdf_canvas.setFont('HeiseiKakuGo-W5', font_size)
	pdf_canvas.drawString(190, 670, '下記の通りお見積もり申し上げます。')

	# 納期、支払条件、有効期限
	font_size = 12
	pdf_canvas.setFont('HeiseiKakuGo-W5', font_size)
	pdf_canvas.drawString(100, 635, '納期:')
	pdf_canvas.drawString(200, 635, '別途ご相談')
	pdf_canvas.line(200, 633, 350, 633)

	pdf_canvas.drawString(100, 615, '支払い条件:')
	pdf_canvas.drawString(200, 615, '月末締め翌月末払い')
	pdf_canvas.line(200, 612, 350, 612)

	pdf_canvas.drawString(100, 595, '有効期限:')
	pdf_canvas.drawString(200, 595, 'お見積り後2週間')
	pdf_canvas.line(200, 593, 350, 593)

	# 自社情報
	font_size = 9
	pdf_canvas.setFont('HeiseiKakuGo-W5', font_size)
	pdf_canvas.drawString(360, 680, '丸の内ソフトウェア株式会社')
	pdf_canvas.drawString(360, 670, '〒100-0001')
	pdf_canvas.drawString(360, 660, '東京都千代田区千代田1-1-1')
	pdf_canvas.drawString(360, 645, 'TEL: 03-1234-5678')
	pdf_canvas.drawString(360, 635, 'E-mail: info@marunouchi-soft.com')
	pdf_canvas.drawString(360, 625, '担当: 田中一郎')

	# 合計金額
	font_size = 14
	pdf_canvas.setFont('HeiseiKakuGo-W5', font_size)
	pdf_canvas.drawString(80, 550, '合計金額')
	pdf_canvas.drawString(180, 550, '800,000 円 (税込)')

	# 線
	pdf_canvas.line(50, 540, 350, 538)

	# 分類、型番、品名、規格寸法、基準単価
	data = [
		['分類', '型番','品名', '規格寸法','数量','基準単価'],
		[' ',' ',' ',' ',' '],
		[' ',' ',' ',' ',' '],
		[' ',' ',' ',' ',' '],
		[' ',' ',' ',' ',' '],
		[' ',' ',' ',' ',' '],
		[' ',' ',' ',' ',' '],
		[' ',' ',' ',' ',' '],
		[' ',' ',' ',' ',' '],
		[' ',' ',' ',' ',' '],
		[' ',' ',' ',' ',' '],
	]
	table = Table(data, colWidths=(25*mm, 25*mm, 55*mm, 25*mm, 15*mm,30*mm), rowHeights=7.5*mm)
	table.setStyle(TableStyle([
			('FONT', (0, 0), (-1, -1), 'HeiseiKakuGo-W5', 8),
			('BOX', (0, 0), (-1, -1), 1, colors.black),
			('INNERGRID', (0, 0), (-1, -1), 1, colors.black),
			('VALIGN', (0, 0), (-1, -1), 'MIDDLE'),
		]))
	# table.wrapOn(pdf_canvas, 20*mm, 20*mm)
	table.wrapOn(pdf_canvas, 20*mm, 20*mm)
	table.drawOn(pdf_canvas, 18*mm, 100*mm)

	# 小計、消費税、合計
	font_size = 9
	pdf_canvas.setFont('HeiseiKakuGo-W5', font_size)
	pdf_canvas.drawString(360, 250, '小計:')
	pdf_canvas.drawString(450, 250, '700000円')
	pdf_canvas.line(360, 245, 550, 245)	

	pdf_canvas.drawString(360, 230, '消費税:')
	pdf_canvas.drawString(450, 230, '70000円')
	pdf_canvas.line(360, 225, 550, 225)	

	pdf_canvas.drawString(360, 210, '合計:')
	pdf_canvas.drawString(450, 210, '770000円')
	pdf_canvas.line(360, 205, 550, 207)	

	# 宛先
	font_size = 9
	pdf_canvas.setFont('HeiseiKakuGo-W5', font_size)
	pdf_canvas.drawString(60, 175, '備考')

	pdf_canvas.rect(50, 50, 500, 120)


	pdf_canvas.showPage()
	
if __name__ == '__main__':
	make()

$ python estimate.py

OK、これをDjangoに組み込みたい。この関数はviews.pyに書くけば良いのか???

Python&reportlabでPDFを生成2

# -*- coding: utf-8 -*-

from reportlab.pdfgen import canvas
from reportlab.pdfbase import pdfmetrics
from reportlab.pdfbase.cidfonts import UnicodeCIDFont
import reportlab.lib.colors as color

def make(filename="test"):
	pdf_canvas = set_info(filename)
	print_string(pdf_canvas)
	# print_figure(pdf_canvas)
	# print_line(pdf_canvas)
	pdf_canvas.save()

# 初期設定
def set_info(filename):
	pdf_canvas = canvas.Canvas("./{0}.pdf".format(filename), bottomup=False) # 原点は左上

	pdf_canvas.setAuthor("hpscript")
	pdf_canvas.setTitle("make pdf using reportlab")
	pdf_canvas.setSubject("reportlab")

	return pdf_canvas


# 文字
def print_string(pdf_canvas):
	pdfmetrics.registerFont(UnicodeCIDFont("HeiseiKakuGo-W5"))
	pdfmetrics.registerFont(UnicodeCIDFont("HeiseiMin-W3"))

	pdf_canvas.setFont("HeiseiKakuGo-W5", 15)
	pdf_canvas.drawString(50, 50, "日経平均レバレッジ上場投信")

	pdf_canvas.setFont("HeiseiMin-W3", 30)
	pdf_canvas.drawString(300, 100, "日経ダブルインバース上場投信")

if __name__ == '__main__':
	make()

$ python test.py

いけますね、なんとなく掴みました。
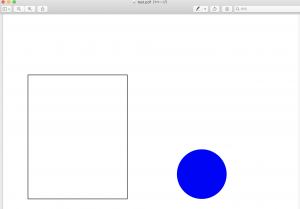
続いて図形

def print_line(pdf_canvas):
	pdf_canvas.rect(50, 150, 200, 250)

	pdf_canvas.setFillColor(color.blue)
	pdf_canvas.circle(400, 350, 50, stroke=False, fill=True)

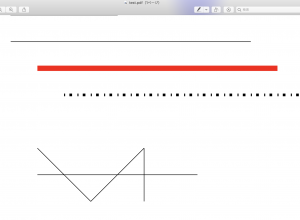
# 線
def print_line(pdf_canvas):
	# 普通の線
	pdf_canvas.line(50, 450, 500, 450)

	# 赤い太い線
	pdf_canvas.setStrokeColor(color.red)
	pdf_canvas.setLineWidth(10)
	pdf_canvas.line(100, 500, 550, 500)

	# 破線
	pdf_canvas.setStrokeColor(color.black)
	pdf_canvas.setLineWidth(5)
	pdf_canvas.setDash([2, 8, 5, 10])
	pdf_canvas.line(150, 550, 600, 550)

	# 複数の線
	pdf_canvas.setLineWidth(1)
	pdf_canvas.setDash([])
	lines = [(100, 650, 200, 750),(200, 750, 300, 650),(300, 650, 300, 750),(100, 700, 400, 700)]
	pdf_canvas.lines(lines)

OK^^

PythonでPDFの見積書を描画したい1

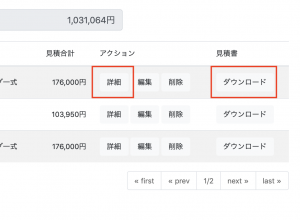
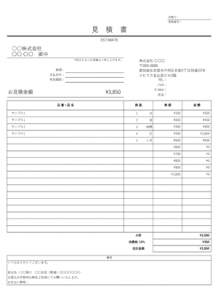
販売管理システムの見積一覧ページで、詳細ボタンを押下するとPDFの見積書を表示し、ダウンロードボタンを押下するとPDFの見積書をダウンロードできるようにしたい。

最初なのでデザインはなるべくシンプルに
▼見積書イメージ

## reportlab
PDF作成ライブラリのreportlabを使用します。

– reportlabのインストール
$ pip install reportlab

### 初期設定
app.py

def make(filename="estimate"):
	pdf_canvas = set_info(filename)
	print_string(pdf_canvas)
	pdf_canvas.save() # pdfを保存

def set_info(filename):
	pdf_canvas = canvas.Canvas("./{0}.pdf".format(filename))
	pdf_canvas.setAuthor("hpscript")
	pdf_canvas.setTitle("見積書")
	pdf_canvas.setSubject("見積書")
	return pdf_canvas

### 日本語設定

def print_string(pdf_canvas)
	# フォント登録
	pdfmetrics.registerFont(UnicodeCIDFont('HeiseiKakuGo-W5'))

	width, height = A4

	font_size = 24

	pdf_canvas.setFont('HeiseiKakuGo-W5', font_size)

	pdf_canvas.drawString(60, 770, '見積書')

### 表の描画
データ入力
-> 二次元配列で書く
e.g. 三行四列の場合

	data = [
		['(0,0)', '(1,0)', '(2,0)'],
		['(0,1)', '(1,1)', '(2,1)'],
		['(0,2)', '(1,2)', '(2,2)'],
		['(0,3)', '(1,3)', '(2,3)'],
	]

tableの大きさ指定
->全列30mm, 全行40mmの場合

table = Table(data, colWidths=30*mm, rowHeights=40*mm)

->1列目10mm、2列目20mm、3列目30mm、1〜2行目30mm、3〜4行目50mmの場合

table = Table(data, colWidths=(10*mm, 20*mm, 30*mm), rowHeights=(30*mm, 30*mm, 50*mm, 50*mm))

tableの装飾

	table.setStyle(TableStyle([
		...
	]))

表にフォントを設定する

('FONT', 始点, 終点, fontname, size)
('FONT', (0, 0), (2, 3), self.font_name, 10)
('FONT', (0, 0), (-1, -1), self.font_name, 10)

表を罫線で囲む

	('BOX', 始点, 終点, 太さ, color)
	('BOX', (0, 0), (2, 3), 1, colors.black)
	('BOX', (0, 0), (-1, -1), 1, colors.black)

四角の内側に罫線を書く

	('INNERGRID', 始点, 終点, 太さ, color)
	('INNERGRID', (0, 0), (2, 3), 1, colors.black)
	('INNERGRID', (0, 0), (-1, -1), 1, colors.black)

フォントの場所を指定

	('VALIGN', 始点, 終点, TOP or MIDDLE or BOTTOM)
	('VALIGN', (0, 0), (0, 3), TOP)
	('VALIGN', (1, 0), (1, 3), MIDDLE)
	('VALIGN', (2, 0), (2, 3), BOTTOM)

セルの結合

	('SPAN', 始点, 終点)
	('SPAN', (0,0), (0, 1))
	('SPAN', (2, 2) (2, 3))


指定した場所に線を引く
- 横線

	('LINEBEFORE', 始点, 終点, 太さ, color)
	('LINEBEFORE', (2, 1), (2, 2), 1, colors.black)

– 縦線

	('LINEABOVE', 始点, 終点, 太さ, color)
	('LINEABOVE', (0, 0), (0, 0), 1, colors.black)

テーブルを書き出す位置を指定

	table.wrapOn(pdf_canvas, 145*mm, 235*mm)
	table.wrapOn(pdf_canvas, 145*mm, 235*mm)

なんとなく基礎を理解したので、次は実際に書いていきたいと思います。

[Django3.0]ページ内検索のページネーションをGETメソッドで実装する

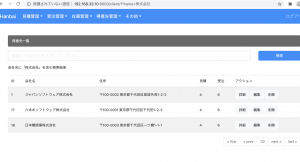
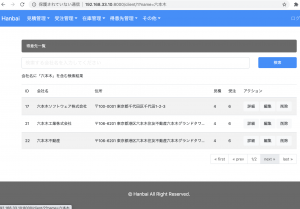
得意先一覧ページで、会社名検索のページネーションの実装について考えます。

formで method=”post”とすれば、views.pyで request.POST[‘*’]と書けば、postされた値を取得することができるのですが、取得データの数が多い場合、検索結果が1ページに収まらないケースが出てきます。

その際に、ページネーションのリンクを以下のように、data.previous_page_numberやdata.next_page_numberなどと書くと、次のページにはGETで遷移してしまうため、検索クエリが引き継がれません。

<li class="page-item">
						<a class="page-link" href="/client/1">&laquo; first</a>
					</li>
					<li class="page-item">
						<a class="page-link" href="/client/{{data.previous_page_number}}">&laquo; prev</a>
					</li>

その為、ページ内検索の場合は、methodをPOSTではなく、GETに変更します。

form

<form action="/client/1" method="get">
				<div class="form-group row">
					<div class="col-md-10">
						<input type="text" class="form-control" name="name" placeholder="検索する会社名を入力してください">
					</div>
					<div class="col-md-2">
						<button class="btn search-btn" type="submit">検索</button>
					</div>
				</div>
			</form>

views.pyでは、以下のようにrequest.GET.get(‘*’,None)で、getMethodがあるか判定します。
views.py

def client(request, num=1):
	if(request.GET.get('name',None)):
		name= request.GET['name']
		data = Clients.objects.filter(name__contains=name)
		page = Paginator(data, 3)
		params = {
			'data' : page.get_page(num),
			'query' : "会社名に「" + name + "」を含む検索結果"
		}
	else:
		data = Clients.objects.all()
		page = Paginator(data, 3)
		params = {
			'data' : page.get_page(num)
		}
	return render(request, 'sales/client.html', params)

ページネーション
リンク先に、{% if request.GET.name %}?name={{ request.GET.name }}{% endif %}を追加してあげます。

<ul class="pagination justify-content-end">
					{% if data.has_previous %}
					<li class="page-item">
						<a class="page-link" href="/client/1{% if request.GET.name %}?name={{ request.GET.name }}{% endif %}">&laquo; first</a>
					</li>
					<li class="page-item">
						<a class="page-link" href="/client/{{data.previous_page_number}}{% if request.GET.name %}?name={{ request.GET.name }}{% endif %}">&laquo; prev</a>
					</li>
					{% else %}
					<li class="page-item">
						<a class="page-link">&laquo; first</a>
					</li>
					<li class="page-item">
						<a class="page-link">&laquo; prev</a>
					</li>
					{% endif %}
					<li class="page-item">
						<a class="page-link">{{data.number}}/{{data.paginator.num_pages}}</a>
					</li>
					{% if data.has_next %}
					<li class="page-item">
						<a class="page-link" href="/client/{{data.next_page_number}}{% if request.GET.name %}?name={{ request.GET.name }}{% endif %}">next &raquo;</a>
					</li>
					<li class="page-item">
						<a class="page-link" href="/client/{{data.paginator.num_pages}}{% if request.GET.name %}?name={{ request.GET.name }}{% endif %}">last &raquo;</a>
					</li>
					{% else %}
					<li class="page-item">
						<a class="page-link">next &raquo;</a>
					</li>
					<li class="page-item">
						<a class="page-link">last &raquo;</a>
					</li>
					{% endif %}
				</ul>

このように書くことで、ページネーションで遷移する場合でも、検索クエリを引き継ぐことができます。

検索項目が「会社名」だけだが、項目が増えるともう少し複雑になりそう。。
と思ったが、実際に書いてみたら割と簡単だった。

さー、いよいよ次はPythonでPDF。やっとここまで来ました。

[Django3.0]datepickerの範囲指定で検索して表示する

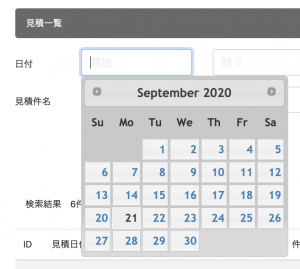
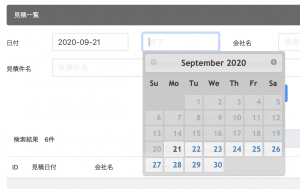
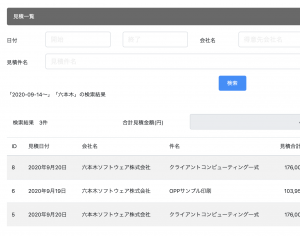
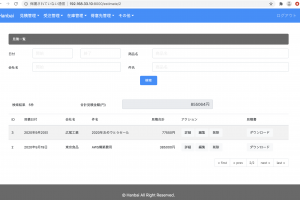
見積一覧ページで、「日付」「会社名」「件名」でページ内検索できるようにする。
なお、日付は、範囲指定か、以上以下で検索できるようにする

画面

### template

<form action="/estimate/1" method="post">
				{% csrf_token %}
				<div class="form-group row">
						<label for="datepicker_s" class="col-md-1 col-form-label">日付</label>
						<div class="col-md-2">
							<input name="datepicker_s" type="text" class="form-control align-bottom" id="start" placeholder="開始">
						</div>
						<div class="col-md-2">
							<input name="datepicker_e" type="text" class="form-control" id="end" placeholder="終了">
						</div>
						<label for="client_name" class="col-md-1 col-form-label">会社名</label>
						<div class="col-md-6">
							<input name="client_name" type="text" class="form-control" id="tel" placeholder="得意先会社名">
						</div>
				</div>

				<div class="form-group row">
						<label for="title" class="col-md-1 col-form-label">見積件名</label>
						<div class="col-md-11">
							<input type="text" class="form-control align-bottom" name="title" id="title" placeholder="見積件名">
						</div>
				</div>

				<div class="">
						<button class="btn search-btn text-center" type="submit">検索</button>
				</div>
			</form>

			<span>{{ query }}</span>

JS

$(function(){
			var format = 'yy-mm-dd';

			var start = $("[name=datepicker_s]").datepicker({
				dateFormat: 'yy-mm-dd'
			}).on("change", function(){
				end.datepicker("option", "minDate", getDate(this));
			});

			var end = $("[name=datepicker_e]").datepicker({
				dateFormat: 'yy-mm-dd'
			}).on("change", function(){
				start.datepicker("option", "maxDate", getDate(this));
			});

			function getDate(element){
				var date;
				try {
					date = $.datepicker.parseDate(format, element.value);
				} catch(error){
					date = null;
				}
				return date;
			}
		});

html側で「終了」が「開始」より前で指定できないようバリデーションがかかります。

### views.py
– 1.「開始」「終了」の入力があった場合、2.「開始」のみ入力があった場合、3.「終了」のみ入力があった場合、4.「開始」「終了」の入力がないPOSTの場合、5.「GET」の場合 でそれぞれレコードを取得します。
– ForeginKeyのクエリを検索する場合は、${model}__${column}で検索する。ここでは、顧客の会社名一部一致の検索のため、client__name__containsとしている。
– 検索内容を検索結果ページに表示させる

def estimate(request, num=1):
	if(request.method=='POST' and request.POST['datepicker_s'] and request.POST['datepicker_e']):
		data = Estimates.objects.filter(estimate_date__range=(request.POST['datepicker_s'], request.POST['datepicker_e']), client__name__contains=request.POST['client_name'], title__contains=request.POST['title']).order_by('-id')
		query = "「" + request.POST['datepicker_s'] + "〜" + request.POST['datepicker_e'] + "」"
		query += "「" + request.POST['client_name'] + "」" if request.POST['client_name'] else ""
		query += "「" + request.POST['title'] + "」" if request.POST['title'] else ""
		query += "の検索結果"
	elif(request.method=='POST' and request.POST['datepicker_s']):
		data = Estimates.objects.filter(estimate_date__gte=request.POST['datepicker_s'], client__name__contains=request.POST['client_name'], title__contains=request.POST['title']).order_by('-id')
		query = "「" + request.POST['datepicker_s'] + "〜」"
		query += "「" + request.POST['client_name'] + "」" if request.POST['client_name'] else ""
		query += "「" + request.POST['title'] + "」" if request.POST['title'] else ""
		query += "の検索結果"
	elif(request.method=='POST' and request.POST['datepicker_e']):
		data = Estimates.objects.filter(estimate_date__lte=request.POST['datepicker_e'], client__name__contains=request.POST['client_name'], title__contains=request.POST['title']).order_by('-id')	
		query = "「〜" + request.POST['datepicker_e'] + "」"
		query += "「" + request.POST['client_name'] + "」" if request.POST['client_name'] else ""
		query += "「" + request.POST['title'] + "」" if request.POST['title'] else ""
		query += "の検索結果"
	elif(request.method=='POST'):
		data = Estimates.objects.filter(client__name__contains=request.POST['client_name'], title__contains=request.POST['title']).order_by('-id')
		query += "「" + request.POST['client_name'] + "」" if request.POST['client_name'] else ""
		query += "「" + request.POST['title'] + "」" if request.POST['title'] else ""
	else:
		data = Estimates.objects.all().order_by('-id')
		query = ""
	page = Paginator(data, 3)
	count = data.count()
	total = data.aggregate(Sum('total'))
	params = {
		'data' : page.get_page(num),
		'count' : count,
		'total' : total,
		'query' : query,
	}
	return render(request, 'sales/estimate.html', params)

これで1ページ目は上手くいってるんだけど、2ページ目はpostではなくgetになってしまうから、上手くいかんな。どうしたらいいんだろうか。

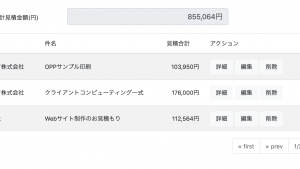
[Django3.0]金額を3桁のカンマ区切りで表示させたい

カンマ区切りを追加するには、「humanize」を利用します。

settings.py

INSTALLED_APPS = [
    // 省略
    'sales',
    'widget_tweaks',
    'django.contrib.humanize', // 追加
]

NUMBER_GROUPING = 3

### view
template側では、humanizeを読み込んで、intcommaを追記します。

{% load humanize %}

<input type="text" disabled id="total" class="form-control col-md-4 text-right" value="{{total.total__sum | intcomma}}円" placeholder="" >

お、凄い良いです。
次はeditとdeleteを実装していきます。

因みに、今日は竹芝ポートシティのタリーズに来てます。なんか竹芝ポートシティの紹介ビデオ見てたらAR勉強したくなってきたなー

[Django3.0]ForeignKeyを使ったデータの取得・表示方法

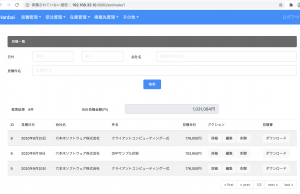
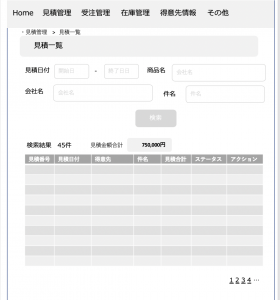
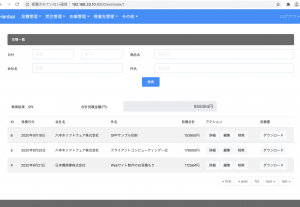
見積一覧ページで、sales_estimatesテーブルに入っている各見積りデータを表示させたい。

▼ワイヤーフレーム

機能要件
– 見積の会社名は、hasManyのリレーション関係にあるsales_clientsのnameから引っ張って表示させたい
– 最新の登録順に表示させる
– 見積件数が増えた場合を想定して、ページネーションを実装する
– 見積の合計金額を表示させる

### views.py
– ${model}.object.all()でデータを取得する
– order_by(‘-id’)でidをdescで取得する
– *.count()で対象のレコード件数を取得できる
– *.aggregate(Sum(‘${columnName}’))で対象カラムの合計値を取得できる

from django.db.models import Sum

def estimate(request, num=1):
	data = Estimates.objects.all().order_by('-id')
	page = Paginator(data, 3)
	count = data.count()
	total = data.aggregate(Sum('total'))
	params = {
		'data' : page.get_page(num),
		'count' : count,
		'total' : total,
	}
	return render(request, 'sales/estimate.html', params)

### estimate.html
– sumの値は、view側でも{{total.total__sum}}と書いてあげる必要がある

<div class="row col-md-12">
				<label class="col-form-label col-md-3">検索結果 {{ count }}件</label>
				<label for="total" class="col-md-2 col-form-label">合計見積金額(円)</label>
				<input type="text" disabled id="total" class="form-control col-md-4 text-right" value="{{total.total__sum}}円" placeholder="" >
			</div>

– 親テーブルの値である会社名を表示させるには、item.client.nameというように、foreignKeyとそのテーブルのカラム名を繋げてあげれば良い

{% for item in data %}
						<tr>
							<td>{{item.id}}</td>
							<td class="text-nowrap">{{item.estimate_date}}</td>
							<td class="text-nowrap">{{item.client.name}}</td>
							<td class="text-nowrap">{{item.title}}</td>
							<td class="text-right">{{item.total}}円</td>
							<td class="text-nowrap"><button class="btn btn-light">詳細</button> <button class="btn btn-light">編集</button> <button class="btn btn-light" onclick="location.href='#modal'">削除</button></td>
							<td class="text-nowrap"><button class="btn btn-light">ダウンロード</button></td>
						</tr>
						{% endfor %}

Djangoの場合、エラー時に参考にする記事の英語の割合が増えるので、やってて面白い。
さて、次は、見積金額を表示させる際に、3桁以上の場合はカンマをつけたいですね。

[Django3.0]ForeignKeyを使ったモデルとviews.pyの保存処理の書き方

見積登録ページを作成するため、hasManyのモデルをmigrationした後にModelFormを作っていきます。
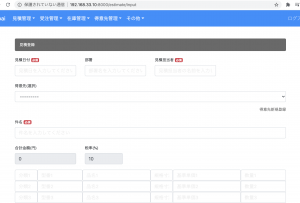
models.py
-> ForeignKeyでClients ModelのhasManyを設定しています。

class Estimates(models.Model):
	client = models.ForeignKey(Clients, null=True, blank=True, on_delete=models.PROTECT)
	estimate_date = models.DateField()
	position = models.CharField(max_length=50, null=True, blank=True)
	name = models.CharField(max_length=255, null=True, blank=True)
	title = models.CharField(max_length=255)
	classification1 = models.CharField(max_length=255, null=True, blank=True)
	// 省略
	total = models.IntegerField(null=True, blank=True)
	remark = models.TextField(max_length=300, null=True, blank=True)
	created_at = models.DateTimeField(auto_now_add=True)
	updated_at = models.DateTimeField(auto_now=True)

	def __str__(self):
		return self.title

forms.py

class EstimatesForm(forms.ModelForm):
	class Meta:
		model = Estimates
		fields = ['client', 'estimate_date', 'position', 'name', 'title', 'classification1', 'classification2', 'classification3', 'classification4', 'classification5', 'classification6', 'classification7', 'classification8', 'classification9', 'classification10', 'type1', 'type2', 'type3', 'type4', 'type5', 'type6', 'type7', 'type8', 'type9', 'type10', 'name1', 'name2', 'name3', 'name4', 'name5', 'name6', 'name7', 'name8', 'name9', 'name10', 'size1', 'size2', 'size3', 'size4', 'size5', 'size6', 'size7', 'size8', 'size9', 'size10', 'unit1', 'unit2', 'unit3', 'unit4', 'unit5', 'unit6', 'unit7', 'unit8', 'unit9', 'unit10', 'price1', 'price2', 'price3', 'price4', 'price5', 'price6', 'price7', 'price8', 'price9', 'price10', 'total', 'remark']

続いて、views.pyでestimate_input関数を書いていきます。

views.py

from .models import Estimates
from .forms import EstimatesForm

def estimate_input(request):
	params = {
		'form': EstimatesForm()
	}
	return render(request, 'sales/estimate_input.html')

## view
### Select文でリレーションの呼び出し
– viewはwidget_tweaksを使っています。
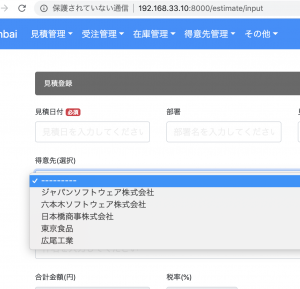
– form.${親テーブル} とするだけでselect文を作ってくれます。

estimate_input.html

<div class="form-group">
						<label for="client">得意先(選択)</label>
						{% render_field form.client class="form-control" %}
					</div>
– 見積の合計金額は、vue.jsでcomputedします。
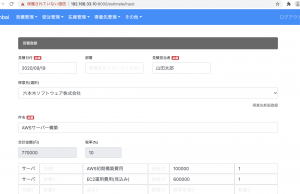
var app = new Vue({
			el: '#app',
			data: {
				tax:10,
				price_1:'',
				// 省略
			},
			computed: {
				add1: function(){
					return (this.price_1 * this.unit_1 + this.price_2 * this.unit_2 + this.price_3 * this.unit_3 + this.price_4 * this.unit_4 + this.price_5 * this.unit_5 + this.price_6 * this.unit_6 + this.price_7 * this.unit_7 + this.price_8 * this.unit_8 + this.price_9 * this.unit_9 + this.price_10 * this.unit_10 ) * (100 + this.tax) / 100;

				}
			}

### views.py
formで飛ばして、最後に保存します

def estimate_complete(request):
	if(request.method == 'POST'):
		data = EstimatesForm(request.POST)
		if data.is_valid():
			client = request.POST['client']
			estimate_date = request.POST['estimate_date']
			position = request.POST['position']
			name = request.POST['name']
			title = request.POST['title']
			classification1 = request.POST['classification1']
			// 省略
			total = request.POST['total']
			remark = request.POST['remark']
			estimates = Estimates(client_id=client, estimate_date=estimate_date, position=position, name=name, title=title, classification1=classification1, classification2=classification2, classification3=classification3, classification4=classification4, classification5=classification5, classification6=classification6, classification7=classification7, 
				classification8=classification8, classification9=classification9, classification10=classification10, type1=type1, type2=type2, type3=type3, type4=type4, type5=type5, type6=type6, type7=type7, type8=type8, type9=type9, type10=type10, name1=name1, name2=name2, name3=name3, name4=name4, name5=name5, name6=name6, name7=name7, name8=name8, 
				name9=name9, name10=name10, size1=size1, size2=size2, size3=size3, size4=size4, size5=size5, size6=size6, size7=size7, size8=size8, size9=size9, size10=size10, unit1=unit1, unit2=unit2, unit3=unit3, unit4=unit4, unit5=unit5, unit6=unit6, unit7=unit7, unit8=unit8, unit9=unit9, unit10=unit10, price1=price1, price2=price2, price3=price3,
				price4=price4, price5=price5, price6=price6, price7=price7, price8=price8, price9=price9, price10=price10, total=total, remark=remark)
			estimates.save()
			return render(request, 'sales/estimate_complete.html')
		else:
			params = {
				'form': EstimatesForm(request.POST),
			}
			return render(request, 'sales/estimate_input.html', params)
	return render(request, 'sales/estimate_complete.html')

### 結合テスト
修正しまくって、上手く動くようになるまで数日かかりました。
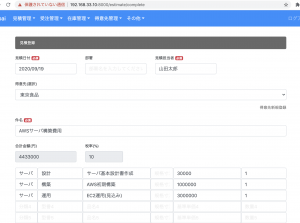
mysql側も確認し、ちゃんと入っています。
client_idには親テーブルのidが入っています。

mysql> select * from sales_estimates;
+—-+—————+———-+————–+—————–+—————–+—————–+—————–+—————–+—————–+—————–+—————–+—————–+—————–+——————+——–+——–+——-+——-+——-+——-+——-+——-+——-+——–+———————–+—————–+——-+——-+——-+——-+——-+——-+——-+——–+———–+——-+——-+——-+——-+——-+——-+——-+——-+——–+——-+——-+——-+——-+——-+——-+——-+——-+——-+——–+——–+——–+——–+——–+——–+——–+——–+——–+——–+———+——–+——–+—————————-+—————————-+———–+
| id | estimate_date | position | name | title | classification1 | classification2 | classification3 | classification4 | classification5 | classification6 | classification7 | classification8 | classification9 | classification10 | type1 | type2 | type3 | type4 | type5 | type6 | type7 | type8 | type9 | type10 | name1 | name2 | name3 | name4 | name5 | name6 | name7 | name8 | name9 | name10 | size1 | size2 | size3 | size4 | size5 | size6 | size7 | size8 | size9 | size10 | unit1 | unit2 | unit3 | unit4 | unit5 | unit6 | unit7 | unit8 | unit9 | unit10 | price1 | price2 | price3 | price4 | price5 | price6 | price7 | price8 | price9 | price10 | total | remark | created_at | updated_at | client_id |
+—-+—————+———-+————–+—————–+—————–+—————–+—————–+—————–+—————–+—————–+—————–+—————–+—————–+——————+——–+——–+——-+——-+——-+——-+——-+——-+——-+——–+———————–+—————–+——-+——-+——-+——-+——-+——-+——-+——–+———–+——-+——-+——-+——-+——-+——-+——-+——-+——–+——-+——-+——-+——-+——-+——-+——-+——-+——-+——–+——–+——–+——–+——–+——–+——–+——–+——–+——–+———+——–+——–+—————————-+—————————-+———–+
| 2 | 2020-09-19 | | 山田太郎 | AWS構築費用 | サーバ | サーバ | | | | | | | | | 設計 | 構築 | | | | | | | | | 基本設計書作成 | EC2初期構築 | | | | | | | | | 設計書 | | | | | | | | | | 1 | 1 | NULL | NULL | NULL | NULL | NULL | NULL | NULL | NULL | 50000 | 300000 | NULL | NULL | NULL | NULL | NULL | NULL | NULL | NULL | 385000 | | 2020-09-19 13:00:45.342104 | 2020-09-19 13:00:45.342128 | 19 |
+—-+—————+———-+————–+—————–+—————–+—————–+—————–+—————–+—————–+—————–+—————–+—————–+—————–+——————+——–+——–+——-+——-+——-+——-+——-+——-+——-+——–+———————–+—————–+——-+——-+——-+——-+——-+——-+——-+——–+———–+——-+——-+——-+——-+——-+——-+——-+——-+——–+——-+——-+——-+——-+——-+——-+——-+——-+——-+——–+——–+——–+——–+——–+——–+——–+——–+——–+——–+———+——–+——–+—————————-+—————————-+———–+
1 row in set (0.00 sec)

これ実装するのにすごい時間かかったけど、ここまで来たら、大分山を超えた感があります。後は基本的なところはauthとメールなど細かな機能でしょう。デバッグする際に、form.errors.itemsで画面にエラーメッセージを表示させてからスピードが上がりました。
[Django3.0] 1対多(hasMany)のモデルを作成

顧客が多数の見積を取る事を考え、sales_clientsテーブルから1対多(hasMany)の関係にあるテーブルを作成したい。

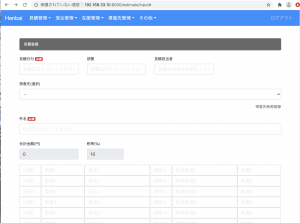
見積登録画面

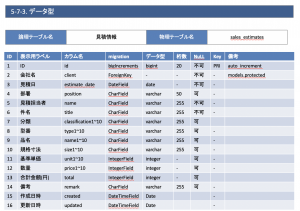
見積画面を元にテーブルのデータ型を作成していきます。
mysqlのdateはDateField、integerはIntegerFieldにします。
clientはhasManyのFoerignKeyとなるものです。

データ型が一通り出来たら、ER図を修正します。

さて、いよいよデータ型を元にmodels.pyを作っていきます。
リレーションは、models.ForeignKey(${modelName})で書きます。
顧客レコードが削除されたら、顧客レコードに紐づいた見積も一緒に削除されると困るので、on_delete=models.PROTECTと設定してあげます。

models.py

class Estimates(models.Model):
	client = models.ForeignKey(Clients, on_delete=models.PROTECT)
	estimate_date = models.DateField(auto_now=True)
	position = models.CharField(max_length=50, null=True, blank=True)
	name = models.CharField(max_length=255, null=True, blank=True)
	title = models.CharField(max_length=255)
	classification1 = models.CharField(max_length=255, null=True, blank=True)
	// classification2~classification10は省略
	type1 = models.CharField(max_length=255, null=True, blank=True)
	// type2〜type10は省略
	name1 = models.CharField(max_length=255, null=True, blank=True)
	// name2〜name10は省略
	size1 = models.CharField(max_length=255, null=True, blank=True)
	// size2〜size10は省略
	unit1 = models.IntegerField(null=True, blank=True)
	// unit2〜unit10は省略
	price1 = models.IntegerField(null=True, blank=True)
	// price2〜price10は省略
	total = models.IntegerField(null=True, blank=True)
	remark = models.TextField(max_length=300, null=True, blank=True)
	created_at = models.DateTimeField(auto_now_add=True)
	updated_at = models.DateTimeField(auto_now=True)

	def __str__(self):
		return self.title

### migration
$ python manage.py makemigrations sales
-> 0004_auto_20200913_1714.pyが作成されたので中身を見てみます。fieldsの末尾にmodels.ForeignKeyが作られている事がわかります。

fields=[
                ('id', models.AutoField(auto_created=True, primary_key=True, serialize=False, verbose_name='ID')),
                ('estimate_date', models.DateField(auto_now=True)),
                ('position', models.CharField(blank=True, max_length=50, null=True)),
                // 省略
                ('client', models.ForeignKey(on_delete=django.db.models.deletion.PROTECT, to='sales.Clients')),
            ],

$ python manage.py migrate

mysql> show tables;
mysql> describe sales_estimates;
+——————+————–+——+—–+———+—————-+
| Field | Type | Null | Key | Default | Extra |
+——————+————–+——+—–+———+—————-+
| id | int(11) | NO | PRI | NULL | auto_increment |
// 省略
| client_id | int(11) | NO | MUL | NULL | |
+——————+————–+——+—–+———+—————-+
70 rows in set (0.00 sec)

ぎゃああああああああああああああああああああああああああああああ
client_idが出来てるううううううううううううううううううう