flask入門2

app.py

from flask import Flask
from flask import Flask, redirect, url_for, render_template

app = Flask(__name__)
app.config.update(dict(
	DATABASE = os.path.join(app.root_path, 'db.sqlite3'),
	SECRET_KEY='foo-baa',
))

@app.route('/')
def index():
	return render_template('index.html', result{})

@app.route('/create')
def create():
	return render_template('edit.html')

@app.route('/analysis', methods=['POST'])
def analysis():
	return redirect(url_for('view', pk=0))

@app.route('/delete/<pk>')
def delete(pk)
	return redirect(url_for('index'))

@app.route('/view/<pk>')
def view(pk):
	return render_template("index.html", values=values)

if __name__ == '__main__':
	app.run(debug=True, host='192.168.33.10', port=8000)

base.html

<!DOCTYPE html>
<html lang="en">
<head>
	<meta charset="UTF-8">
	<meta name="viewport" content="width=device-width, initial-scale=1.0">
	<title>簡易分析ツール</title>
	<script src="https://code.jquery.com/jquery-3.2.1.slim.min.js"
            integrity="sha384-KJ3o2DKtIkvYIK3UENzmM7KCkRr/rE9/Qpg6aAZGJwFDMVNA/GpGFF93hXpG5KkN"
            crossorigin="anonymous"></script>
    <script src="https://cdnjs.cloudflare.com/ajax/libs/popper.js/1.12.9/umd/popper.min.js"
            integrity="sha384-ApNbgh9B+Y1QKtv3Rn7W3mgPxhU9K/ScQsAP7hUibX39j7fakFPskvXusvfa0b4Q"
            crossorigin="anonymous"></script>
    <script src="https://maxcdn.bootstrapcdn.com/bootstrap/4.0.0/js/bootstrap.min.js"
            integrity="sha384-JZR6Spejh4U02d8jOt6vLEHfe/JQGiRRSQQxSfFWpi1MquVdAyjUar5+76PVCmYl"
            crossorigin="anonymous"></script>
    <link rel="stylesheet" href="https://maxcdn.bootstrapcdn.com/bootstrap/4.0.0/css/bootstrap.min.css"
          integrity="sha384-Gn5384xqQ1aoWXA+058RXPxPg6fy4IWvTNh0E263XmFcJlSAwiGgFAW/dAiS6JXm" crossorigin="anonymous">
    <link rel="stylesheet" type=text/css href="{{ url_for('static', filename='style.css') }}">
</head>
<body>

<header>
	<div class="navbar navbar-dark bg-dark box-shadow">
        <div class="container d-flex justify-content-between">
            <a href="/" class="navbar-brand d-flex align-items-center">
                <strong>簡易分析ツール</strong>
            </a>
        </div>
    </div>
</header>

<div class="container">
	{% block body %}
	{% endblock %}
</div>
</body>
</html>

edit.html

{% extends "base.html" %}
{% block body %}
<h1>新規分析</h1>
<form action="{{ url_for('analysis') }}">
	<label>タイトル</label>
	<input class="form-control" type="text" size="30" name="title">
	<label>分析データ</label>
	<textarea class="form-control" name="data" rows="5"></textarea>
	<input class="btn btn-primary" type="submit" value="送信">
</form>
{% endblock %}

view.html

{% extends "base.html" %}
{% block body %}
<h1>結果参照</h1>

<h3>0:サンプルタイトル</h3>
<p>2022/01/01 12:00</p>
<div class="row">
	ここにグラフを配置
</div>

<div class="row">
	<textarea class="form-control" name="data" rows="5">テストデータ</textarea>
</div>
<br><br>
{% endblock %}

http://192.168.33.10:8000/
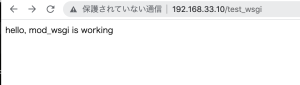
ほう、これは凄い
Djangoに似てる

ubuntu20.04にapache2とMod_wsgi

$ Mod_wsgi on
$ sudo apt install apache2 apache2-utils ssl-cert libapache2-mod-wsgi
$ sudo systemctl restart apache2
$ sudo mkdir -p /var/www/scripts
$ sudo vi /var/www/scripts/test_wsgi_script.py

def application(environ, start_response):
	status = '200 ok'
	html = '<html>\n' \
			'<body>\n' \
			'hello, mod_wsgi is working\n' \
			'</body>\n' \
			'</html>\n'
	response_header = [('Content-type', 'text/html')]
	start_response(status, response_header)
	return

$ sudo vi /etc/apache2/conf-available/mod-wsgi.conf

WSGIScriptAlias /test_wsgi /var/www/scripts/test_wsgi_script.py

$ sudo a2enconf mod-wsgi
$ sudo systemctl restart apache2
http://192.168.33.10/test_wsgi

PythonでQRコード作成

$ pip3 install qrcode
$ pip3 install pillow
qrcodeをinstallすると、qrコマンドが使える様になる

$ qr “text for qrcode” > qrcode.png

PythonでQRコードを作成

import qrcode

img = qrcode.make('test text')
img.save('qrcode_test.png')

qrコードの色やback colorを指定

qr = qrcode.QRCode(
version=12,
error_correction=qrcode.constants.ERROR_CORRECT_H,
box_size=2,
border=8
)
qr.add_data(‘test text’)
qr.make()
img = qr.make_image(fill_color=”red”, back_color=”blue”)
img.save(“qrcode_test2.png”)
[/code]

背景に画像を設定する方法がわからんな…

[Python] scrapyによるスクレイピング

scrapyとはweb scraping用のフレームワーク

$ pip3 install scrapy
$ scrapy version
Scrapy 2.5.1
$ scrapy startproject test1

$ cd test1
$ scrapy genspider test2 https://paypaymall.yahoo.co.jp/store/*/item/y-hp600-3/
Created spider ‘test2’ using template ‘basic’ in module:
test1.spiders.test2

test1/items.py

import scrapy
class Test1Item(scrapy.Item):
    title = scrapy.Field()

test1/spiders/test2.py

import scrapy
from test1.items import Test1Item

class Test2Spider(scrapy.Spider):
    name = 'test2'
    allowed_domains = ['paypaymall.yahoo.co.jp/store/*/item/y-hp600-3/']
    start_urls = ['https://paypaymall.yahoo.co.jp/store/*/item/y-hp600-3//']

    def parse(self, response):
        return Test1Item(
        		title = response.css('title').extract_first(),
        	)

$ scrapy crawl test2

BS4で良いじゃんと思ってしまうが、どうなんだろうか。

[Python] BeautifulSoupによるスクレイピング

$ sudo pip3 install bs4

import requests
from bs4 import BeautifulSoup

response = requests.get('https://paypaymall.yahoo.co.jp/store/*/item/y-hp600-3/')
soup = BeautifulSoup(response.text, 'html.parser')
title = soup.find('title').get_text()
print(title)

$ python3 main.py
年内配送OK カニ かに 蟹 ズワイガニ カニ刺身 かにしゃぶ 殻Wカット生本ズワイ3箱セット カニ8規格 選べる最大3kg かに脚 フルポーション剥身 姿 カニ爪 かに鍋 越前かに問屋ますよね公式ストア – 通販 – PayPayモール

urllibより操作が簡単そうですな

[Python] urllib.requestによるスクレイピング

from urllib import request

response = request.urlopen('https://paypaymall.yahoo.co.jp/store/*/item/y-hp600-3/')
content = response.read()
response.close()
html = content.decode()

title = html.split('<title>')[1].split('</title')[0]
print(title)

$ python3 main.py
年内配送OK カニ かに 蟹 ズワイガニ カニ刺身 かにしゃぶ 殻Wカット生本ズワイ3箱セット カニ8規格 選べる最大3kg かに脚 フルポーション剥身 姿 カニ爪 かに鍋 越前かに問屋ますよね公式ストア – 通販 – PayPayモール

なるほど

[Python] ファイルの小文字を一括して大文字に変更したい

目的: 4000行ぐらいのテキストファイルの中身を全て小文字から大文字にしたい

まず大文字に変更

text = "train/dr1/fcjf0/si1027.wav";

print(text.upper())

$ python3 main.py
TRAIN/DR1/FCJF0/SI1027.WAV

ファイルを読み込む

with open("file.txt") as f:
	for line in f:
		line = line.rstrip()
		print(line)

uppercaseでファイルに書き込む

file = open('myfile.txt', 'a')

with open("file.txt") as f:
	for line in f:
		line = line.rstrip()
		file.write(line.upper() + "\n") 
		print(line.upper())

TRAIN/DR1/FCJF0/SI1027.WAV
TRAIN/DR1/FCJF0/SI1657.WAV
TRAIN/DR1/FCJF0/SI648.WAV

SincNetっていう音声認識のOSSをgit cloneして動かそうとした際に、timitが必要でunzipしたらフォルダファイルが大文字で、SincNetのプログラムでは小文字で処理してたので、SincNetのプログラムを4000行くらい一括して大文字に変換する必要があった。

うーむ、、、やってみると意外とすぐ出来た

pythonで音源分離

import warnings
warnings.simplefilter('ignore')
import nussl
import numpy as np
# from common import viz

mix = nussl.AudioSignal('pop.mp3')
# stft = signal1.stft()
repet = nussl.separation.primitive.Repet(mix)
repet.run()
repet_bg, repet_fg = repet.make_audio_signals()

# Will run the algorithm and return AudioSignals in one step
repet = nussl.separation.primitive.Repet(mix)
repet_bg, repet_fg = repet()

repet_bg.istft()
repet_bg.embed_audio()
repet_fg.istft()
repet_fg.embed_audio()

repet_bg.write_audio_to_file('bg2.wav')
repet_fg.write_audio_to_file('fg2.wav')

パスポートの文字をtesseractで読み込む

try:
    from PIL import Image
except ImportError:
    import Image
import pytesseract


FILENAME = 'test.jpg'

text = pytesseract.image_to_string(Image.open(FILENAME))
lines = text.split("\n")
for line in lines:
	if '<<<' in line:
		t = line.replace(' ', '')
		print(t)
test1.png
P<GBRUK<SPECIMEN<<ANGELA<ZOE<<<<<<<<<<<<<<<<
5334755143GBR8812049F2509286<<<<<<<<<<c<<<04

test2.png
PDCYPPOLITIS<<ZINONAS<<<<<<<<<<<<<<KKKKKKKKK
FOOOOOD005CYP8012148M3006151<<<<<<<<<<<<<<02

test3.png
PTNOROESTENBYEN<<AASAMUND<SPECIMEN<<<<<<<<<<
FHCO023539NOR5604230M2506126<<<<<<<<<<<<<<00

なぜか変な文字列が混ざりますね

def convert(Filename):
	img = Image.open(Filename)
	img=img.convert('RGB')
	size=img.size
	img2=Image.new('RGB',size)
	 
	border=110
	 
	for x in range(size[0]):
	    for y in range(size[1]):
	        r,g,b=img.getpixel((x,y))
	        if r > border or g > border or b > border:
	            r = 255
	            g = 255
	            b = 255
	        img2.putpixel((x,y),(r,g,b))

	return img2

text = pytesseract.image_to_string(convert('test.jpg'))
lines = text.split("\n")
for line in lines:
	if '<<<' in line:
		print(line)

うーむ、ちょっと違うかな

[音声認識] librosaで音声の波形を描写したい

まず、mp3の音声ファイルを用意します。

ubuntuにlibrosaをinstall
$ pip3 install librosa
$ sudo apt-get install libsndfile1
$ sudo apt install ffmpeg

import librosa
import numpy as np
import matplotlib.pyplot as plt

file_name = "./test.mp3"
y, sr = librosa.load(str(file_name))
time = np.arange(0, len(y)) / sr

plt.plot(time, y)
plt.xlabel("Time(s)")
plt.ylabel("Sound Amplitude")

plt.savefig('image.jpg',dpi=100)

うおおおおおおおお、なるほど